 |
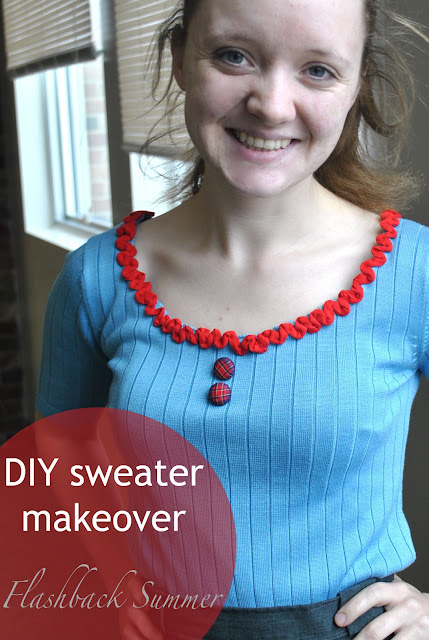
| Pardon the crazy hair. I was thrashing about crafting before this photo! |
Today I've got a tutorial/DIY for you guys on how to dress up a plain sweater!
I got the idea from a 1950s sweater I found in a flea market (styled here and here).
To make a plain sweater awesome, you will need:
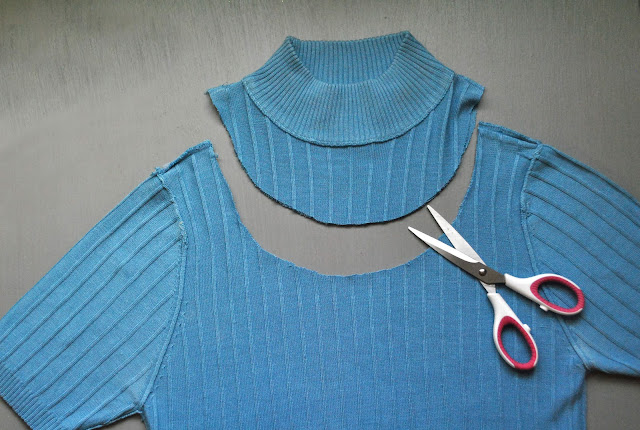
1. First, find an old sweater with a neckline that you don't mind making over. I found this sweater for a dollar in a thrift store. I like the soft material (100% silk!) and the color, but I really didn't like the turtleneck. It needed some help.
2. Next, find a sweater or shirt with a neckline that you do like. Lay it on top of your old sweater, trace, and cut. (Keep in mind that your old sweater may stretch a bit where you cut because of the nature of knit materials. You may want to cut a bit smaller and see how it stretches, just in case.) Then try it on and make sure that's how you want the neckline to look. Make more cuts if necessary.
3. Now zig-zag stitch or serge the edge of your sweater. Try not to pull on it as you sew, so as not to stretch it out more.
4. The edges may be a bit rippled. Just iron it flat.
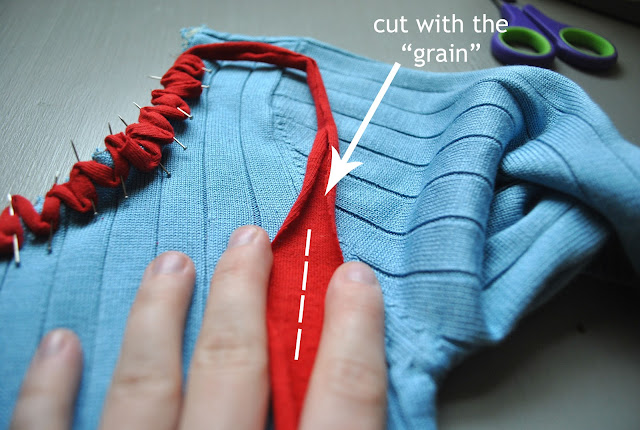
5. Now take your edging and pin it on your neckline as you want it.
(I'm a big fan of the "make do or do without" mentality, so I used what I had in my room already: an old t-shirt. To get the trim look I used, cut an old t-shirt into thin strips, cutting with the "grain" of the t-shirt, your cut lines parallel to the vertical lines in the weave of the shirt. This will make the strips automatically curl with the raw sides under. I then pinned it in a zig-zag pattern.)
6. Here comes the labor of love part. Now sew the trim down onto your neckline, trying not to stretch out the neckline and just easing it in. (I hand sewed mine.) The straight stitches here will help keep everything from stretching out. Then iron it flat.
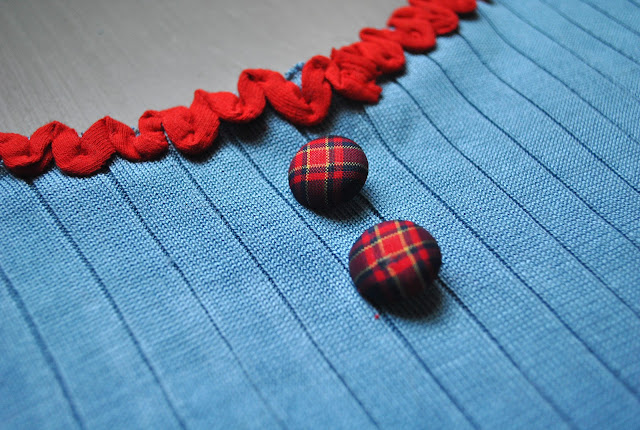
7. If you have any other embellishments, add them on as well. I have buttons, so I centered them on the sweater and sewed.
8. Now your sweater is complete! Go to a mirror and admire your creativity!


This looks awesome! I love that the trim is made out of an old t-shirt; what a great way to use up something that's past its best.
ReplyDeleteWell, like I said, I love the "make do or do without" mentality. It works with my budget, and as my mother would always tell us, not having the "right" supplies all the time is actually a blessing. It makes you be creative and resourceful!
DeleteThanks a bunch!
Hand on my heart, this is one of the absolute cutest, most appealingly lovely sweater revampings I've ever seen. Flat out fabulous job, honey - your new sweater is awesomely darling.
ReplyDelete♥ Jessica
Hand on your heart, haha. (I like that.) I still don't have a whole lot of vintage clothing, so I'm doing what I can a piece at a time to build the wardrobe up! I'm glad you like it. Thanks so much, Jessica!
Delete$1 plus creative genius=one of a kind, fabulous sweater
ReplyDeleteHaha, "creative genius", thanks! :)
DeleteThis is SO CUTE! OH MY GOODNESS! It's absolutely one of the most "green" makeovers and soooooo creative! YAY! You go girl! You're amazing!
ReplyDeleteAw, thanks so much! That's what's so great about upcycling clothes: it's budget friendly! I'm glad you like it!
DeleteWhat a great new top! I may have to dig through my clothes to see what I can remake. Thanks for the tutorial!
ReplyDeleteThanks Bobbi! I'd love to see a pic when you're done! I think it's great to see other people's spin on an idea!
DeleteThis is super fantastic! It's amazing the eye you have to transform such items!
ReplyDeletexoxo
-Janey
Thank you very much, Janey! It's definitely a case of "Necessity is the mother of invention"!
DeleteSuch a cute idea! I always see turtle neck sweaters at the thrift store...now I know what to do with them. I found your blog through Va-Voom Vintage.
ReplyDeleteThank you so much! I'd love to see a picture of anything you try. I always like to see the personal twist other people put on ideas!
DeleteCute idea! I see sweaters all them time at thrift stores in colors I like but there is always something "meh" about them. Next time I might pick one up and give this a try!
ReplyDelete-Emily