Spring Dress Fashion Photos

Flashback Summer: Spring Dress Fashion Photos - 1935 Zanzibar Tanzania block print dress

Flashback Summer: Spring Dress Fashion Photos - 1935 Zanzibar Tanzania block print dress

Flashback Summer: Spring Dress Fashion Photos - 1935 Zanzibar Tanzania block print dress

Flashback Summer: Spring Dress Fashion Photos - 1935 Zanzibar Tanzania block print dress

Flashback Summer: Spring Dress Fashion Photos - 1935 Zanzibar Tanzania block print dress

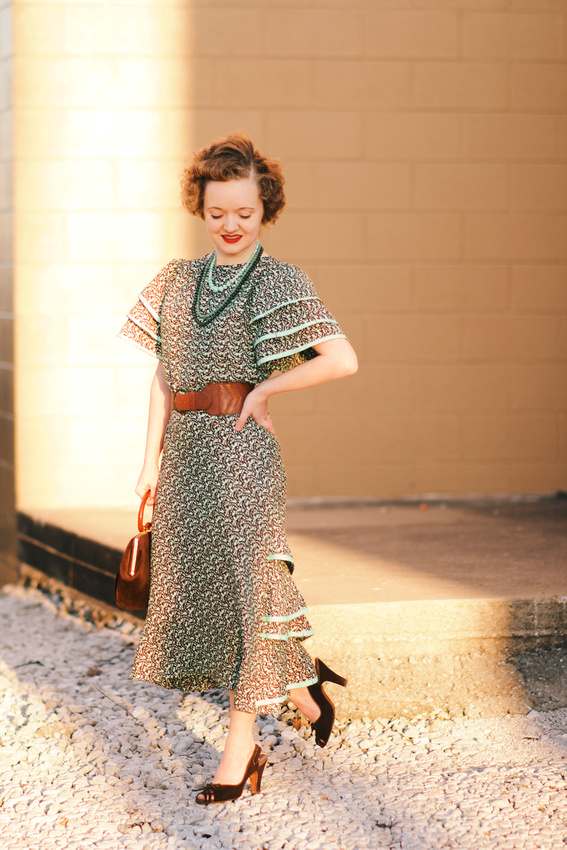
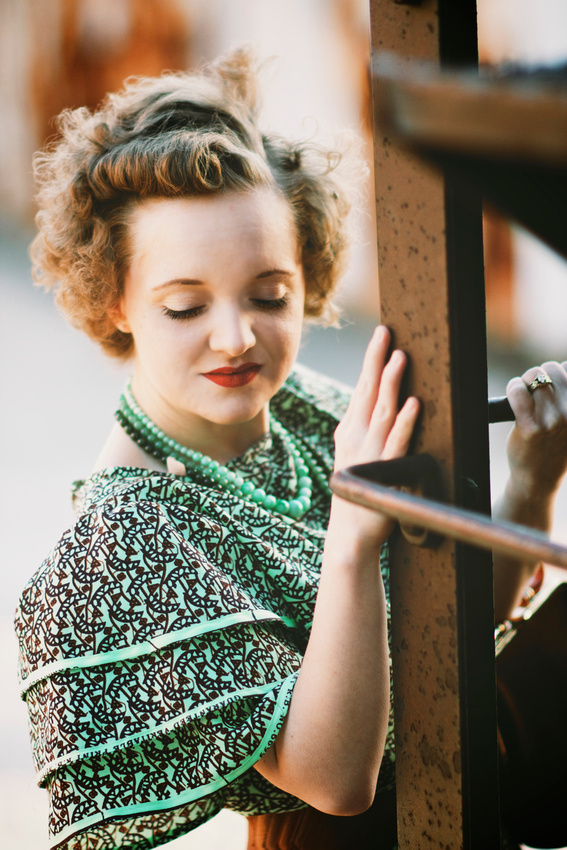
Huzzah for another photo collab with my awesome friend Chloé of Chloé Wead Photography!  I'm wearing my 1935 Zanzibar block print dress I made, and we found some lovely blooming trees near which to take photos.  Then also a train, haha!  In Springfield there is a street where both happen to be, and it's one of my favorite and most frequent photo spots!


Flashback Summer: Spring Dress Fashion Photos - 1935 Zanzibar Tanzania block print dress

Flashback Summer: Spring Dress Fashion Photos - 1935 Zanzibar Tanzania block print dress

Flashback Summer: Spring Dress Fashion Photos - 1935 Zanzibar Tanzania block print dress

Flashback Summer: Spring Dress Fashion Photos - 1935 Zanzibar Tanzania block print dress

Flashback Summer: Spring Dress Fashion Photos - 1935 Zanzibar Tanzania block print dress

Flashback Summer: Spring Dress Fashion Photos - 1935 Zanzibar Tanzania block print dress

Outfit details
Dress: handmade by me
purse: gifted
1940s shoes: Decades (Springfield, MO)
necklaces: Kenya/gifted (I believe...)
lipstick: Kat Von D "Outlaw"

1935 Zanzibar Block-Print Dress & Depew E-1830

Flashback Summer: 1935 Zanzibar Block-Print Dress & Depew E-1830

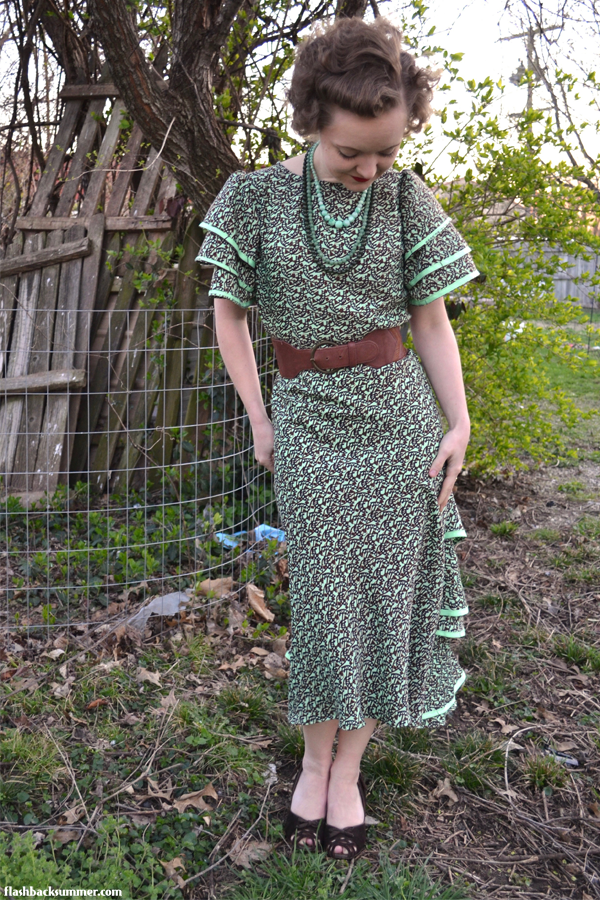
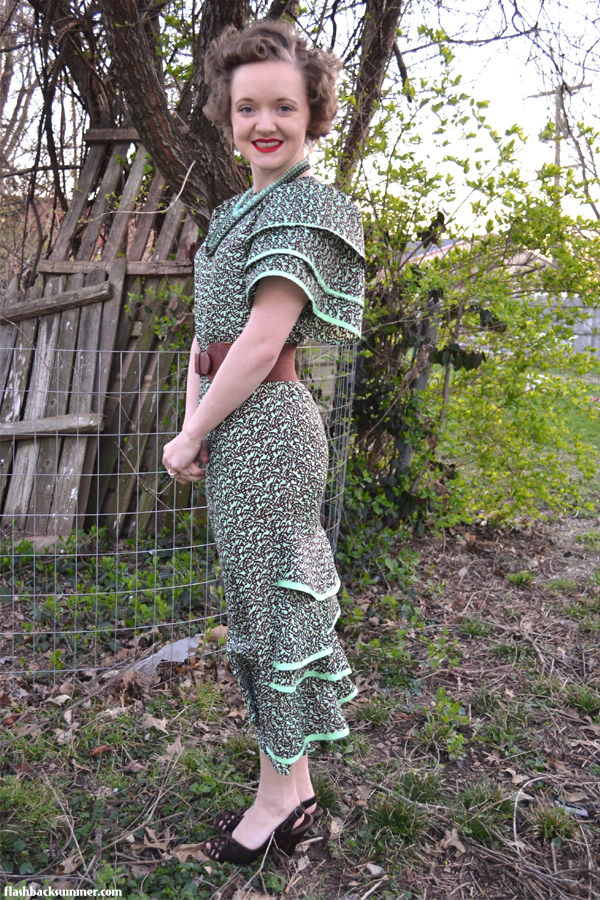
Today I'm debuting a dress I just finished!  This is yet another instance of my last-minute "event sewing."  My church holds a multiethnic banquet every year for city officials and community leaders of ethnic/racial groups to network and meet each other.  Although I had a lot of things to do to prepare for the event, I, of course, got it into my head that a new outfit would do nicely.  So... the night before and day of I did a lot of cutting and sewing!  I still had to sew myself into the dress for the event, but as for procrastination sewing... that's pretty much a success.

I used fabric from Tanzania (specifically, Zanzibar) that my mother gave me from Christmas.  From what I can tell, this is a block print.  (At least, this is my guess.  If anyone is more knowledgeable and can verify or correct me on that, I would welcome it!)  I LOVE the bright sea foam color, and the brown pattern is lovely.

Flashback Summer: 1935 Zanzibar Block-Print Dress & Depew E-1830

Flashback Summer: 1935 Zanzibar Block-Print Dress & Depew E-1830

For this dress, I used Depew E-1830.  It's a pattern from 1935.  In case you've never used any of these Depew patterns, you should know they are based on a French drafting system that uses rulers to scale up tiny drawings into pattern pieces based on your size.  There are usually no instructions included with the pattern and very few markings for things like darts. 

Flashback Summer: 1935 Zanzibar Block-Print Dress & Depew E-1830

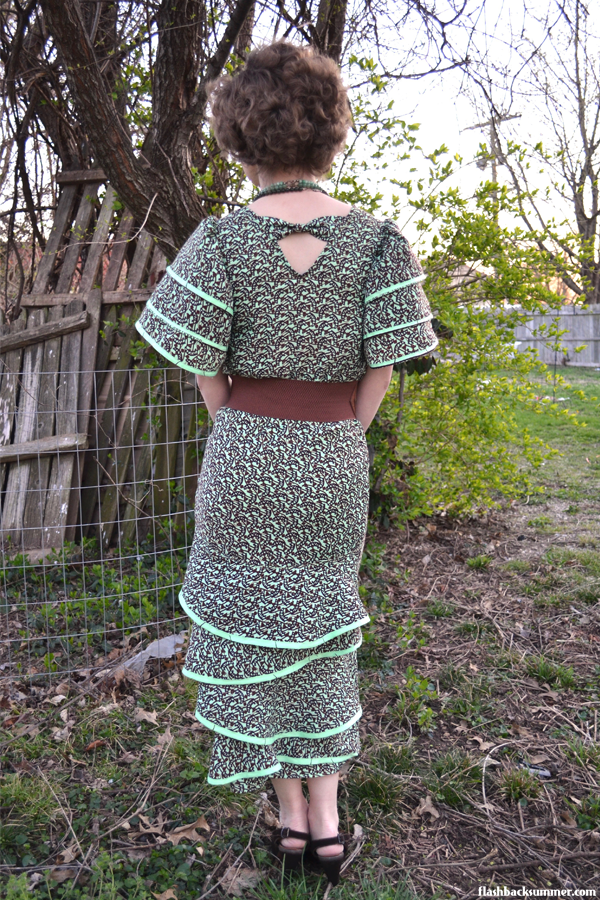
In this pattern, the only pieces included are for the four ruffles on the back, front and back skirt pieces, front and back bodice pieces, and the three-tier sleeve pieces.  The belt and bow pieces are ones you would need to draw yourself.  All edges are finished with a hem or bias tape.

Flashback Summer: 1935 Zanzibar Block-Print Dress & Depew E-1830

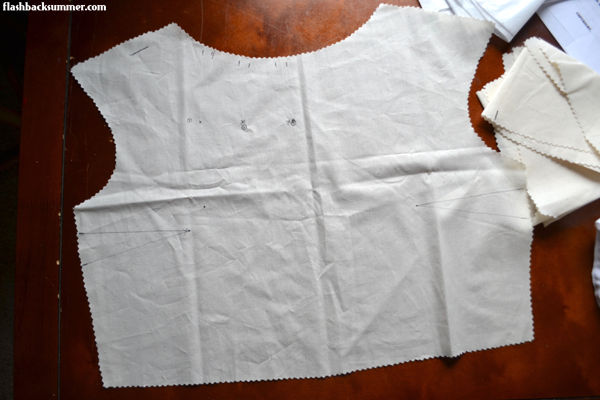
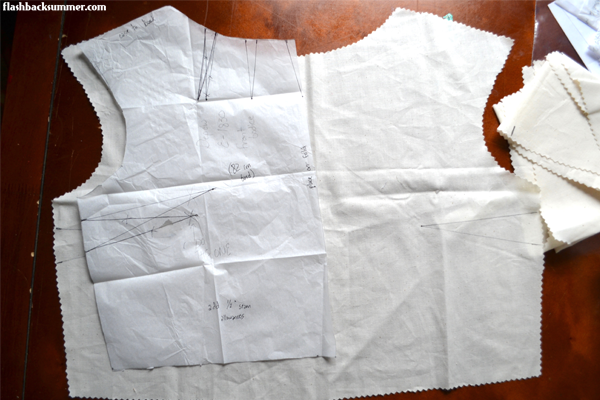
I took the basic front bodice piece and put it on my dress form to figure out proper dart placement.

Flashback Summer: 1935 Zanzibar Block-Print Dress & Depew E-1830

I then transferred these to my paper pattern.  With some trial and error, obviously....  I made a muslin out of the other pieces to check for fit.

The skirt patterns were essentially just elongated trapezoids with no curves or darts, so I assumed they should be cut on the bias.  It is a 1935 pattern after all, so I thought it would be appropriate. It seemed to work pretty well!

The only major thing I would change for next time would be the bodice length.  On my muslin it seemed fine, but the light, airy fabric didn't seem to create enough weight in the skirt to pull the bodice down like I thought it would.  However... all of this is covered by a giant belt, woohoo!

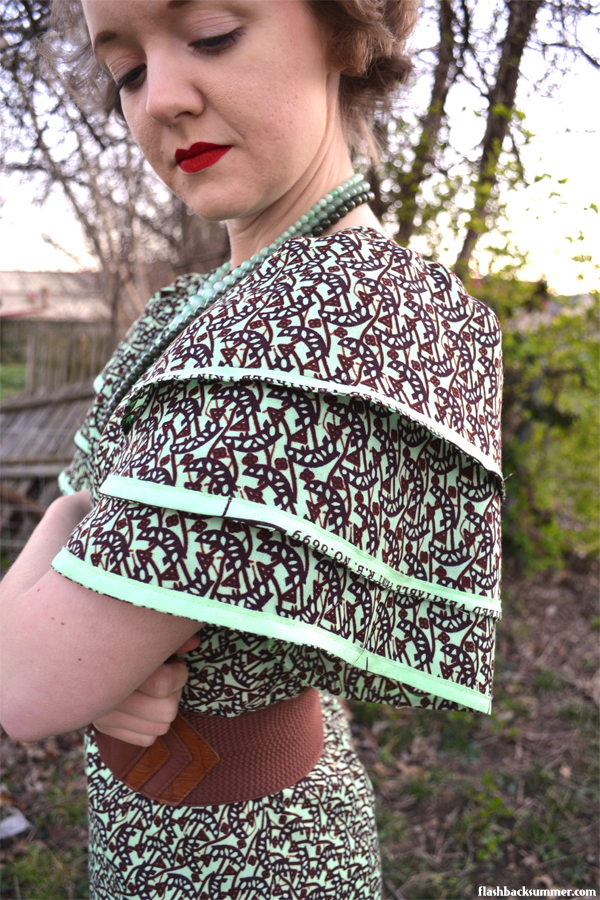
And how about these ginormous sleeves?!  At first I was a bit concerned about their volume, but now I think works.  Plus, the bigger the sleeves are, the smaller one's waist looks.

Flashback Summer: 1935 Zanzibar Block-Print Dress & Depew E-1830

Flashback Summer: 1935 Zanzibar Block-Print Dress & Depew E-1830

There is also an element of major make do and mend to this dress.  I wanted to only use items from my stash and to avoid buying anything, but I was left with a dilemma.  The pattern on this fabric is quite busy, and I was afraid that the ruffle and sleeve details would be utterly lost if they weren't highlighted in some way.  However, I didn't have bias tape in an even remotely acceptable color, and I was sure the store would only have brown, which didn't seem like it would pop enough.  To stay within my stash, I decided to use... the fabric selvedge!  I noticed that the pattern ended about 3/4" from the edge of the fabric, so I was careful not to cut any of it when I cut the pieces out.  I then had several yards of narrow tape I could use that was the perfect color!

You can see the printed phrase "100% Guaranteed Veritable Print R.B. No. 6699" on some of the sleeves, which I don't mind.  It's just some sewing character!

Flashback Summer: 1935 Zanzibar Block-Print Dress & Depew E-1830

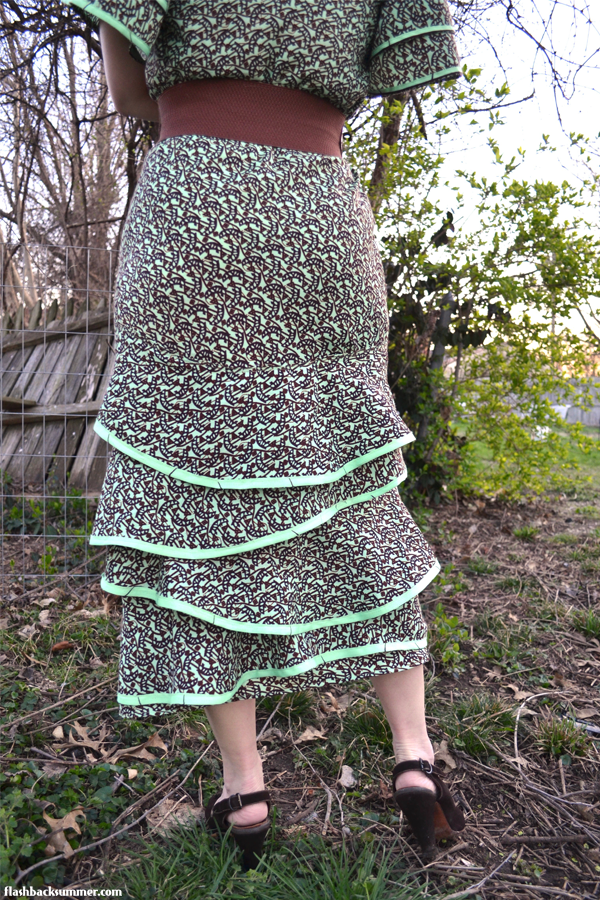
The only other issue I encountered was the ruffles on the back.  I'm not entirely sure whether it was a poor drafting on my part or just pattern pieces not working together well with the bias cut of the skirt.  I was having trouble lining them up and making them parallel across the back of the skirt like the pattern illustration showed.  They weren't long enough to go across the back, and then the edges were not falling evenly.  So, short on time and not about the recut all these pieces, I decided to go for an asymmetrical layout and call it a design feature!  I rather like the effect, actually.

Flashback Summer: 1935 Zanzibar Block-Print Dress & Depew E-1830

Have any of you tried a Depew pattern or a drafting system like this?  On another note... What do you think of these sleeves?!  Are they too much, or do you think they work?

Controversial Post: Who Can Clap for That Wrap?

As we've been going through the "Clap for That Wrap" series, I've noticed that some of you have expressed trepidation at trying new head wrap styles because you're afraid of culturally appropriating styles from other cultures.

I won't lie, I find this interesting, and I'm ashamed I didn't think it enough of an issue to address right off! But, hey, better late than never, right?  Let's dig into this together!


@flashbacksummer
Two things I think we can all agree on to start (or the vast, vast majority of us at the very least can agree on), is that 1.) The question is not whether or not each of us can or cannot wear head wraps, but which head wraps we can rightly wear, and 2.) Religious head wear (such as specifically Muslim or Sikh styles) should only be worn by the people adhering to those religions or ideals.

Now that we've got that settled, let's get into the not-so-clear part of head wrapping: Who can wear which wraps?


I didn't feel I could bring as well-rounded and diverse a viewpoint that this discussion requires, so I asked for the opinions of others to aid in the discussion.  I've also pulled quotes from articles on the subject and included a few more resources at the bottom for your further reading enjoyment and learning!


@flashbacksummer
What are we afraid of?

"I wonder about the history of some vintage styles. They have definitely been inspired by cultures other than dominant Western ones, and even if I'm referencing vintage style, I wonder about cultural appropriation."  - Kim Koin


I think most of us are afraid to try certain wraps we're unsure of because we don't want to insult people.  We don't want to appropriate from other cultures, and we do want to respect other people groups.  We don't want to act out of ignorance and hurt others.  I hope Dasha's words will encourage you as we go further:


"But the fact that we all pause and think, 'How can I do this [headwrap] justice?' is a step in the right direction, as opposed to blindly doing things without facing our own ignorance... We're all trying not to offend each other."   - Dasha Guyton


"... head coverings will always have a place in society." - Dasha Guyton

Discussion is important, and just asking the question is a show of maturity and awareness.


What wraps are in question?


Most of us probably don't have a problem with anyone wearing a "Rosie the Riveter" style wrap or such styles that are just plain "vintagey" and Western or worn for utility.  From what I can tell, many wraps in question for you guys are inspired by black/African (differentiating between these is a whole other conversation we won't get into!) or even Middle Eastern styles.  The way the fabric itself is wrapped may be the "iffy" part for some of us, or sometimes the print on the fabric (such as kente cloth or wax prints) may make some of us feel uneasy about trying them.  We may even be concerned after watching wrap tutorial videos if the person in them doesn't look like us.  


Who needs to question their wrap styles?


Unless you can clearly, unambiguously connect yourself to a particular wrap style as far as culture or history goes (such as being a Nigerian wearing a Nigerian wrap), then you should do an evaluation before wearing.  This evaluation is not limited to a particular race, culture or people.  Anyone borrowing a wrap style that can be attributed to another culture should ask themselves if it is alright to wear, just as a starting point. The answer may differ from situation to situation or person to person, but most of us are going to need to start by asking, "Am I the person to wear this wrap?"


So how do I evaluate?


"El-Amin Naeem argues that the practice of headwrapping came before some religions, for practical reasons, such as keeping hair clean and blocking sand from the nose and mouth. 'No one group owns it. You decide for yourself,' El-Amin Naeem says." - from this article


"You decide for yourself." - Zarinah El-Amin Naeem
My top 5 tips for deciding which head wraps to wear:

1.  Do research.  Is this wrap style originating from a certain people group, religion, or era?  Does the fabric's print have a name or signify something?


2. If it originates from a certain group, has that group expressed their opinion on "outsiders" wearing the style?  Is there someone from that people group you can ask for insight, or articles that may share their thoughts on it?  (If you discover through several resources that they really don't want "outsiders" wearing it... don't do it.  If it seems ambiguous, use your best judgement and keep evaluating with the questions below.)


3. Are you at least knowledgeable enough about the wrap or fabric to be able to converse about it and show a basic understanding of its roots?  Honestly, if you aren't willing to do a five minute google search on a wrap or fabric that belongs to another culture, you don't deserve to wear it. Yep, I'll be that blunt. 


4. If it's not exactly a traditional wrap, is it a version "inspired by" or very similar to a wrap claimed by a cultural group?  Is there a version you can buy that would support the community it originates from?  If not, are you willing to support a company that has knocked it off without giving credit?


5. What do designers say?  Look at shops that sell head wraps.  Do they feature anyone that looks like you wearing their products?  If not, is there any information on their social media profiles or website that express their views on people outside their group buying and wearing their products?   (I found this IG post from the feed of @thewraplife to be a good example.)


6.  Do you ROCK IT?!  After all the evaluating, this is the question it all comes down to... Does it flatter you?  Do you feel downright amazing in it?! If so, rock it!


While I have my ways of evaluating for myself which wrap styles I wear, I also wanted to share some tips and thoughts from others on how they decide what wraps they should and should not don:


"Head wraps have existed in all cultures for aeons, but we have to be mindful that cultural relativism actually shifts over time. What projected one way decades ago projects in another today. I think it's today we are concerned with, not yesterday--even as this is a vintage clothing discussion site. We don't live in the past, and regarding racism and sexism, we sure as hell wouldn't want to."

- Robin Edgerton

"IMO, as long as you are not wearing a culturally significant textile or wearing a religious turban, I think it's ok to wrap a scarf or fabric and tie it on your head. I generally stick to solid fabrics or pattern scarves that are in no way culturally tied."  

- Aly Rose of Aly Rose Vintage


Mary of Verily Merrily Mary
"One thing Westerners and Western culture can do is stop acting like they found a novel fashion piece whenever they are rocking African items, head wrap or otherwise. It happens so often and is so offensive. Arbitrary 'tribal print' headscarves and clothing sold in stores like Forever 21 sometimes have them with patterns that are African and, of course, Africa is not given the due credit when it is advertised. It’s just a cool 'new' trend. Knowing the history of the continent and how it has been (and continues to be) pillaged and colonized, the very least they can do is acknowledge and respect the origin of those fabrics and buy from African designers. At the end of the day, people are going to do what they want to do, but I would prefer that non-African people wear African fabrics for reasons other than 'it looks cool.' That will challenge people to actually research the history of what they are wearing, perhaps even to the point that they would rather not wear it out of respect. When in doubt, my advice is to wear the fabric if you’re invited by someone in the culture to do so (wedding, etc.)."
- Mary of Verily Merrily Mary


@alyrosevintage
"It can be done right by doing your homework. If I'm going to showcase my love for Indian culture, African culture etc, I'm going know the appropriate names and origins. This doesn't mean I don't have the right to style it or wear it in a nontraditional way but being prepared to say, 'Oh thank you, I love this kente print too,' as opposed to saying, 'African,' shows your respect for its roots...
[Black women], too, have to ask ourselves if it would be offensive to our culture or anyone else's. After all, Africans and African-Americans have a tumultuous history. We have to face the elephant in the room and ask ourselves if we are selling out by mimicking the style of ancestors who sold us into slavery?"
- Dasha Guyton

"I don't think it's appropriation if you are not wearing a religious turban, and you are taking care to wear an ethnic wrap with respect to the culture. Especially if you're supporting the local designers of color.  Rock your head wrap!"  

- Nisha Miles

"Don’t wear a wrap just so you can say you’re 'pro-black' or something… Don’t do it because you have a political reason.  Do it because you really like it, because you appreciate the ability it gives you in creating a new look for you."  

- Aziza Lynn, aka "The Bargain Beauty"


"The bigger the knot, the better you feel." - Aziza Lynn, aka The Bargain Beauty
"It's hard to decide what is appropriation and what is not, especially in the arts (fashion included) because being influenced by other ideas and cultures is natural. I think one of the big red flags that we can all agree on is taking culture (in this case fashion) from another culture and using it without regard for the context or claiming it as your own. Women from all over the world and from many parts of history have used a variety of wraps and ties all throughout history to keep their hair neat and off of their neck, as well as for religious and modesty reasons. I think the head wrap is a challenging issue because it's not strictly used by one culture or only for religious dress. I'm not sure what the right answer is for head wraps, but it seems to me like the fact that we're having the conversation means that everyone's intentions are in the right place."  
- Allison Dyke

So, readers, what about you?  Are there head wrap styles you feel nervous about trying?  How do you decide which wraps to wear?  Has any of these people's insight changed your thoughts on what you would wear?


Extra reading:

How A Head Wrap Taught Me An Important Lesson About Professionalism And Race
The Curious History of "Tribal" Prints
IG conversation on @thewraplife feed
Black America, Please Stop Appropriating African Clothing and Tribal Marks
In Order for Black Americans to Appropriate African Culture...
Culture Is Not Costume
Under wraps: Style savvy Muslim women turn to turbans
You're Wearing That Out?: My Family's Disdain for Headwraps and Why I'm Embracing Them
The African American Woman's Headwrap: Unwinding the Symbols

Vintage Stocking Guide

Flashback Summer: Vintage Stocking/ Hosiery Guide

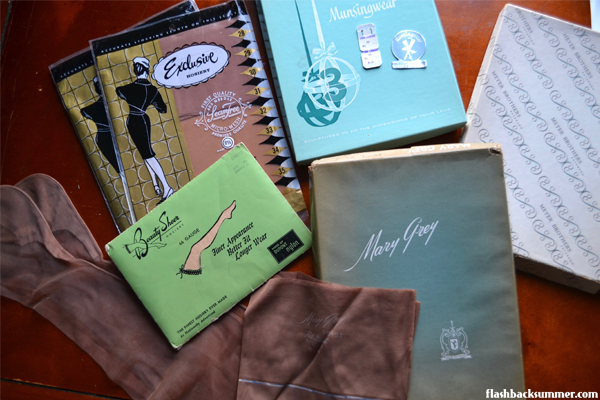
Stockings are one of those things that many of us modern wearers learn about only as we get into vintage (or lingerie, for that matter).  It's not something that most women these days wear, and a lot of my learning about stockings has been a bit through trial and error and through reading blogs.  I want to share some information I've found from period sources and my own experiences.  I'd love for you more experienced stocking-wearers to contribute, too!

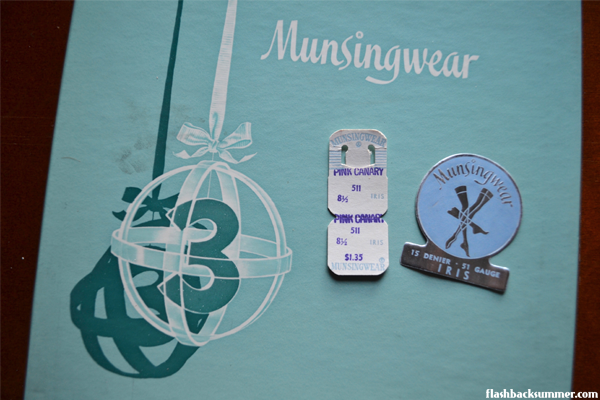
Below I have two pages of information that came with some vintage stockings I bought, and it explains a bit about the makeup of stockings and how to care for them.  First up, some handy-dandy info from Munsingwear!


Fitting and Sizing


Flashback Summer: Vintage Stocking/ Hosiery Guide

As you can see here, vintage stockings are not like modern tights.  There is a lot more sizing and fitting involved, since the nylon used was not as stretchy as our modern tights.  The important measurements you need to know when buying vintage stockings are top-to-heel length, heel-to-toe length, and thigh (top) circumference.  These measurements should be very close to your body measurements to fit properly.

However, you'll almost never find these measurements on vintage stocking labels or packaging; you'll find sizes.  Vintage stocking sizes range from about 8 1/2 to 14, and it's based largely on foot size.  Sometimes you'll find petite, regular, and tall options to account for differing leg sizes.  The Nylon Swish has a really great chart to help you convert your measurements to a vintage stocking size.

Flashback Summer: Vintage Stocking/ Hosiery Guide

For me, a size 8 1/2 works alright.  I've got about a 28" inseam length and a size 5US foot. I'd rather have a bit smaller, but I've never run across a size 8 petite... though I think that would be my perfect size. (If anyone's got some... let me know!  I'm interested!)  I have yet to find reproduction stockings that are short enough for my legs, so petite ladies beware!  Keep your eyes out for vintage ones.


You also want your stockings to be shorter than your inseam, obviously, because of how it will be attaching to the garter belt or girdle.  You need a gap between them for the suspenders to stretch as you move.


Denier and Gauge


Next, I've got some info about the construction of stockings from Mary Grey Nylons:


Flashback Summer: Vintage Stocking/ Hosiery Guide

The part that is especially useful here is the description of the terms "gauge" and "denier."  In case it's a bit small for you to read, here's what the page says:


While "denier" denotes weight or thickness of the nylon yarn, "gauge" refers to the texture of the knitted fabric.  High gauge stockings have a more flattering appearance and wear longer because of their fine, closely-knit fabric.


As you can see in their graphics, a higher gauge number makes for a finer, more durable stocking.  A higher denier makes for a more opaque stocking, and a lower denier means the stocking will be more sheer.

Oftentimes ladies back in the day picked their stockings for the occasion.  For work or everyday wear, they would go with a high-gauge, high-denier stocking that would be thick and durable.  These are also good for cold weather.  On the other hand, ladies preferred the sheerest, most natural-looking stockings for special occasions like parties or weddings.


Flashback Summer: Vintage Stocking/ Hosiery Guide
source

Laundering and Mending
Both of these pages have similar advice for laundering stockings:


Mary Grey Nylons - For added wear and beauty, wash your nylons after each wearing.  Keep finger and tonsils well manicured, and when putting on your stockings, carefully roll them first and then gently unroll them onto the foot and leg.


I strongly support that last sentence; unrolling them onto the leg will prevent a lot of wear and tear on your stockings.  I also take my rings off when I put stockings on.  I've snagged my nylons a couple times in putting them on, and it's very devastating.  Don't do it!


Flashback Summer: Vintage Stocking/ Hosiery Guide

Munsingwear - Rinse out your Munsingwear hosiery before the first wearing.  And after each additional wearing, wash gently in warm mild suds and rinse.  Roll in a towel to absorb moisture. Hang to dry away from heat and sunlight.

Always hand wash vintage nylons in some soft soap.  Most of the time I use a gentle dish detergent and warm water, and it works brilliantly!  DON'T ever twist or wring out your nylons.  I've found it alright to ball them up and squeeze the water out then lay them flat on a towel.  Rolling them in this towel squeezes out most of the water, and hanging them to dry will leave you with fresh stockings!


What about you guys?  What are your top tips for stocking wearing?  Do you have recommendations for your favorite reproduction brand?

This Is My Church Khanga

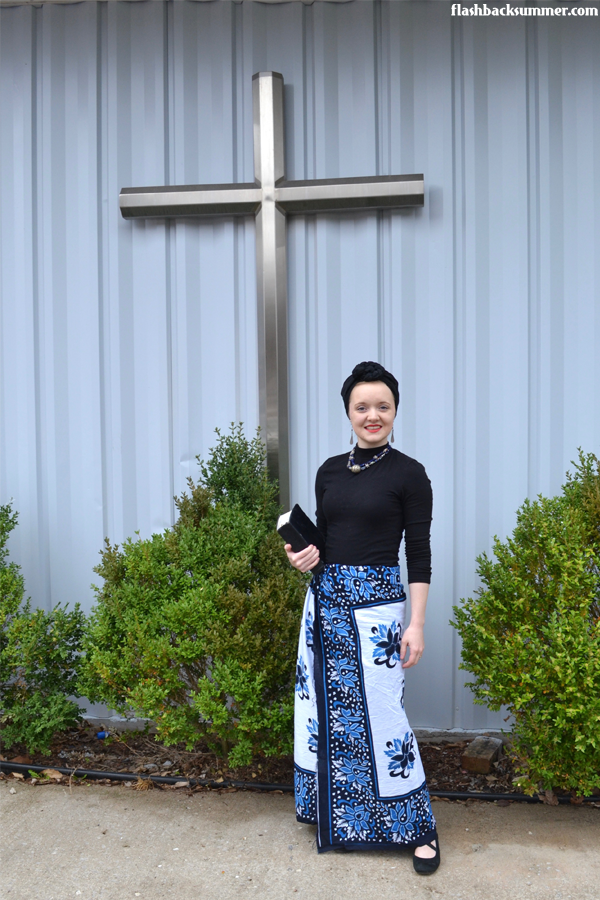
Flashback Summer: This Is My Church Khanga - Tanzania kanga fabric skirt

To celebrate Easter this month, my intercultural church has decided to wear our "garments of praise"... aka, traditional clothing from around the world!

Dried Flower Box DIY

Flashback Summer: Dried Flower Shadow Box DIY tutorial
When I went to my friend Molly's house, I noticed she had several shadow boxes filled with beautiful arrangements of dried flowers.  I asked her about them, and she explained how many of the flowers were from special occasions, like her wedding.  She had dried the flowers and made these lovely boxes herself!

They remind me of antique and vintage frames that often hold a wedding veil, photo, and flower crown to commemorate them for decades after the event.  It seems a perfect way to save flowers that would otherwise be ruined over the years, and Molly was kind enough to work with me on a tutorial to share with all of you so you can make your own!

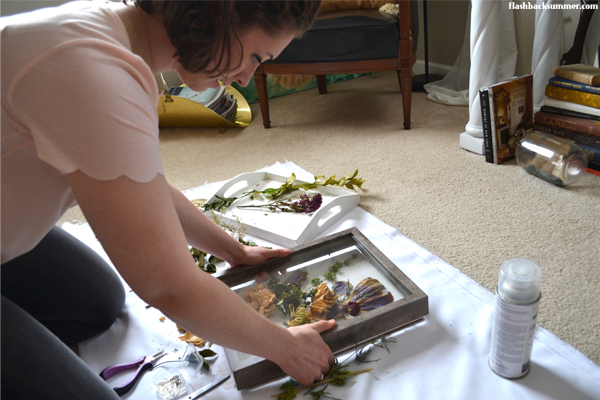
Flashback Summer: Dried Flower Shadow Box DIY tutorialSupplies you'll need: dried flowers, a shadow box, scissors, straight pins, and dried flower preservation spray
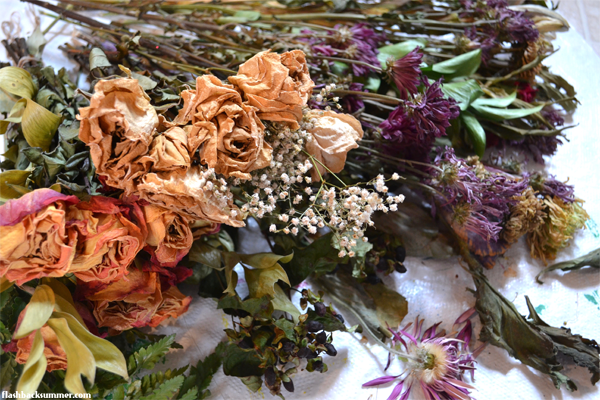
Flashback Summer: Dried Flower Shadow Box DIY tutorialFirst, dry the flowers you would like to use.  You may need to experiment a bit because not all flowers dry well, and oftentimes they may even change colors completely.  Baby's breath, roses, and many types of greenery usually dry quite well, while daisies and other many-petaled flowers may not do so well in the drying process.
Flashback Summer: Dried Flower Shadow Box DIY tutorialNext, spray all of the dried flowers with the preservation spray in a well-ventilated area.  This will help them retain their color.
Flashback Summer: Dried Flower Shadow Box DIY tutorial
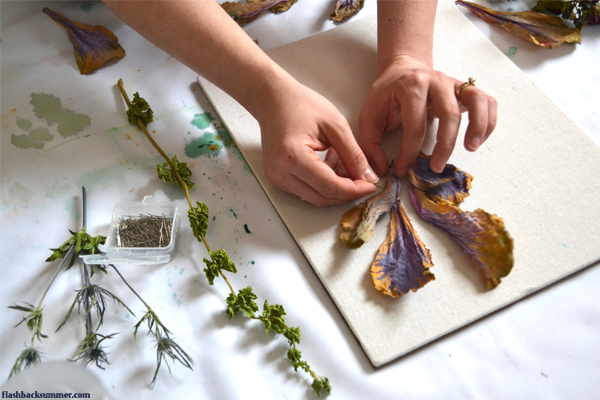
Now crank up some tunes and grab a coffee; it's time to start the art!  Remove the back board from your shadow box.  Use straight pins to secure plant bits to the board.  (Molly has tried using both pearl-topped and plain straight pins.  She says both work well, but it will affect the look of the piece.  Pearl pins will add an antique, feminine touch, and the plain silver ones will blend in more subtly with the piece.)

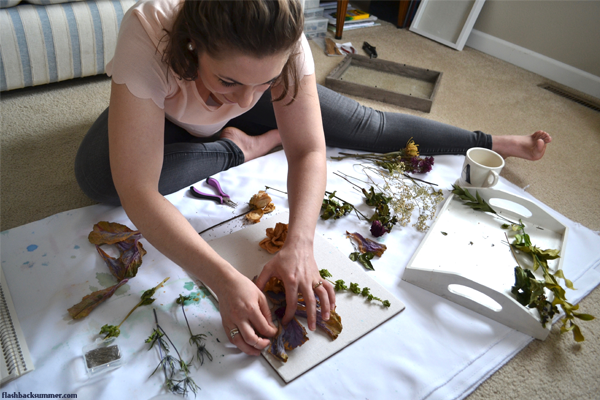
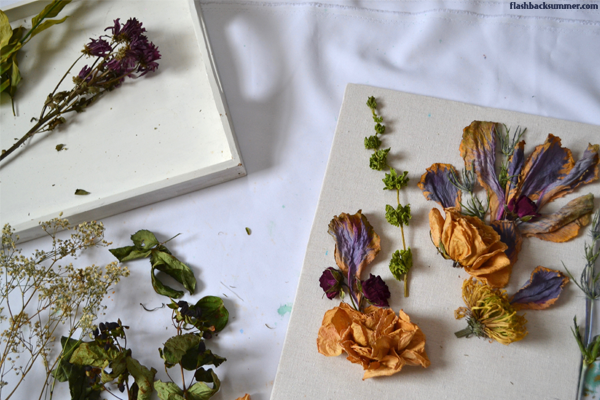
Flashback Summer: Dried Flower Shadow Box DIY tutorialArrange the flower petals and leaves in a way that looks good to you.  Don't be afraid to take flowers apart or cut pieces off to make it aesthetically pleasing. 
Flashback Summer: Dried Flower Shadow Box DIY tutorial
When your arrangement looks good to you, pick up the board and shake it a tiny bit to make sure each piece is secured to the board.  Add more pins where necessary.

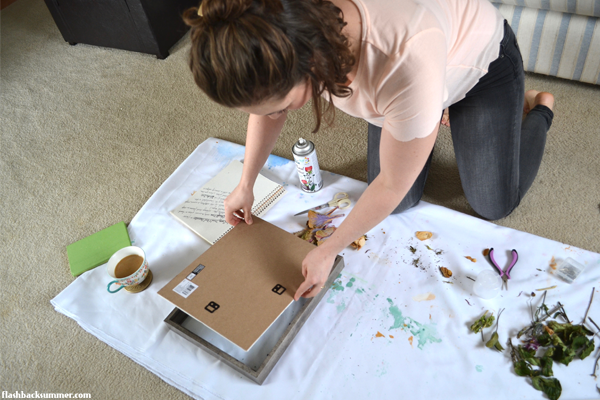
Flashback Summer: Dried Flower Shadow Box DIY tutorialNext, take the top of your shadow box and lay it on the board.  If any blossoms look especially squished by the glass, you may want to flatten it out a bit.  It's up to you, really.  As long as you like it!
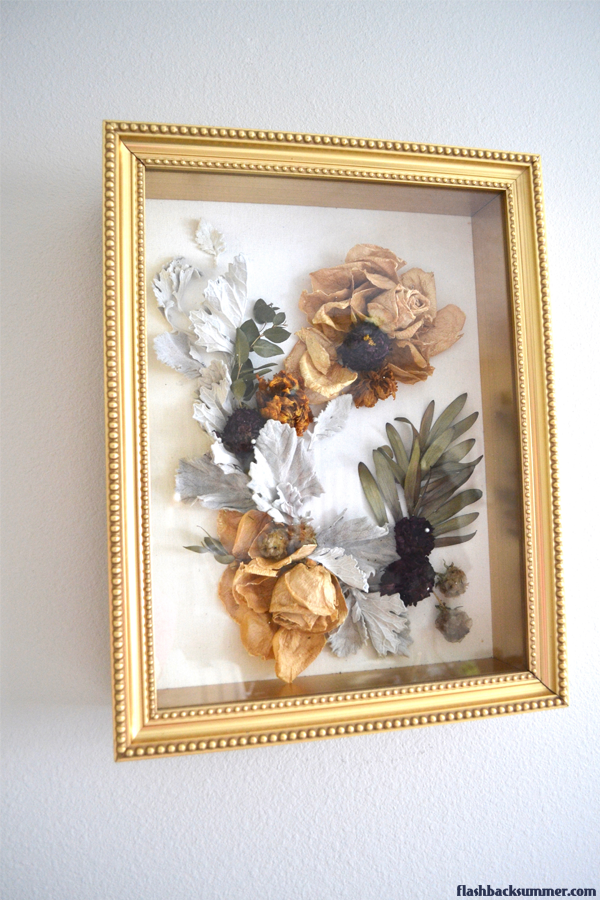
Flashback Summer: Dried Flower Shadow Box DIY tutorialFinally, place the board inside the frame and secure it on the back.  Your piece is done!
Flashback Summer: Dried Flower Shadow Box DIY tutorial
Flashback Summer: Dried Flower Shadow Box DIY tutorialNow find the perfect place to hang your beautiful work! Molly has made several of these boxes, and below are a couple more of her examples.  The frame of the box and the colors of the flowers make such a difference, don't they? 
Flashback Summer: Dried Flower Shadow Box DIY tutorial
While many of us have the time and desire to make our own, Molly is also available to take commissions!  If you have special flowers you would like to preserve, Molly would be very happy to work out shipping logistics and the process with you.  If you're interested, you can email her directly!

I have personally commissioned Molly to make a couple boxes, and I will share them with you guys when they are done!  I LOVE dried flowers, and there really can't be too many around one's house, in my opinion!

What do you think of these dried flower boxes?  Do you have any special flowers you would like to immortalize in art?