Season's Cleanings: Mending & Altering Clothes & Shoes


Mending and repairing clothing is an important, unavoidable part of wearing vintage.  Since our clothing is older, it sometimes needs a pick-me-up to get back into wearable condition and to help preserve it for longer.  However, I've learned that there are a lot of things I could do for my wardrobe that I overlooked in the beginning!

First, there are alterations.  This is a touchy subject I've touched on in previous posts, but it's an option ladies in previous generations went to all the time.  If you've noticed there's a garment you like but it doesn't quite fit you right, take it to be altered!  I've found that when a couple little fit issues have been addressed I'll wear a garment far more often, such as my 1950s power suit.

Next, there's clothing repair.  If you aren't handy with a needle and thread, this is often an easy job that can be done by dry cleaners, tailors, and sewing friends.  It's important to catch rips and holes when they're small and repair them ASAP to prevent them from getting bigger.  In my experience, vintage pieces often need repairs on underarms, waist seams, and hems.  Before storing your clothing or putting it back into your closet to wear this season, take an evening to address the mending issues of each garment.  Carefully look over the whole thing inside and out and do what needs to be done to make it sturdy again.

Lastly, it's time to take care of shoes!  I didn't realize all the things that can be done to preserve vintage shoes until recently.  If your shoe has an issue, take it to a cobbler or shoe repair person.  You'll never know what can be done unless you ask the pros!  I would recommend having these things done by a professional for it to be done right.  Shoe pros have machinery, tools, and skills that aren't commonplace, so it's good to let them do these things.

Here are some of your shoe maintenance options to keep them looking better longer:
- Conditioning leather: Sometimes leather gets dry, and if it starts to crack it may never be fixable. Conditioning your leather will keep it soft, supple, and wearable.
- Weatherproofing:  Wet conditions can stain leather or ruin certain types like suede.  Taking your shoes to be weatherproofed will help be more water-resistant and look better.
- Heel repair: Oftentimes shoes, especially heels, will begin to wear down on the back of the sole and round off. To prevent the heel part from eroding further, get the heel tips replaced from time to time.
- Metal taps: This is an old trick you'll often see on vintage shoes and even on modern-day work and military shoes.  You can get metal taps installed on certain places on the soles of your shoes that get the most wear.  These taps won't erode like rubber soles and will help your shoes last longer.
- Leather repair: Brittle or worn-out ankle straps are common on vintage shoes since they've often been well-loved, especially when the wearer tended to buckle them at a certain hole every time. Take these shoes in and get a reinforcement strip of leather sewn on the back of the strap.  It will prevent the strap from snapping when you walk!
- Redyeing: Not every shoe repair person will do this, but re-dyeing shoes is also an option.  Redyeing can restore leather shoes to their original, vivid color.  You can also dye shoes made of other materials to brighten their color or even change the color completely.
- Sewing repairs: Cobblers have special sewing machines that allow them to repair seams in shoes we home sewists generally can't fix.  Catch tears in the upper parts of shoes early to keep the tear from spreading!

Do you have items in your closet that need to mended or repaired? What's your favorite mending or maintenance trick you've learned when dealing with vintage?

Season's Cleanings: Seasonal Wardrobes & Laundry Tips

Flashback Summer: Season's Cleanings - Click through for vintage laundry tips and a printable chart to help in your laundry area!

Granted, not all of us live in places with defined, markedly different seasons, but most of us will still have some items that are reserved for a certain time of year.  Whether it's a pair of snow boots, a long-sleeved dress or winter coat, it's crucial to prepare this clothing for storage by deciding what to put away and cleaning it thoroughly.

The first step, deciding what to put away, is one I've just started doing recently.  As I've transitioned from modern to vintage clothing I haven't had enough clothing to cycle in and out.  This year, however, I have a few pieces that I know I definitely won't be wearing until next season, which for me will be spring.

I also like the idea of storing garments that could work year-round for another reason: closet rotation fun!  By putting away some items I love for a few months and pulling them back out later, it will be like getting new clothing.  It also forces me to imagine new ways to style garments I already have and wear items I don't get to as often. By limiting my choices, I have to increase my creativity!

There are four things to look at when deciding which clothing to store:
- Which items do I absolutely need this season?
- Which basic garments will I need for mixing-and-matching?
- Which garments do I want for pizzazz?
- What special events will happen this season?

For me, I knew I absolutely needed warm clothing.  This means I'm keeping a few long-sleeved dresses, furs, stockings, warm hats, and enclosed shoes in my closet.
I also knew I would need office-appropriate basics for mixing and matching. I'm keeping my trousers, suits, and solid-colored blouses out for this purpose.  Lastly, I wanted some winter pizzazz!  I've decided to keep out a couple hats, some patterned blouses, and some poppin' shoes.  

I also know that this is the season for Christmas parties, and I may have a formal event or two.  With that in mind, I've kept a couple formals and my highest heels in my closet for the occasion!

All the rest of it will be stored in my closet and places around my home.  However, all of it needs to be properly laundered.  It's a good time to air out the items I'll be wearing this season, so I hung them outside in my yard to get some fresh air.  (I hung them in the shade to prevent fading from the sun, except my whites which could benefit from some sun-bleaching!)

As for items I'll be storing, I went over them and looked for spots, stains, weird smells, and deodorant residue. It's important to remove these things if at all possible before storing so they don't set permanently or cause discolorations or deterioration while in storage.

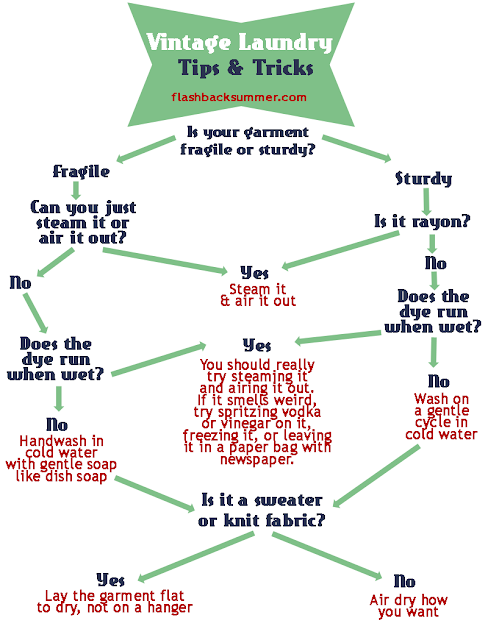
Here's a series of questions to help you decide how to wash your vintage pieces (or those not-as-vintage-savvy people in your household…). It's a basic overview, so if you have more detailed questions feel free to ask in the comments below! (You can get a printable version of this chart to hang in your laundry area here!)


Flashback Summer: Vintage Laundry Tips & Tricks (Click to the original post for a printable version to hang in your laundry area!)

Season's Cleanings: the Index Card System

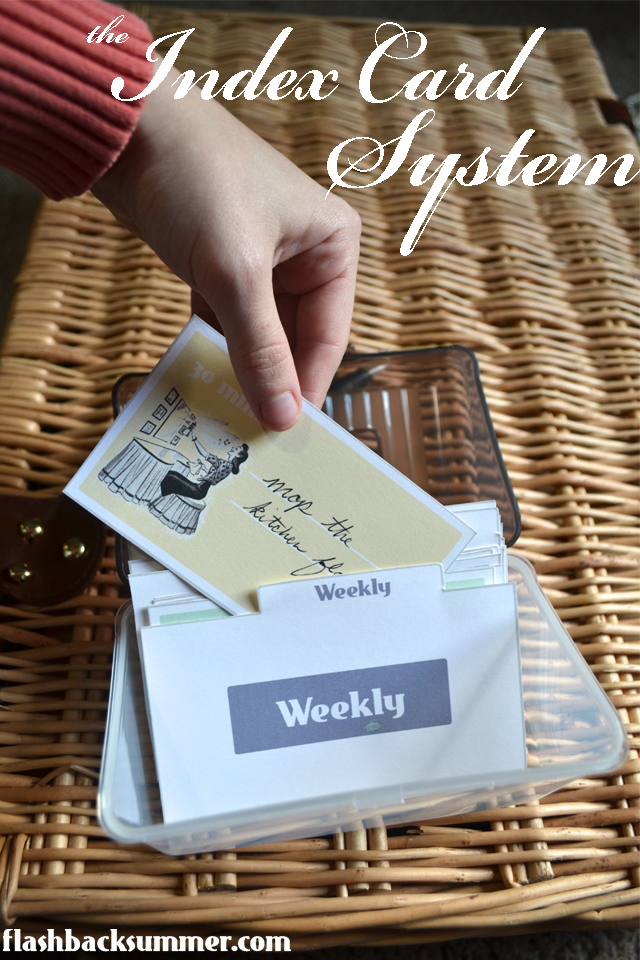
Flashback Summer: Season's Cleanings - the Index Card System - home maintenance and chore tips

Today I've gotten my mother's permission to repost her index card cleaning system, a practical and easy way to maintain your homes cleanliness without having to put much thought into it.  This system allows you to utilize your few spare moments throughout the day to get some of those bothersome chores done and remember the less frequent monthly cleaning that helps a home stay in good condition.

Personally, this has been a major part of my learning curve since I've graduated college. I feel like the clutter piles up, and use to wait until it was a disaster zone until I made time to clean it (which usually took a while by that point).  I've implemented this index card system, and I think it's helped my husband and I a lot in making the most of our time.

To implement the index card system, you'll need:
- an index card box with two tabs
- index cards in four different colors  
(I've created the fun, retro-inspired printable cards and tabs you see in the picture for you guys!  Click here to download the chore cards and here for the dividers.)


Flashback Summer: Season's Cleanings - the Index Card System - home maintenance and chore tips

First, label the divider tabs: Weekly, Monthly   

Next, on a separate sheet of paper write down every cleaning task you can imagine that needs to be done in your home.  For example:
Mop kitchen floor
Vacuum living room carpet
Dust furniture
Organize Food Pantry
Clean out closet
Organize "junk" drawer
Bleach counter tops
Clean under the refrigerator
Clean oven
Mop bathroom floor
Scour bathtub/shower
Clean bathroom
Sweep garage floor
Organize garage
Sort clothes (keep, store, give away)


Approximate how long each task will take you.  For example:

Sweep and mop kitchen floor-20 minutes
Vacuum living room carpet-30 minutes
Dust furniture-30 minutes
Organize Food Pantry-30 minutes
Clean out closet-1 hour
Organize "junk" drawer-10 minutes
Bleach counter tops-20 minutes
Clean under the refrigerator-10 minutes
Clean oven-20 minutes
Mop bathroom floor-20 minutes
Scour bathtub/shower-10 minutes
Clean bathroom-30 minutes
Sweep garage floor-10 minutes
Organize garage-1 hour
Sort clothes (keep, store, give away)-1 hour


Flashback Summer: Season's Cleanings - the Index Card System - home maintenance and chore tips

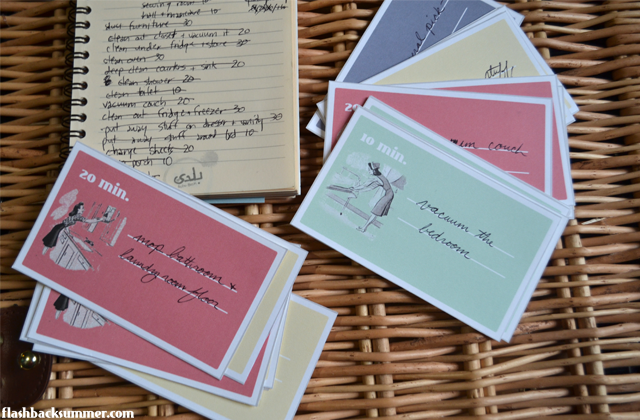
Now divide your index cards based on color.  For example: green cards are 10 minutes, red cards are 20 minutes, yellow cards are 30 minutes and blue cards are 1 hour.

Write down all your 10 minute tasks, giving each task its own card.  Continue with the 20 minute tasks, 30 minute, etc.  For example:


Top right of card:  10 min.
Middle of card: Organize "junk drawer"


Flashback Summer: Season's Cleanings - the Index Card System - home maintenance and chore tips

Now create two sections in your box by placing the "Weekly" tab at the front and the "Monthly" tab behind it.

Put all your "Weekly" tasks in time order starting with pink 10 minute cards, then blue 20 minute cards, etc. Do the same for the "Monthly" tasks.  For example:

WEEKLY: Scour bathtub/shower-10 minutes
WEEKLY: Sweep garage floor-10 minutes
WEEKLY: Sweep and mop kitchen floor-20 minutes
WEEKLY: Bleach counter tops-20 minutes
WEEKLY: Mop bathroom floor-20 minutes
WEEKLY: Vacuum living room carpet-30 minutes
WEEKLY: Dust furniture-30 minutes
WEEKLY: Clean bathroom-30 minutes


MONTHLY: Organize "junk" drawer-10 minutes
MONTHLY: Clean under the refrigerator-10 minutes
MONTHLY: Clean oven-20 minutes
MONTHLY: Organize Food Pantry-30 minutes
MONTHLY: Clean out closet-1 hour
MONTHLY: Organize garage-1 hour
MONTHLY: Sort clothes (keep, store, give away)-1 hour


Flashback Summer: Season's Cleanings - the Index Card System - home maintenance and chore tips

Now as you are going through your day and you find yourself in between errands or the next event, check your watch.  Do I have 10 minutes?  Maybe 20?  If so, pull one of the cards and do the task on it.  When you have completed it, move it to the back of the section.


Flashback Summer: Season's Cleanings - the Index Card System - home maintenance and chore tips

Work through the cards whenever you have small increments of time.  If you have children, add a section for them.  They can pull cards, too, which helps them focus on a specific task.


What do you guys think?  Would this be a potential strategy to help you with your routine home cleaning?  Do you have any other tips and tricks you use to keep your cleaning organized?

If you'd like, you can read my mother's original post on her blog here.

Season's Cleanings: Safe, Homemade Cleaners


Today we have a practical guest post from Lisa of Retro Housewife Goes Green   Her blog has an interesting niche of vintage and sustainable, green living, so I knew she'd be the perfect person to contribute to the Season's Cleanings Series!

During the 1950’s America saw an increase in the use and purchase of consumer goods. This post-war period brought all kinds of new things to buy.  Housewives were being marketed to at a level that hadn't been seen before. Suddenly, we needed all kinds of gadgets and products to clean and care for our homes.

Now don’t get me wrong, I love my dishwasher, but is all that progress really good? Women today are exposed to countless chemicals while caring for their homes, chemicals our ancestors did fine without. 

The cost to our health is not the only thing the increase use of these store-bought cleaners have. From just 1952 to 1956 consumer debt (excluding real estate loans) increased from $27.4 billion to $41.7 billion. We’ve largely forgotten the frugal ways of the wartime women of the 1940s. 

A simple way to save your family money and improve their health is by using simple, natural ingredients to clean your home. These are three easy cleaners that you can make today to get you started:

All-Purpose Cleaner

You can find many all-purpose cleaning spray recipes all over Pinterest, but the way your great-grandma cleaned most things is really one of the best. 

Good old hot, soapy water is a simple, yet very effective way to clean much of your home. Fill up your sink, a bucket, or a bowl with some hot water and your natural soap of choice. I’m a big fan of Dr. Bronner’s Castile soap. 

Simply use a clean rag to wipe the surfaces and you’re done!

Towel Bowl Cleaner

Again, you can go for the fancy recipes or keep it really simple. 

While cleaning your bathroom, spray the inside and outside of the toilet with white vinegar. Let this sit while you clean other things in your bathroom. 

Wipe down the outside of the toilet, working from the cleanest area to the dirtiest. Scrub the inside of the bowl with a toilet brush.

If you need extra scrubbing power, use some baking soda. Just remember vinegar is an acid and baking soda is a base, they are fun to mix but don’t clean well together

Cleaning Scrub

For tougher messes a scrub can be helpful. Take a little bit of baking soda, a few drops of castile soap and enough water to make a paste. Use this to scrub those stubborn messes.  This is my favorite way to clean soap scum from the bath and sink. 

With just three affordable ingredients you can clean most anything in your home. And no more nasty headaches from the cleaning fumes, just a fresh, clean-smelling home! 

What do you guys think of Lisa's cleaning tips?  Are there any you especially want to try out?  Do you have any homemade cleaner recipes?

Season's Cleanings: 7 Tips to Deep Clean, Rearrange, & Freshen Up

Flashback Summer: Season's Cleanings - 7 Tips to Deep Clean, Rearrange, & Freshen Up

Sometimes I get antsy.  I'm tired of how parts of my home look, but I'm lacking in the budget and skills department to do an HGTV-worthy overhaul.  Luckily, this was the same predicament most average people faced in the earlier 20th century decades, and we can learn from their sweet skills!  

One of the best ways to bring a new look to a room is to rearrange it, and it's practical to deep clean it along the way.  Before I even thought to do this blog series, that's exactly what I did in my kitchen!  The layout had a giant 70s dropleaf table in the middle, and the way utilities had been built in has made for an awkward cabinet and fridge layout.  However, I was determined to make the most of the space.  

We found a vintage table, and that sealed the deal. We had been searching high and low for a new table because our 70s dropleaf wasn't in good condition (like, leaves falling off randomly not matter how many times you re-screw them in), and I was elated to discover this affordable table and chair set in a local flea market.  


Flashback Summer: Season's Cleanings - 7 Tips to Deep Clean, Rearrange, & Freshen Up

However, that table purchase was the majority of the budget, so I didn't have many more resources to rework the kitchen.  Here are some of my tips I would suggest in revamping a room on a budget, based on things I've seen in vintage home layouts and in looking at my own home:

1. Start rearranging with the largest piece.
 Rearranging a room can be a daunting task. It seems like my rooms have so much STUFF in them, and I don't realize it until I try to move it all! Focusing on placing a few large items and moving down the size list helps avoid the "I must move everything in this room" overwhelming feeling to "First I'll move the couch, then the end tables..."
I was a bit stuck in rearranging my living room because every single wall has a door or a window in it, and the spaces in between aren't very big.  I started pondering my rearranging options by seeing where the biggest piece in the room, the couch, would fit without blocking anything.  There were only two walls that were options, so I put it on the wall I wasn't currently using!
This works well in nearly any room that has at least one large piece. By starting out with placing large pieces, you can then fill in the rest of the room with increasingly smaller items until you're left with the fun part: decorating!

2. Deep Clean
There are places in my house that don't get cleaned as often as others. Under the couch, under the stove, behind the toilet, places like that. Take this opportunity to thoroughly clean those forgotten corners.  Stuff will get messy anyway with moving stuff around, so you might as well!
Flooring in particular could get some attention at this point since furniture will be moved.  Steam clean your carpets and beat your rugs outside.  (It does more than vacuuming AND relieves stress!)  Wash or steam your curtains, vacuum under the couch cushions, wipe down pantry counters, really get in there!

3. Reorganize
Some things in our homes just aren't as functional as they could be, but we put up with them every day because we haven't taken time to change them up.  Now is a great time to address them!  I rearranged the food storage in our Hoosier cabinet to prevent spices from falling on my head all the time.  It's a small thing, but it has hugely helped my kitchen efficiency!  I also took time to reorganize stuff that had piled in our laundry/storage room and find new places for stacked-up items. It may take some ingenuity, but these little reorganizations can do a lot for reducing daily frustration.

4. Do a project you've been putting off.
Deep cleaning and reorganizing aren't the most fun parts of a seasonal cleaning/refreshing, so take some time to do a craft project you've been putting off. Whether it's that thing that's been pinned to your Pinterest board for several years or a new idea you just discovered, take the time to actually do it!  Print out new pictures for the frames, paint that old mirror, finish that decorative pillow.
I finally made an earring holder and added a bottom curtain to my kitchen window.  I've wanted both for so long but just never gotten around to it, but they're officially done and I'm using them.  Not to mention, they were welcome cleaning breaks!

5. Change out lighting.
Now, here, I'm talking about a VERY budget-friendly lighting change: cleaning and light bulbs!  The fixtures in my home were very dim due to dust gathering on them.  I scrubbed the light fixtures to let more light through. That's step 1.
The next option you can try is a new kind of light bulb.  Surprisingly, it can make a huge difference in how a room feels!  If you'd like a brighter space, try out a daylight bulb.  If you'd like warmer, more intimate lighting in a room like a bedroom, try an incandescent, "yellowy"-colored bulb or experiment with Christmas lights.

6. See what furniture pieces you have that you can freshen up.
Compared to new furniture, paint is cheap!  Women of decades past made full use of paint and other make-do-and-mend tactics to update their old furniture.  One vintage pamphlet I read even suggested taking apart furniture pieces and putting them back together in new ways, such as creating a unique china cabinet by removing the legs off a curio cabinet and putting it on top of a buffet!  That's a bit more work, but if you're feeling DIY-ish it can be an cost-effective way to make a new statement piece for your room.  Easier options could include stenciling a motif on several items in the room, switching out hardware, or moving tchotchkes from their current room to a new one.

7. Open your windows and get some flowers.
To finish it all off, open your windows and air out your house.  Mine has been shut up in an effort to save on air conditioning bills over the summer, but a good airing out in the cooler fall weather has made a huge difference! Add some bright flowers in a vase to the mix and your home will look and feel noticeably fresher.

What rooms in your house could use some sprucing?  Are there any other easy ways you've found to freshen up your living space?

Vintage and Vintage-Inspired articles you may enjoy:
The Proper Arrangement of Furniture in a Room
8 Characteristics of Post-War 1940s Decor
 

Season's Cleanings: Dignity in Homemaking

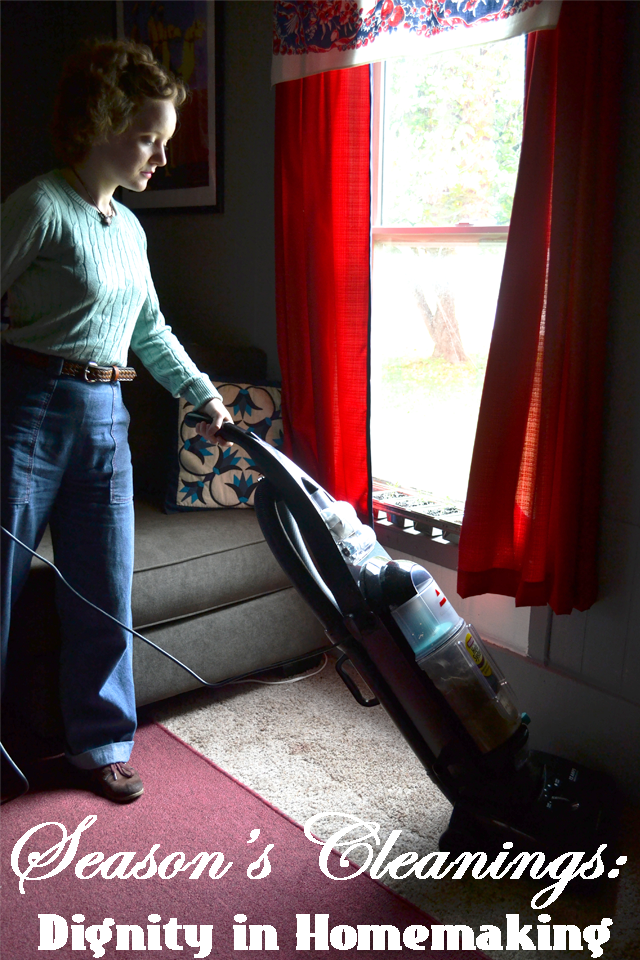
Flashback Summer: Dignity in Homemaking

Home-keeping is a science, and but who profess it really possess it?  The more we accomplish with the least of money, and the smallest amount of work, the more science we exhibit. The woman who keeps her house so that it is home to the tired and weary husband and little ones, so that any and all the time they spend at home, until the very idea of at home is a happy thought, is a scientific home keeper.
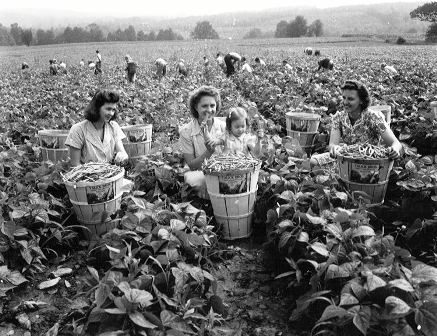
~Western Garden and Poultry Journal, source

While I don't necessarily love all aspects of taking care of a home (I'd rather do other things like, say, knitting), I do think it's an extremely important and overlooked skill these days.  I've realized what an art it is, a science even.  There is so much to learn in order to do things better, faster, and cheaper in regards to cleaning, maintaining, and organizing a house.  Women of previous decades were oftentimes the sole caretakers of their home (with husbands working outside of it), and this knowledge was considered essential for them.  It was taught in schools and even college-level courses by women such as Mary Brooks Picken, and these courses had thousands of enrollees!  During the Depression, these skills were put to the test as women scrimped and saved to help their families make it through. During WWII, domestic arts and savvy homemaking were seen as a patriotic duty and survival skill for families on the home front.

These days, as women have received more opportunities, this knowledge isn't necessarily considered essential for us any more.  We have the ability to work outside our homes and build careers outside of traditional "women's jobs."  This is fantastic!  However, it also means that sometimes skills traditionally associated with women have been deemed old fashioned or sub-par in comparison to skills used outside a home in a career field.  Or, viewing it from another angle, these skills are only seen as truly useful and worthy of developing if you can make money off of them in some sort of small business endeavor.

To me, this unintended consequence of the women's lib movement is a bit sad.  Taking care of a home is no longer a point of pride for women; it's a necessary evil they sheepishly admit to doing or don't consider a "worthy" effort until it makes money.  Men who take care of their homes often encounter social stigmas as well, as if that role was a womanly and, therefore, less important one.

This is crazy to me!  While it is great that women are able to work outside of the home, a welcoming, comfy home is something everyone wants.  However, society doesn't respect the work it takes to create such a home.  Apparently, magical elves are just supposed make it happen while we all go off to our "more-important" outside jobs every day!

I think many women would agree that taking care of a home can be hard work.  As I go through the rest of the series, I want to communicate dignity in the hard work of homemaking.  This work, obviously, can be done by both men and women, but I recognize that the vast majority of my audience is women, so posts may be geared that way in language and content.

We should be proud of being competent in careers and homemaking alike, for one is not better than the other.  Both are necessary, both are valid job choices, and both are unique skills.  The amount we dabble in either one will depend greatly on personality and circumstance, but we can take pride in both!  Domestic arts require perseverance, trial and error, ingenuity, invention, and elbow grease.  The benefits to be reaped by these skills cannot often be measured in monetary value, but they help create the memories and feelings we carry with us throughout our lives: the clean, safe kitchen where delicious food was made, the Christmas candle that will always be the "official" smell of the holidays, the patches on our play clothes that made them last longer.  Homemaking isn't something we should view as a cliche relic of the sexist past.  We can take pride in the heritage of skills our mothers and grandmothers have passed down to us and honor their strength by being intentional and effective in our own homemaking today.

Here are a couple bonus vintage articles I enjoyed on the subject:
Housekeeping vs. Homemaking
Homemaker's Creed of the Home Legion

How do you view house work and skills traditionally associated with women? Have you felt like this kind of work isn't valued or considered as important as career skills, or have you found the opposite to be true?

Season's Cleanings


As the seasons are changing, now is the time of year when I do some deep home and wardrobe cleaning and organizing.  I'm making a point to be very intentional and thorough about it this round because I feel more established in my adult routines than I was last autumn, so I'm actually excited to get to work!  

I do my deep seasonal cleaning in spring and fall, so no matter which hemisphere you live in, now is the time to get at it!  Temperatures tend to be milder and, for many, the weather changes mean there needs to be a bit of a wardrobe shift.  As I go through my techniques for home and wardrobe cleaning and organizing, I'm going to post about each step with practical advice and tutorials to help you along in your own seasonal cleaning.

Here are the things I'll be covering:
- Dignity in homemaking
- 7 tips for deep cleaning, rearranging, and freshening up a room
- Safe, homemade cleaners
- The Index Card System: my mother's tried & true technique of regularly maintaining a home
- Dividing a wardrobe into seasons and laundering tips
- Mending and repairing clothing
- A 1930s hanging storage bags tutorial
- Storing seasonal clothing properly

I'll be sprinkling each post with interesting info from vintage sources, personal thoughts about caring for a home, and some handy-dandy printable guides you can use for quick reference.

Are any of you starting seasonal cleaning or wardrobe organizing?  Do you find it refreshing, a necessarily evil, or a bit of both?

40s + Thai

Flashback Summer: 1940s + Traditional Thai clothing

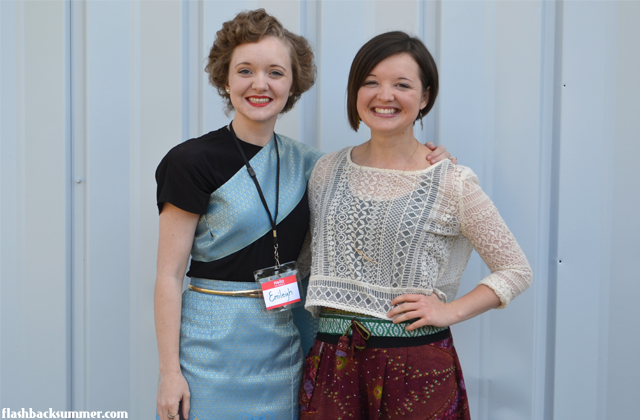
This week was a grand event that a team I'm a part of has been planning for for over a year: the launch of our new intercultural church!

Some of you might know this, but I'm an associate/assistant pastor at a Pentecostal intercultural church in a 95% Caucasian town.  Yes, it is an adventure!  We officially launched yesterday evening, and it was amazing!  Part of how we do church involves having church on Saturday nights and always having dinner together at the beginning.  Each week we pray for a certain country, and we all try our hand at making dishes from that country to try at the dinner.  It's always delicious, and it works well for an intercultural church.  Just TRY to name a culture that doesn't enjoy food!


Flashback Summer: Life 360 Intercultural Church Launch

Flashback Summer: Life 360 Intercultural Church Launch

Flashback Summer: 1940s + Traditional Thai clothing

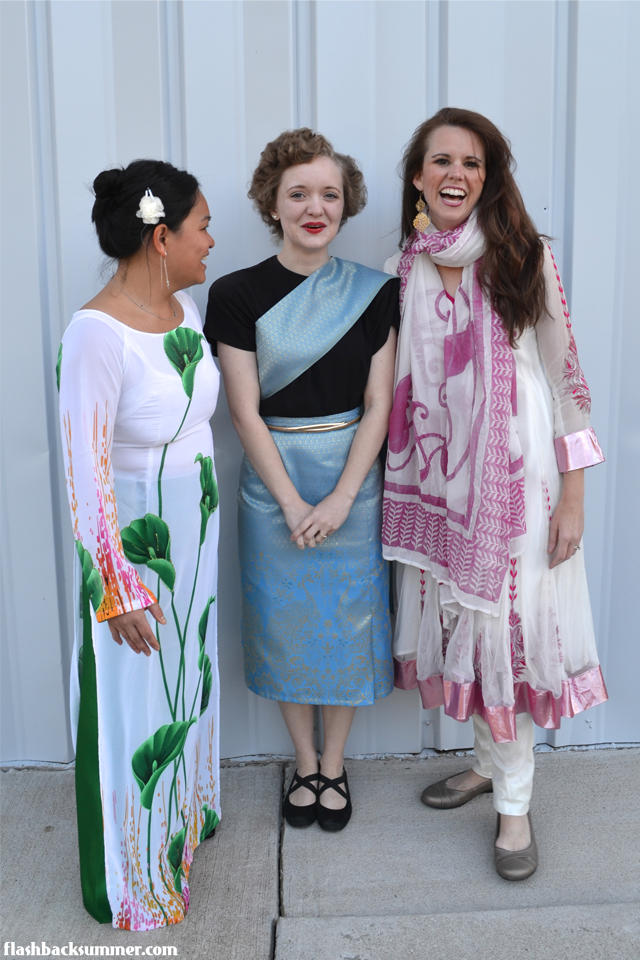
The other part that was special for our launch is that we all wore clothing from different cultures.  While some wore clothing from their native culture, others of us borrowed from cultures that aren't our own.  It's a really great opportunity to learn about other cultures and the meanings behind their fashion.  I've learned how to tie bows on Korean hambok and Japanese kimono along the way!  It allows people to share their culture with others in a tangible way.


Flashback Summer: Life 360 Intercultural Church Launch

Flashback Summer: Life 360 Intercultural Church Launch

Flashback Summer: Life 360 Intercultural Church Launch

Usually I would wear a look from Africa (because that's what I have), but I have a couple new options that have made their way into my closet recently: an Indian sari, a Chinese qipao/cheongsam, and some Thai fabric my mother bought me when she was in Thailand recently.  The Indian sari blouse needs some re-sizing, so I had to skip that one. The qipao was GORGEOUS but was a bit too... bootylicious for a pastor to wear to a church launch, haha!  (I'll be saving it for a date night!)  With those options out, I decided to work with the Thai fabric my mother got me.


Flashback Summer: 1940s + Traditional Thai clothing

Flashback Summer: 1940s + Traditional Thai clothing

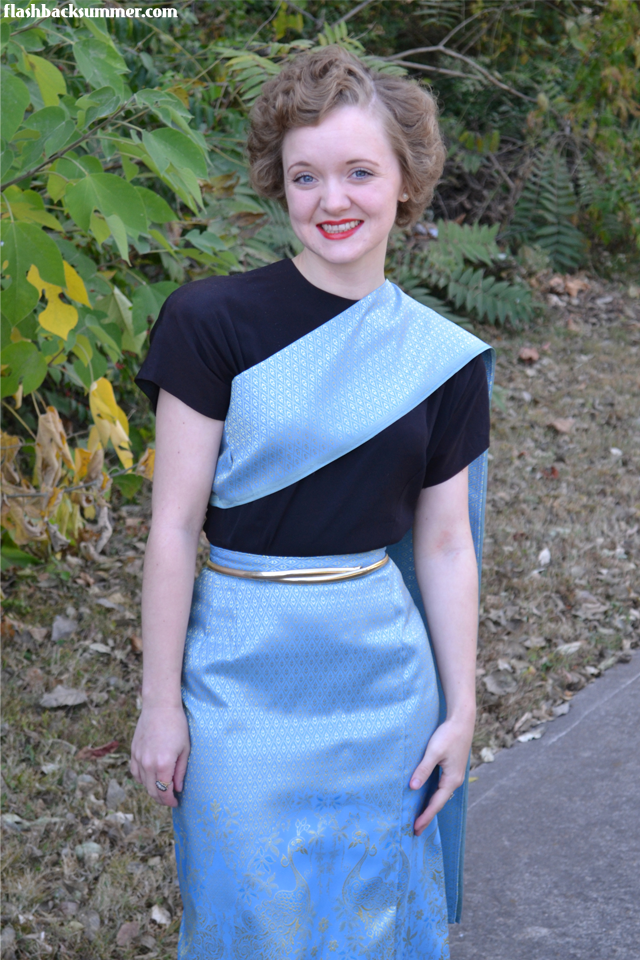
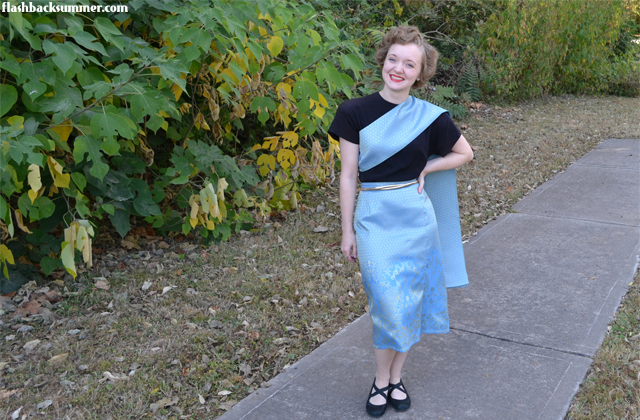
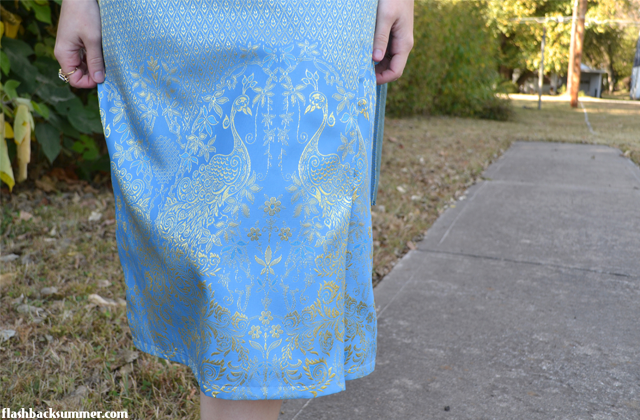
I wanted to create a look that was obviously inspired by traditional Thai clothing to wear to the church event.  This blue fabric is exquisite, but I don't have the skills or knowledge on how to recreate an actual Thai look, and I didn't have remotely enough fabric for all of that.  Thus, I went for an interpretation of a traditional Thai ensemble, mixed with a bit of 40s to bring the Emileigh factor!  I want it to reflect Thai aesthetics while still being wearable for me in my day-to-day life.  I don't want it to be treated as a costume I only pull out for "Thai events." I want it to be something I can appreciate in normal life, too.


Flashback Summer: 1940s + Traditional Thai clothing

Flashback Summer: 1940s + Traditional Thai clothing

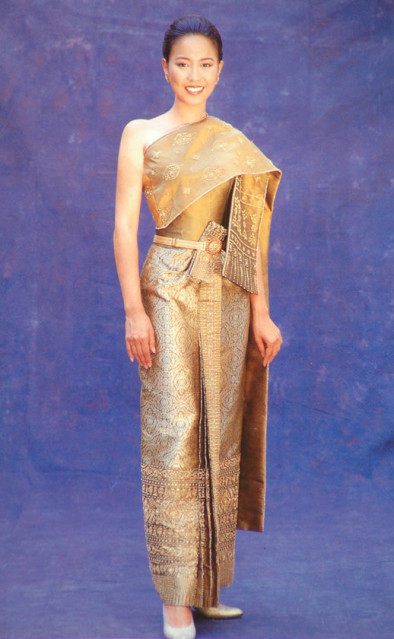
While researching, I noticed three of the common elements of Thai traditional women's clothing: a long wrap skirt, gold accessories, and a blouse and/or sash-like fabric wrapped around the bodice.  I learned there are many kinds of traditional outfits, so they don't all look the same.  Each outfit can be worn by a specific people group or for a specific occasion, so there are lots of variations. However, most of them I saw in my research had these three elements.  I included these in my version.


Flashback Summer: 1940s + Traditional Thai clothing
source
Flashback Summer: 1940s + Traditional Thai clothing
source

I did, however, shorten the skirt.  While I totally love the long-skirted look of traditional ensembles, I was afraid I didn't have enough fabric to allow me to get a wrapped look and still walk.  I shortened it to a pencil skirt which will get more wear anyway.  I used a 1950s pencil skirt pattern that had a faux wrap detail on one side because I thought it mimicked the look of the Thai skirts:


Flashback Summer: 1940s + Traditional Thai clothing - Simplicity 1690

Next, I needed to do a bit of interpretation for the top. Like I said, I didn't have much fabric (just about 2 yards for all of this), so I used the scraps from the skirt to make the fabric to wrap around the bodice.  I paired it with a vintage 1940s black shirt to help the blue and gold really pop and bring the vintage aspect.

Lastly, time for gold accessories!  In my research, I learned that gold (or costume gold) is really the only way to go when it comes to traditional Thai looks. I gladly obliged and grabbed a couple gold accessories, my favorite! I had my gold snakeskin pumps to put on when the event started, but I ended up running around keeping logistics on track and decided to stick with these black flats.

Now for some more photos of a few fabulous attendees!


Flashback Summer: Life 360 Intercultural Church Launch

Flashback Summer: Life 360 Intercultural Church Launch

Flashback Summer: Life 360 Intercultural Church Launch

Flashback Summer: Life 360 Intercultural Church Launch

Flashback Summer: Life 360 Intercultural Church Launch

Flashback Summer: Life 360 Intercultural Church Launch

Flashback Summer: 1940s + Traditional Thai Clothing

What do you think of traditional Thai fashion?  Do you have more information about it you can share with us?

Do you think this outfit pays homage to Thai culture and aesthetics, or has it crossed the line of appropriation? 
(Yep, I'm throwin' it out there. Feel free to answer honestly, especially if you happen to be Thai!)


More sources to learn about traditional women's Thai clothing: 
Something Very Thai - blog post about different traditional Thai ensembles
Thai clothing store
Traditional Thai clothing
Thailand Clothing Meaning

American Farming: Then and Now


Flashback Summer: American Farming Then & Now - 1940s and modern farming

It may surprise you to find out, but I LOVE learning about farms.  Farming is one of the oldest ways of life, and it's hugely important to society.  (Remember history class?  It takes a surplus of food to get to the art part of a culture!) 

Last Friday I had the opportunity to tour three local farms with people from the Missouri Farm Bureau.  Like I said, I love farms, so I was pumped!

As I looked around the farms and heard from the farmers and their families, I was astounded at how high-tech farming has become and all the science farmers incorporate in their work.  I think a lot of us think of "Green Acres" or "Little House on the Prairie" when we think of farms, but that's not true for most of them today!  I learned SO MUCH on this trip that I can't possibly post it all here!

In the earlier part of the 20th century, scientists were afraid the world would run out of food as the population grew.  With their farming methods of the day, we would have had a food crisis by now.  However, major advancements have been made to make farming more efficient, safer, and cheaper to provide us with affordable food.

To show how far farming has come and its importance in history, here are some farm facts from the 1940s:

Farming Then

In 1940, 18% of the American workforce is employed in farming.  One farmer supplied an average of almost 11 people with food.

In 1940, 58% of farms had at least one car,  33% had electricity, and only 25% had a phone.

Flashback Summer: American Farming Then & Now - 1940s and modern farming
source

The average farm in 1940 is family owned and spans about 175 acres.

In 1941, the National Victory Garden program is launched in the United States. This initiative encouraged civilians to start their own gardens to allow more food to be sent to soldiers overseas. It was a big part of preventing food shortages during the war.

Flashback Summer: American Farming Then & Now - 1940s and modern farming

1942-1949: Food price regulation and rationing are in place.  Victory gardens become an important way to supplement rationed food options.  Women take the place of men in doing a lot of farm work while the men are at war.  They get a taste of freedom from working outside the home, and their work is seen as a patriotic duty.

Flashback Summer: American Farming Then & Now - 1940s and modern farming
source

During the 40s and 50s, farmers move from using horses to tractors, and the use of herbicides and pesticides increases.

Facts found at this source.

Flashback Summer: American Farming Then & Now - 1940s and modern farming
source

Farming Now

As of 2012, only 1% of the American workforce works in farming, fishing, or forestry.  Less than 2% of Americans live on farms.  (source)

The average American farm is still family owned but has increased to 433 acres. (source)


Flashback Summer: American Farming Then & Now - 1940s and modern farming
calves at the Samek dairy farm

Nowadays, about 41% of the U.S. is farmland.  We still export a lot of our food, and U.S. farmers produce 46% of the world’s soybeans, 41% of the world’s corn, 20.5% of the world’s cotton and 13% of the world’s wheat. (source)

Increased technology has made farmland more productive than ever. One farmer now supplies food for 144 people!  (source)


Flashback Summer: American Farming Then & Now - 1940s and modern farming
Mr. Drake, a row crop farmer

Things I Learned About Farming

There is an increasingly large gap between farmers and consumers.  It didn't used to be this way.  Back in the day, nearly everyone had a family member that lived on a farm, or they lived on a farm already!  Agricultural basic knowledge was commonplace.  Nowadays, that just isn't true. Most Americans don't know why farmers do what they do or where their food comes from.  I think it's important to bridge this gap to build trust between farmers and consumers and to create the healthiest, safest food for our communities.


Flashback Summer: American Farming Then & Now - 1940s and modern farming
Drake Farm

The vast majority of farmers strive to produce good food using safe practices. Most of them live on the land they farm, drink the water from the wells beneath their fields, and eat the food they produce. They want safe food for their consumers and for their own families. 


Flashback Summer: American Farming Then & Now - 1940s and modern farming
Mr. Samek, the dairyman at Samek Farm, a multi-generational family farm

There are very, very few farmers that don't care about their animals. Besides being a moral thing to do, taking proper care of animals and providing for their needs produces better food.  (In fact, the tags you see on cows' ears are like cow Fit Bits! They track the cow's activity and health on a daily basis to ensure they are doing well. Farmers are very serious about the health of their animals.)


Flashback Summer: American Farming Then & Now - 1940s and modern farming
Cribbs beef farm

Farming technology is crazy advanced!  There are combines that literally drive themselves, GPS systems in tractors, and fine-tuned machinery that makes farming hugely efficient. These technologies also allow farmers to use only as much water or chemical as is absolutely needed in a field, no more and no less.  Agriculture is more precise and accurate than it has ever been.


Flashback Summer: American Farming Then & Now - 1940s and modern farming
Yes, this is me on a combine.  It was awesome.

Technology and scientific advancement needs to be learned about, not feared.  There's a lot of talk of GMOs, pesticides, and other chemicals these days. While it is important to be educated on these topics, I think we need to make more room for farmers to explain their processes before we freak out. A lot of GMOs allow farmers to use less chemicals. The row crop farmer we talked to, Trent, said they use less than a quart of many herbicides and pesticides on their land per acre; most of what you see being sprayed on a field is water.  The dairy farmer explained how the hormones they use to help cows produce more milk are already present in cow's bodies; they aren't mutant-juice created in a lab, and there's no detectable difference in the milk. Take time to learn about these issues, but try to hear from a real farmer, too.  The media can make things seem scary when, in reality, they aren't.  Farmers and their families eat their produce, too; they aren't just faceless corporate farms trying to make a profit.  Learn from them!
Flashback Summer: American Farming Then & Now - 1940s and modern farming
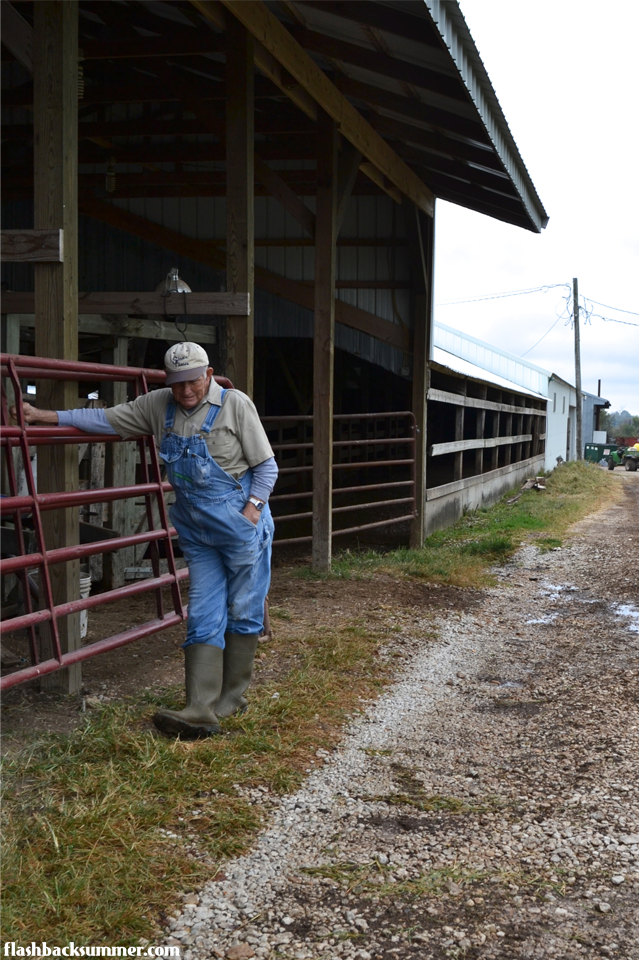
Mr. Cribbs (in the green hat) teaching us the ways of beef farming

Do any of you have ancestors that were farmers back in the day?  What were your ideas of farmers and farming before this post?  Have you ever gotten the chance to go to a farm or talk to a farmer about his work?

I learned far too much to include in this post, so if you have questions, feel free to ask!  We can find answers together!


For more learning, check out these sites:
Growing a Nation: The Story of American Agriculture
1941 Agriculture Video 
Missouri Farm Bureau website 

Power Suit

Flashback Summer: Power Suit - 1950s vintage suit

You won't see me in many 1950s looks (unless you're looking at older posts on this blog, before I found my style "niche" in the 30s and 40s).  However, there is one part of 50s trends that make my heart melt: the suits.  Specifically pencil-skirt suits.

To me, the 1950s were the glory years of suits.  They're flattering, gorgeous, tailored, and full of amazing details.  They are timeless and look just as chic now as they did then.  In fact, 1950s suits are some of the easiest vintage pieces to wear in the modern world.  People oftentimes don't even realize they're vintage because the lines are so classic; they just think it's a really nice suit! 

Flashback Summer: Power Suit - 1950s vintage suit

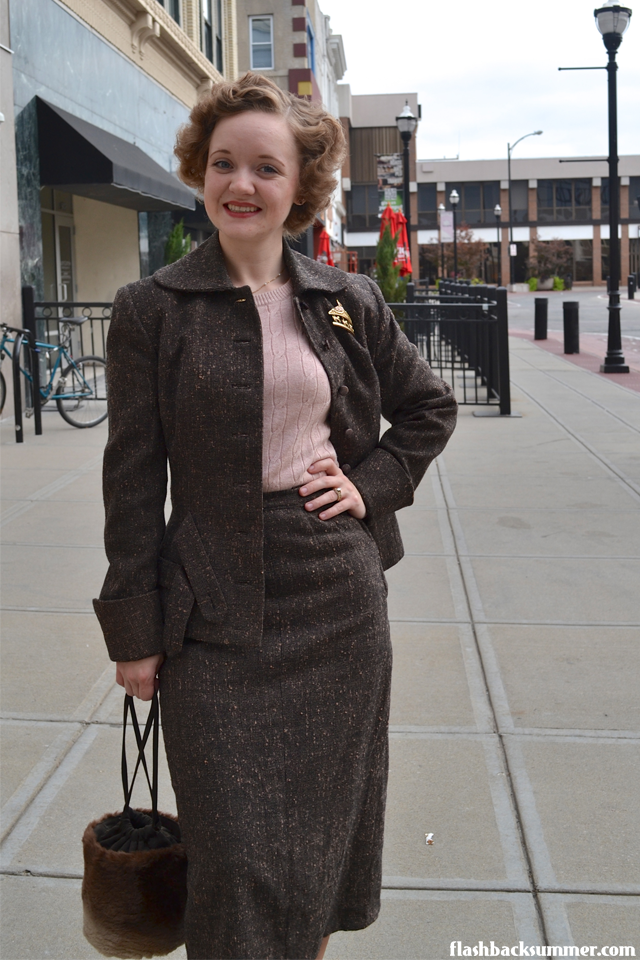
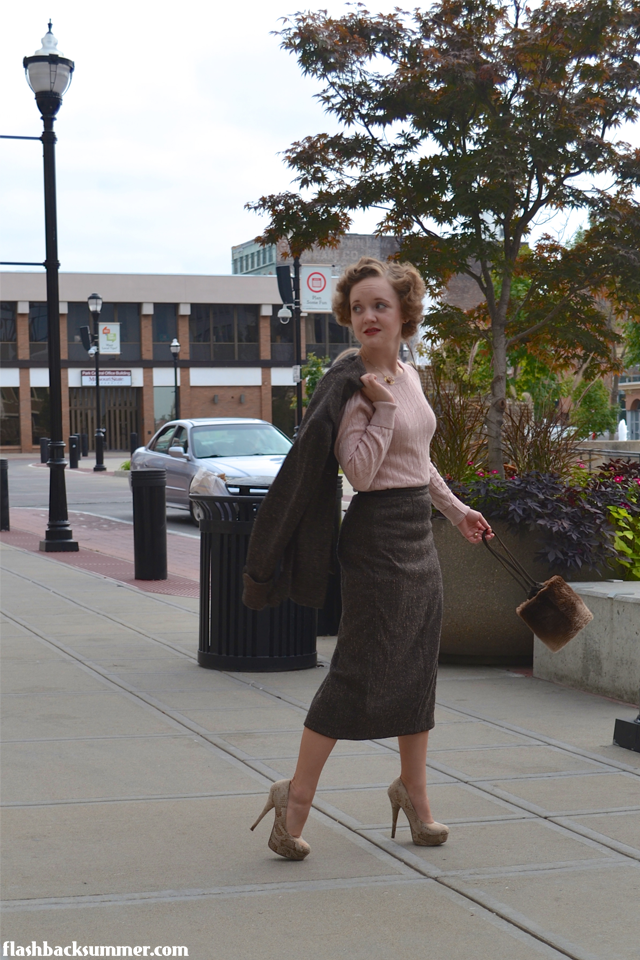
This ensemble is my first well-fitting vintage suit, and I'm modeling it in front of a historic theater on our town square.  I had to get the suit brought in a bit on the sides and could probably do with a bit less length on the skirt, but I don't want to do to much to it in case I should pass it to someone else in the future.  Hemming skirts shorter has a way of majorly limiting who can wear the piece later, and I don't want to do it unless it's necessary.

Flashback Summer: Power Suit - 1950s vintage suit

Flashback Summer: Power Suit - 1950s vintage suit

The suit is made of a nubby wool weave with both brown and black threads.  I paired it with a dusty rose colored sweater, the only shade of pink you'll find in my closet!  For some reason, since I was a kid, this is the only pink I've ever liked.  I used to refer to it as "grandma pink" until I realized the proper name was "dusty rose"!

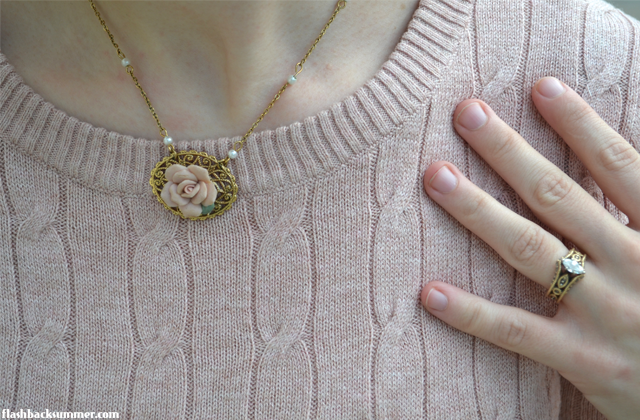
I accessorized with a brooch that used to belong to my grandmother, but, sadly, at some point while I was wearing it two of the little pink roses on it fell off!  I found one on the floor of my office and will glue it back, and I'll be scouring my office today to see if I can find the other!

Flashback Summer: Power Suit - 1950s vintage suit

Flashback Summer: Power Suit - 1950s vintage suit

To finish off the outfit, I wanted a shoe that extended my leg.  Since the skirt is a bit long on me, it gets real frumpy real fast if I wear flat or low shoes.  What better to elongate the leg than some 5 inch platforms?!  These are some of my favorite shoes; I won't lie.  As I always say, gold snakeskin is a neutral!

Flashback Summer: Power Suit - 1950s vintage suit

Flashback Summer: Power Suit - 1950s vintage suit

I'm always on the hunt for more petite suits.  I LOVE THEM. I love that the pieces can be mixed and matched with other garments or worn together. I love that they work for office looks but can be made casual by switching out the blazer with a cardigan.  A suit to me is my "power look."  I feel confident, capable, and beautiful in a well-fitting suit.  They're my absolute favorite!  Not to mention, there is a huge supply of vintage suits, and they can often be quite affordable compared to modern pieces with the same quality.  With a bit of tailoring, voila! You have a classic piece that looks like a million bucks!

So that being said... if any of you run across any tiny, short suits from the 20s-50s... I'm your gal!

What are your thoughts on vintage suits?  Do you have a certain outfit that is your "power look"?