One of the most remarkable things about 1940s working women is that they not only wore clothes that helped them work effectively, but they oftentimes made those outfits pretty. They, as much as possible, retained a feminine appearance and personalized their outfits as they could. Sure, they might be putting planes together in a loud, dusty factory, but dangit, they were gonna look good doing it!
Here are some of the ways that these amazing women "finished" their work outfits:

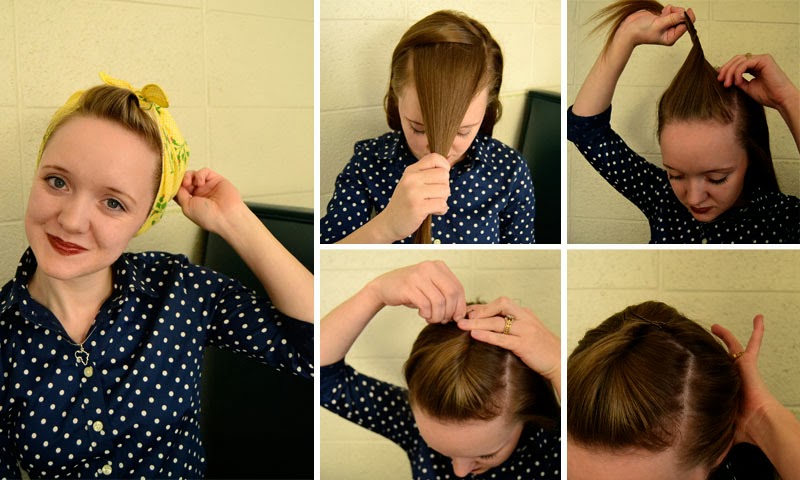
1. Great hair
Yes, safety regulations required that hair be up and out of the way, but did that depress 1940s working women? No way! It's just a chance to do awesome updos and bandana styles!
 |
| source |
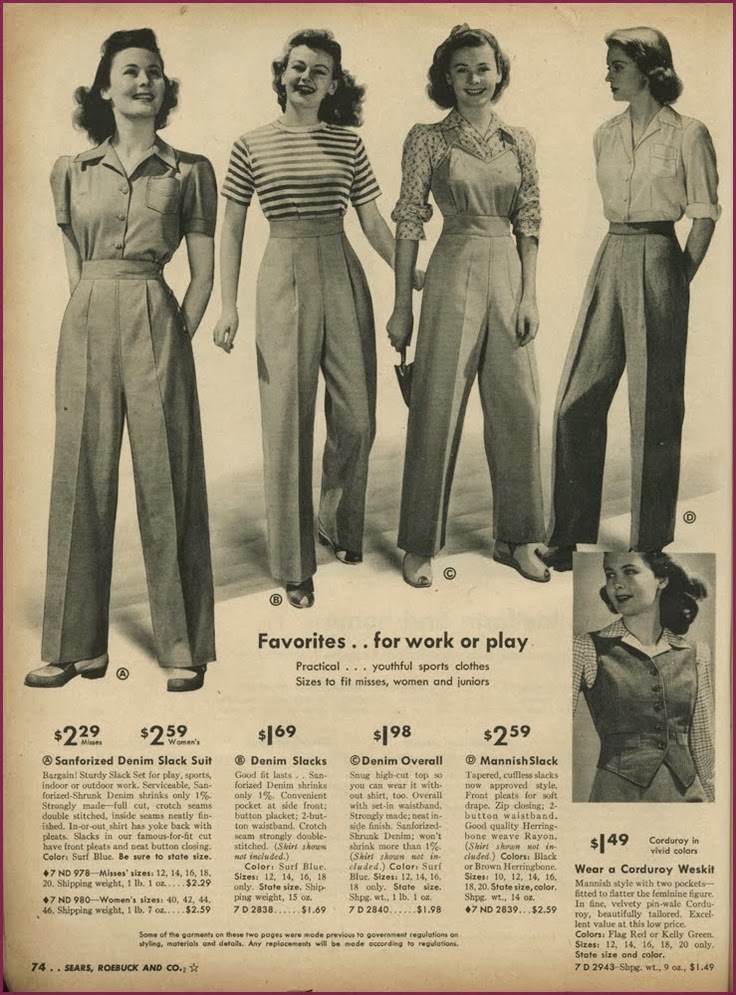
2. Pretty Scarves.
As I've talked about in a previous post in this series, head scarves/bandanas were an integral part of a working woman's wardrobe largely for safety concerns, but that doesn't mean they didn't become fashion statements as well! Isn't this polka dotted scarf just adorable?!

3. Natural Makeup and Hot Lipstick.
I would imagine these ladies' morning routines were fairly simple and quick, but their makeup was natural and emphasized their natural beauty as women. And, of course it was impossible to forego the bright lipstick! Nothing adds class like a sassy lipstick.

4. Earrings and small jewelry.
Obviously, safety requirements forbade jewelry like necklaces and long baubles because of the risk of getting caught in machines or other accidents, but that doesn't mean that other jewelry was used. Stud/clip on earrings could be worn, along with pins (oftentimes as work IDs or tokens from a loved one overseas), brooches, and hair ribbons, as can be seen in some of the photos below.
Even such small touches, I think, add a lot to these ladies' looks. It makes them seem put-together and intentional instead of just putting on a work uniform they have to wear. They took tiring, difficult, and oftentimes dirty, tough situations and brought beauty to them.
Below I've included some more photos of 1940s working ladies to inspire you as we wrap up this series. To find all the rest of the posts on this subject, you can find the intro page here. I hope you've enjoyed this look at practical 1940s working woman fashion!