Wearing History Homefront Overalls

Flashback Summer: Wearing History Homefront Overalls - 1930s 1940s WWII Rosie the Riveter

I. LOVE. THESE. OVERALLS.

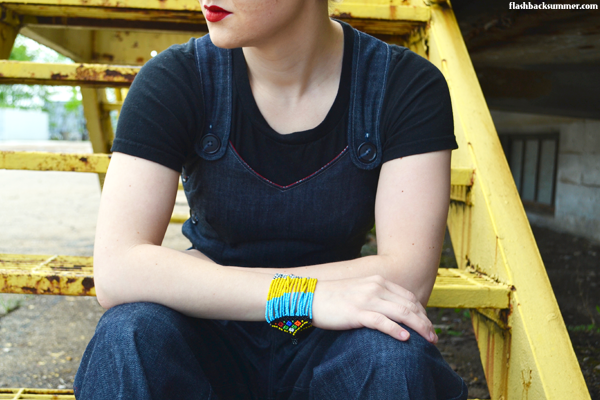
You are looking at my uniform for this summer: t-shirt, overalls, flats.  It'll be happening all the time.

WHY have I not made up this Wearing History Homefront Overalls pattern before now?!  I have no idea.  I've ready many fantastic reviews from other sewists, but I haven't gotten around to making them until now.  I went with the overalls version first because... well, overalls, obviously.  I haven't had a pair since I was a kid, and I think that's wrong.

When I told my sister I was making overalls, she sneered.  

"Are they acid wash, or, like... 90s overalls?"

Flashback Summer: Wearing History Homefront Overalls - 1930s 1940s WWII Rosie the Riveter

No, they are classy, awesome, very vintage overalls!  They are fitted at the top and feature a sweetheart neckline.  The waist has a thick, comfy waistband, and the legs are roomy and have a longer rise for ease of movement.  They're fantastically 30s/40s and perfect for the non-stretch denim I had in my stash.

Flashback Summer: Wearing History Homefront Overalls - 1930s 1940s WWII Rosie the Riveter

As far as the sizing, I went with the suggested pattern sizes that coordinate with my body measurements: 32-24-35 and petite.  This coordinated with the e-pattern for size pack A.  I used size 14 on the top and bottom and graded them both to a size 12 (24") at the waist.  This worked really well on the bottom half, and the legs and hip area are comfortably baggy.  However, there is a bit of gaping at the back of the top between the straps.  The dart placement is great, though, so I think next time I will just size down to the 12 (30" bust) and make it all a bit tighter.  This should get rid of the gaping at the back and create a snugger fit on the sides.  I may even go for styling a 1930s "farmerette" look on the next version!

Flashback Summer: Wearing History Homefront Overalls - 1930s 1940s WWII Rosie the Riveter

I also took the time to topstitch a lot of the seams and serge most of the seam allowances.  It just adds a RTW, quality feel to it that I like and also reinforces the seams a bit to make them durable. ('Cuz I plan on wearing it a LOT, like I said.)  

I added back pockets as well.  They don't come with the pattern, but they're really easy to draft yourself.  The patch pockets on the front are awesome, but when it comes to bending and moving around, it's better to have back pockets to put stuff in.  I did just realize, though, in looking at pictures of other versions people have made, that I probably shouldn't have put a buttonhole through the front pocket, just under it... Oh well.  Live and learn.  Button plackets are kind of my nemesis.

Flashback Summer: Wearing History Homefront Overalls - 1930s 1940s WWII Rosie the Riveter

Flashback Summer: Wearing History Homefront Overalls - 1930s 1940s WWII Rosie the Riveter

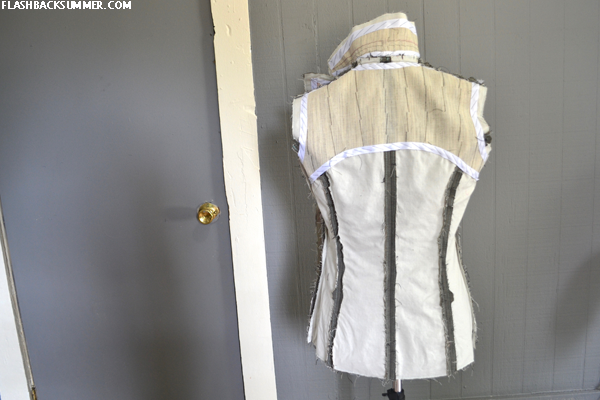
The only other major change I made was to line the bodice instead of facing it at the edges.  I went for a fun pop of color and used this silver star and red cotton from my stash.  I thought if I did go for a farmerette look and wore the overalls as a jumpsuit that cotton would be a bit more comfortable on my skin than just denim.  It changed the construction process a bit, mostly when it came to the button placket.  I just had to be careful to think through the steps and make sure to sew each piece at the right time... sewing origami! I sewed it to the waistband seam allowance with a messy but effective blanket stitch.

Flashback Summer: Wearing History Homefront Overalls - 1930s 1940s WWII Rosie the Riveter

I am VERY happy with how these turned out.  Even with the top being a bit big, they are amazingly comfortable.  The torso is the right length for me, and the pant length gives me enough room to cuff the legs a couple times and still reach the ground. For the summer, though, I prefer to wear them Huck Finn style and roll them up to a cropped length!

Flashback Summer: Wearing History Homefront Overalls - 1930s 1940s WWII Rosie the Riveter

There is also a surprise hat pattern that comes with the overalls!  However, when I attempted it I think I rushed through and didn't do things right.  Basically... it was an epic fail and I'm not going to show it to you.  I'll try again and let you know how it goes.

Here is a summary of the pattern details and things I changed:
Fabric: Denim, 100% cotton bodice lining
Year: early 1940s
Notions: 7 buttons
How historically accurate is it? Very accurate!  Wearing History patterns are very close to originals, and denim and buttons are appropriate things to use for 1940s patterns, although they are not officially vintage.
Any tricky parts to the pattern?  The button placket.  I just struggle with these in general.
Did you change anything?  I added back pockets and lined the bodice instead of using facings
Time to complete: 3 days
First worn: April 20, 2016
Total cost: Ummm.... I think about $15 for the denim, $9 for topstitching and normal thread, and $6 for buttons, and I won the pattern in a WH photo contest!  So about $30.
Notes: My measurements are 32-24-35 and I'm petite.  Next time I will use the 30" bust size on the top and the 35" hip size on the bottoms, both graded to 24" at the waist.  The length of the overalls were fine for my torso and legs and gave me enough fabric to cuff the legs twice.  Taller people will probably want to adjust this.

Flashback Summer: Wearing History Homefront Overalls - 1930s 1940s WWII Rosie the Riveter

Outfit details:
headwrap: The Wrap Life, "Yendi" wrap
overalls: handmade by me
lipstick: Kat Von D "Outlaw"
shoes: OLL
t-shirt: gifted
bracelet: from Kenya

Other sewn-up versions of this pattern:
Playsuit version by Anneliese (post in German)
Rosie Wednesday - shorts, overalls
Va-Voom Vintage (overalls)
Pinhouse Playmate (overalls)

Fashion Revolution 2016 - Goals

Flashback Summer - Fashion Revolution 2016: Goals

Today officially ends Fashion Revolution week, but it doesn't end our responsibility to bring about change!  This week has helped me think through my abilities and weaknesses in my skill as a maker, and I think I can move forward as a better creator and consumer in the fashion industry.

My personal goals to take from this week are:

Flashback Summer - Fashion Revolution 2016: Goals

What about you?  Have you had any epiphanies or thought-provoking discoveries this week?  Are there any habits you have as a maker and/or consumer that you would like to work on this year?

Fashion Revolution 2016 - Skill Up

Flashback Summer - Fashion Revolution 2016: Skill Up

Making clothes is a black hole of skills.  It seems to me that the more I know about sewing... the more I realize I have yet to learn.  There are so many kinds of sewing, so many types of garments, so many skills to learn!

While it sometimes seems a little overwhelming, I'm actually really okay with it.  I love learning, and what better field to pick than one that can provide a lifetime of learning?!


It's important to me to master my craft, to become exceptional at what I do.  It means that the clothes I make will be more durable and longer-lasting, thus being better uses of resources.  It also means I will be more likely to keep these garments.  Do any of you know the pain of deciding what to do with a garment you spent hours upon hours making?!  You do NOT just throw it out without a second thought!  If it must go, you find a good home for it or repurpose it into something equally as awesome.  It means something to you.


Flashback Summer - Fashion Revolution 2016: Skill Up

There are a lot of areas in which I want to improve my skills.  My top three are in tailoring (suits specifically), lingerie, and sewing knits.  I'll be working on these specifically this year.

What areas of "makery" would you like to skill up in this year?  

Fashion Revolution 2016 - Secondhand First

Flashback Summer: Fashion Revolution 2016 - Secondhand First

Today's Fashion Revolution theme is "secondhand first," and I don't need to tell you vintage lovers much about that!  Most of us realize the beauty of buying "secondhand" items, especially if they happen to be midcentury or before!

One of the reasons I love vintage is that it's not even like other secondhand purchases from thrift stores or charity shops.  It's generally higher quality and much of it gains value over time instead of losing it.  It's collectible and it's historical... and it's fabulous!

The vintage community, obviously, lives out the "secondhand first" idea extremely well.  It's what makes us the vintage community!  


Flashback Summer: Fashion Revolution 2016 - Secondhand First

Another thing that I want to do better in, however, is in buying secondhand fabrics and newer secondhand clothing for sewing projects if at all possible.  Though I don't generally buy clothing from thrift stores very often, they are wonderful places to find clothing to create into something new, sewing notions, and fabric.  My wedding suit was made of mystery fabric from a thrift store, as well as many of my old college dorm accessories.  Now that I think of it... my wedding dress and veil were also "secondhand" vintage!

I actually prefer buying notions, especially zippers and buttons, secondhand if at all possible.  Zippers tend to be especially cost-effective this way, and oftentimes I get vintage metal zippers that hold up for longer!  Not to mention, vintage buttons are far superior in design and look to most modern buttons, in my opinion.


Flashback Summer: Fashion Revolution 2016 - Secondhand First

Quite honestly, I don't feel the need to write a very lengthy post, because this is something you are likely extremely good at already!  You see the value; you get it!

What are some of your favorite items to buy secondhand?  Are there any items you would like to be more diligent in checking for a secondhand version before buying new?

Fashion Revolution 2016 - Upcycle

Flashback Summer: Fashion Revolution 2016 - Upcycle

Oh, upcycling!  That is today's Makers for Fashion Revolution Week, and of course it's one near and dear to my 1940s-loving heart!  We vintage wearers know, of course, that upcycling is just the modern term for "make do and mend."  Ladies of yesteryear were creating new fashions out of old ones long before it was a trendy thing to do.  They did it out of necessity and practicality.

I've had a few of my own refashions that you might recall:

The 1930s Gray Dress
90s MuuMuu to 40s Playsuit
Straw Hat Refashion
Middle East Skirt Refashion
Turn a Button-Down into a Vintage Style Blouse
Sweater Makeover

I also have these photos of a jabot I made out of old hankies.  I'm still working on an outfit to style it with!


Flashback Summer: Fashion Revolution 2016 - Upcycle

There are so many awesome vintage resources that have to do with turning old clothes into new ones.  Here are just a few:

"Grand Ways to Eke Out Dated or Worn Clothes"
"Another Angle on Fashions for Victory"
1940s refashioning article and illustrations

Flashback Summer: Fashion Revolution 2016 - Upcycle

For myself, my main action step for this year is to give newer second-hand clothes a shot to be refashioned.  You know, the ugly 80s and 90s garments that are unlikely to come back into vogue ever again and are probably destined for a landfill without a refashion.  They're relatively inexpensive, and it would be a great way to cut down on clothing being thrown away.

Do you have any favorite makeovers that you've done for old garments?  Are there any vintage make do and mend resources that you love?

Fashion Revolution 2016 - I Mend My Clothes

Flashback Summer - Fashion Revolution 2016: I Mend My Clothes

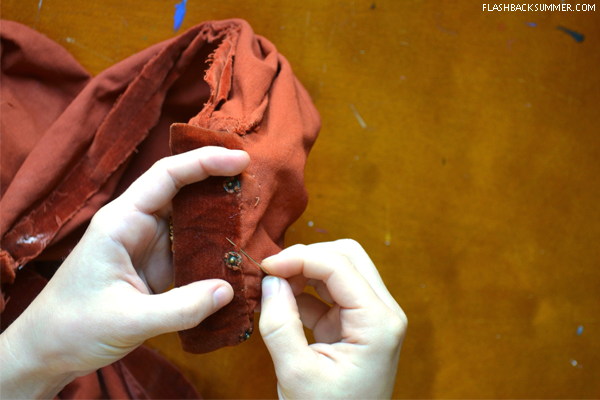
Mending one of those things that I have fallen into by necessity through wearing vintage.  If you've worn true vintage, I'm sure you have had the experience of a popped seam, fallen hem, or loose button that needed to be fixed.  (I've even had those happen while I was wearing them... which is why I recommend all vintage wearers carry a tiny sewing kit in their purse at all times, ha!)

Not many people know how to mend nowadays!  While people of yesteryear always mended their clothing ("make do and mend" was a real thing!), I can honestly say I never thought to mend clothing until I wore vintage.  If a shirt got a hole in it when I was younger, I figured it was ruined and usually threw it out.  No longer!

Flashback Summer - Fashion Revolution 2016: I Mend My Clothes

Fixing garments, I've found, is a unique skill.  It's not exactly the same as sewing a garment.  It takes some ingenuity and creativity!

The 1930s and 40s were especially good at clever mending fixes due to poverty and war shortages.  They used mending tape embellishments to fix torn buttonholes and cover other flaws.  They embroidered over flaws and dyed garments to cover stains.  If you'd like some vintage mending inspiration, here are a few of my favorite examples and resources:

1940s Darning from Colette
"How to Mend After Moth"
"How to Patch an Overall" by Mrs. Sew and Sew

Flashback Summer - Fashion Revolution 2016: I Mend My Clothes

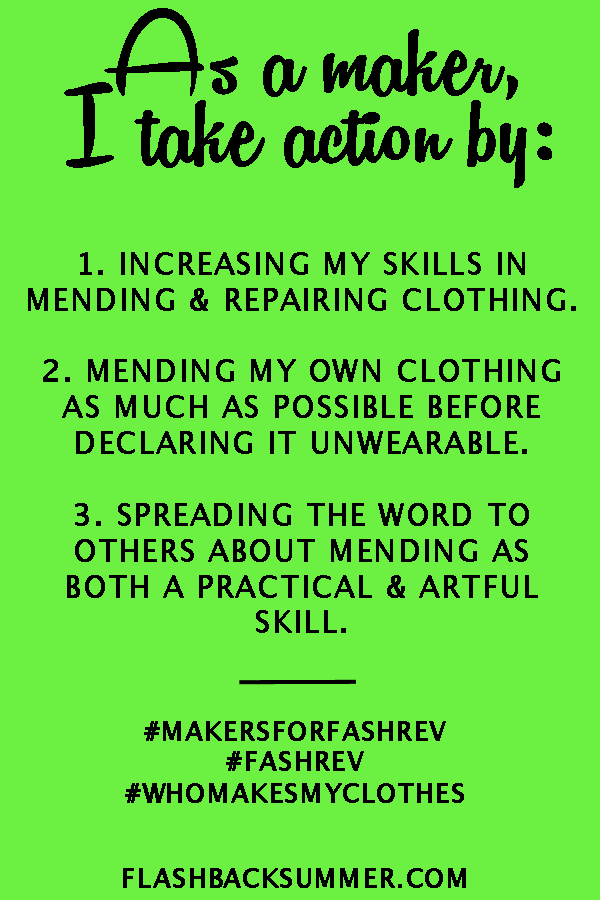
So, here are my action steps for today:

Flashback Summer - Fashion Revolution 2016: I Mend My Clothes


How do you guys feel about mending?  Have you learned any useful tips or have any favorite mending resources?