Week of Pre-Wedded Bliss.... Sort Of...

Last Monday as I laid on the couch watching HGTV and feeling absolutely, horribly sick, I turned to my mother and asked, "So when does the week of wedded bliss start?"

You see, dear readers, as many of you may have wondered about my last post that was picture-less, my plans went a bit awry earlier this week.  I did graduate without tripping and wore my new graduation outfit and got to spend time with mine and Jacob's families afterward.  That part was lovely.  This picture sums up the moms' reactions, I think:


Then, for the two days after that, I worked on getting everyone on my dorm floor checked out and officially moved out, cleaning everything up, doin' my Resident Assistant deal.  That, of course, is one of my least favorite parts of the year, but it was my last time doing it and my amazing parents and fiance helped me do it.  Thus, it went much faster than normal and was not nearly as traumatic as it could have been.

Then Sunday was great!  My whole family is in the United States right now (quite a feat, I assure you), so for the first time in a long time we, with Jacob, went to church together, ate at a fun local pub in a small Missouri town, went to the Springfield Artsfest 2014, then finished at the Aviary with way too many crepes because of a mistake in the kitchen!  Best day ever!

However, the next day, doom set in.  I woke up not feeling very well, but I met my mom, sister, and friend for coffee that morning thinking that some tea and a bit of food would help settle the nausea and I would be fine.  However, I just felt worse as time went on and ended up leaving early to go back to the house I was staying at.

By the afternoon, I was really not doing well.  (This is why my last post didn't have pictures.  I was praying for death and didn't remember to edit it.)  With a mix of flu and food poisoning-like symptoms (although it turned out to be neither and was actually a virus), it was basically the worst ever.  (And I've experienced food poisoning in Africa, so that's saying something.)  My family ended up taking me to the hospital where I got a bunch of liquids put in intravenously because I was really dehydrated and my blood pressure was super low.  My first emergency hospital visit!

This is me getting re-hydrated.  Apparently it can make you feel really cold, which is why I have six blankets on me.  But look at that guy!  Best guy in the world!
So Jacob has seen me at pretty much my worst and he's, apparently, still in and wanting to get married on Saturday.  Woohoo!  So the plans are still a go!

However, on the bright side, this week Jacob and I signed the papers on our first home together, a SUPER cute little rental home that I'll be posting about soon!  It's really an answer to prayer.  Like I said... you'll hear more about it soon.  It's just too good!

All that to say, now I'm doing well.  I've done a LOT of resting the past few days and rehydrated, and I'll be ready to go on Saturday.  I'll just be takin' it easy and enjoying the fun times that come with all my favorite people around!

Graduation Outfit!

Sorry about the first posting of this not having any pictures!  I scheduled it ahead of time, and when I was going to add all the photos I got very sick and, obviously, wasn't thinking about this post.  I've fixed it, so now I hope you enjoy it more!


So, as many of you know, this picture pretty much encapsulates my life for the next three weeks:
source

Hairnet Styling


A couple weeks ago, Joanna of Dividing Moments held a giveaway in which I and several other ladies each won a couple vintage hairnets!  Along with a very cute card, Joanna sent me a couple of dark blonde hair nets made of real hair.

I won't lie, it was a little strange to get them out of the package and think about how they're real hair.  I studied them a bit, and one had an elastic loop on the edge, and the other didn't.  I opted for the elastic one to try out because I figured it would be easier to get and keep on.

I divided my hair in half and styled the back part into a roll.  I put on the hair net and pin curled a bunch of pieces all over the front until I thought it looked right.  The front pin curls helped cover the edge of the hair net.


This back-roll style usually exasperates me with its reluctance to stay in place even when I use a million bobby pins.  But... I really like it.  I did find that the hairnet really helped  to keep that back roll in place much better than the roll on its own.

However, the hair net was made for someone with a lot thicker hair than me because it was pretty big.  I think if I included more hair from the front section, it may have worked better.  Or just had thicker hair.  I simply took all the extra hair net and tucked and pinned it around the edges under the rolls.  I also added a hair clip to secure the hair net more, and it also helped disguise it a bit.

I think, overall, hair nets can definitely be useful, but I think I'm going to have to play with them a bit more to get the hang of them!  Thanks to Joanna for letting me have this opportunity to try them out!


Sew For Victory 2014 Project #2!

Flashback Summer:  Sew For Victory 2.0 2014 Project, 1940s Vogue 9384 velvet robe

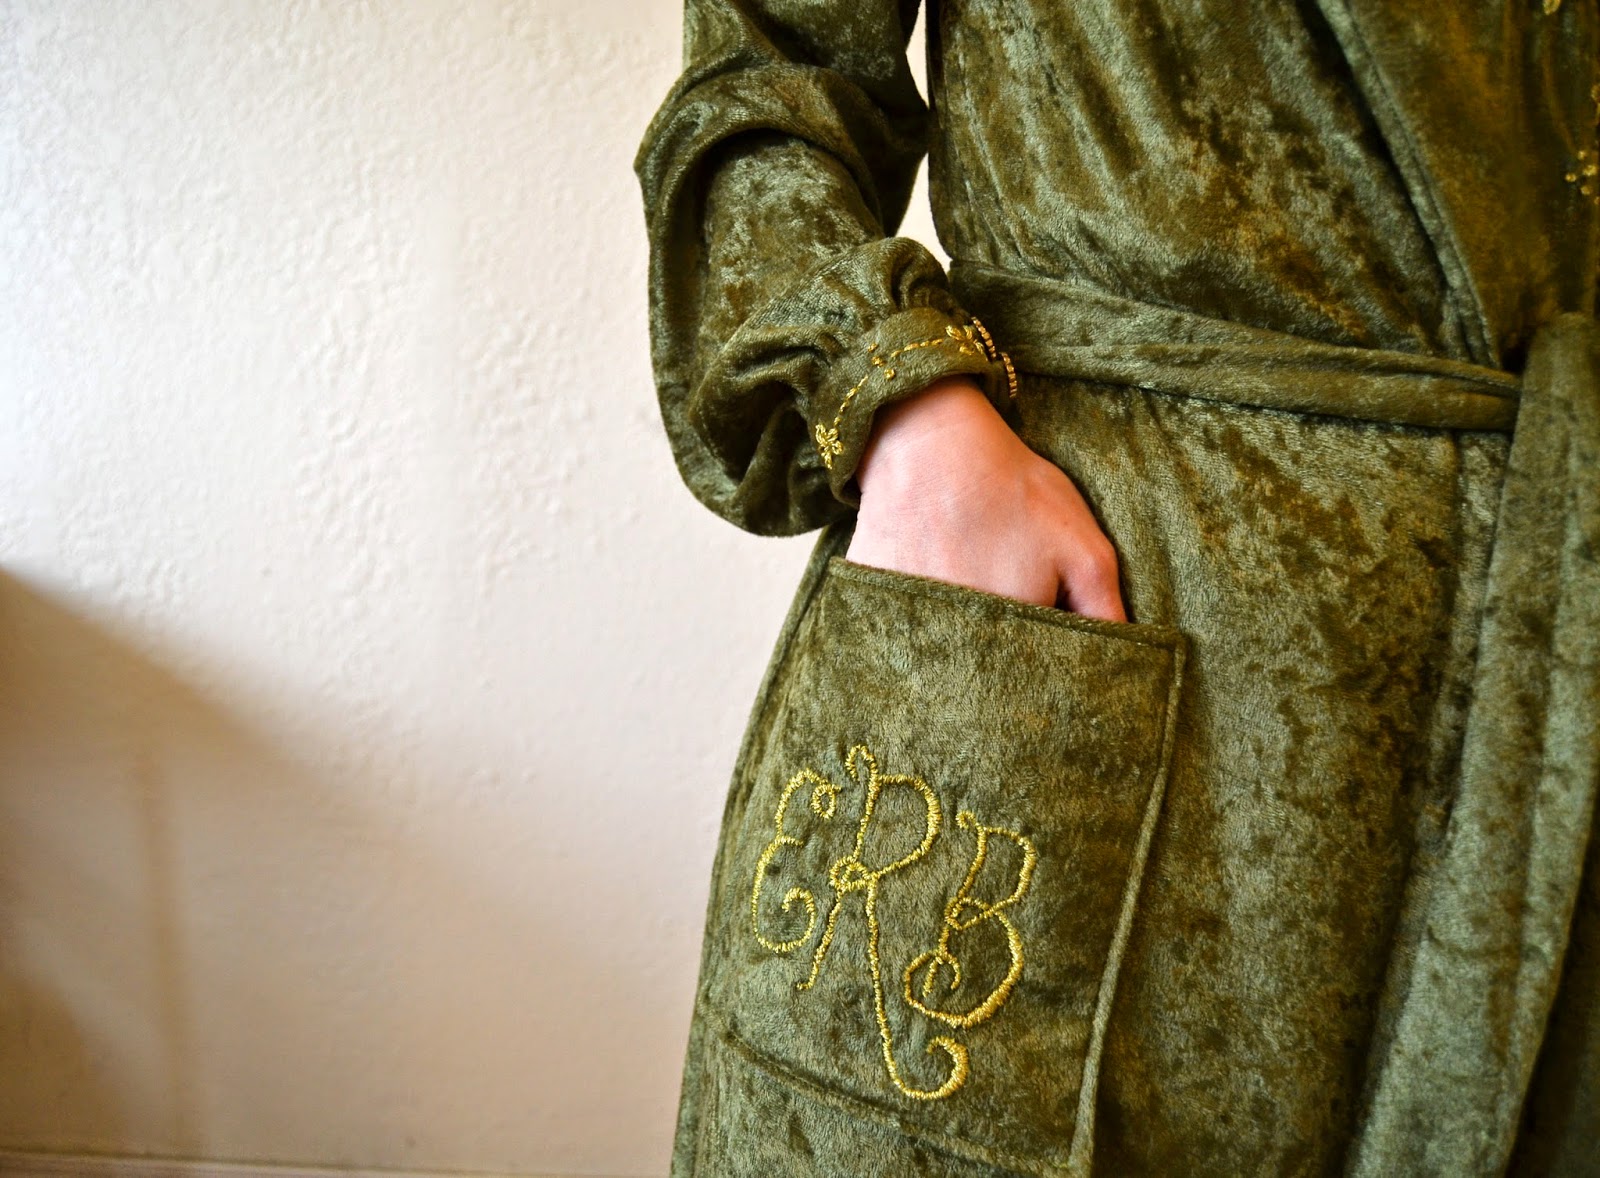
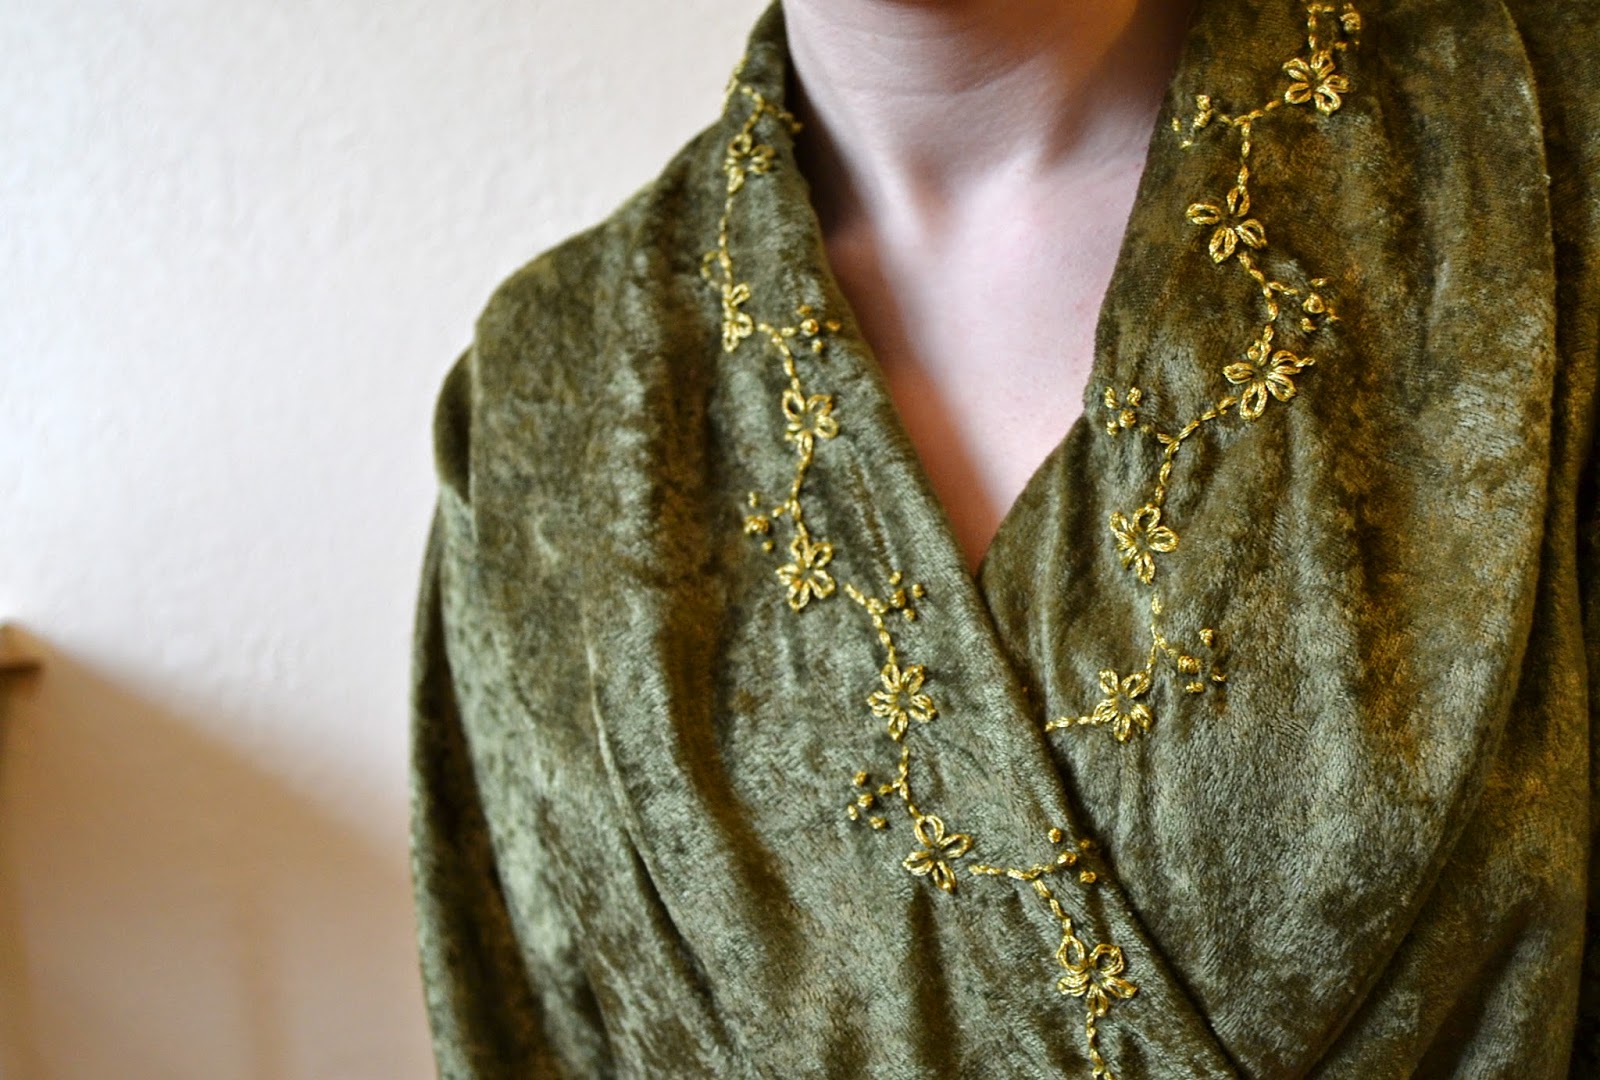
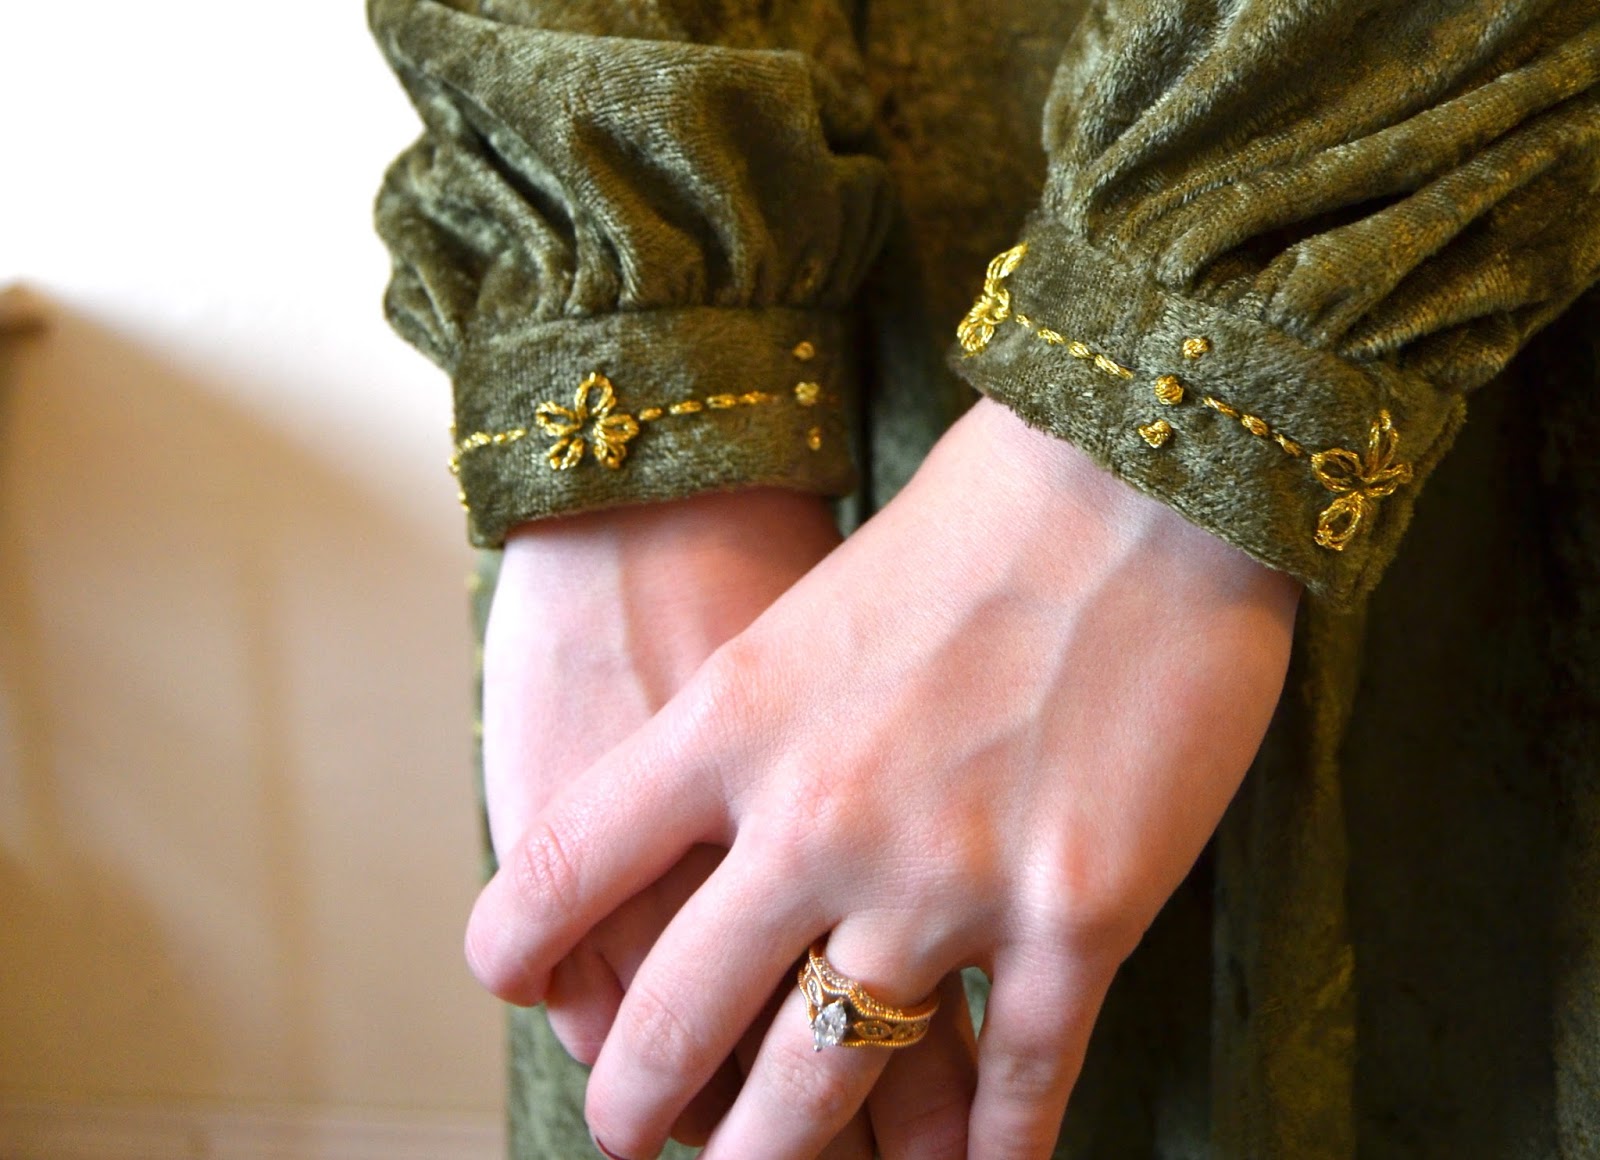
It is done!!!  My second Sew For Victory 2014 project, the late 1940s velvet robe (Vogue 9384), is done!  My friend Darlene was kind enough to lend me her art studio to take some pictures in!

Flashback Summer:  Sew For Victory 2.0 2014 Project, 1940s Vogue 9384 velvet robe

Flashback Summer:  Sew For Victory 2.0 2014 Project, 1940s Vogue 9384 velvet robe

If you recall, I posted about my original plan here, but as I went along I still ended up changing it a bit.  Instead of lining it in flannel, I found that the large amount of velvet and the floor length actually made the robe quite warm without the lining.  I did, however, keep all the seams nice and tidy inside, since they would be showing!

I also tweaked my embroidery plans a bit and ended up embroidering the collar, cuffs, a strip down the back, and monogramming the pocket with my soon-to-be new initials (by hand, may I add!).  I changed the pattern to add the tighter cuff because baggy robe sleeves always seem to get in the way.  

I only made two other slight changes to the original pattern (besides basic size alterations).  I added shoulder pads for a more tailored 40s look and to help my tiny-shouldered proportions look a little more balanced with the voluminous, full-length bottom of the robe.  I also added some gold fringe to the sash..... because I happen to love luxurious garments that sometimes border on gaudiness and I liked it.

I TOTALLY love this robe.

It's, for once, pretty much exactly how I envisioned it, and I am quite pleased.  It feels so posh, and I can't wait to lounge around the house in it soon!

Also, be sure to check out the Sew For Victory flickr group to see more of my photos and the other fabulous projects people are working on!

Extra note:  Just in case you happen to like the embroidery pattern I used on this robe, I made a very ghetto version of it that you can print off and use in your own projects!  You can find it on the Flashback Summer Facebook page here.  (The flowers in my robe-- if you measure from a left side flower to the next left side flower-- are about 3" apart.)

What about you guys?  The April 30th deadline is getting closer!  How are your projects coming along?

Flashback Summer:  Sew For Victory 2.0 2014 Project, 1940s Vogue 9384 velvet robe

Flashback Summer:  Sew For Victory 2.0 2014 Project, 1940s Vogue 9384 velvet robe

Sew For Victory 2014 Project #1!

Flashback Summer:  Sew For Victory 2.0 2014- 1940s mail order 3700 suit and sundress

I have my first finished Sew For Victory 2014 project to share with you guys, the mail order suit I first discussed in this earlier post!  I created this suit set as part of my wedding trousseau, and I was amazed that I had to change almost nothing on the pattern to fit me!  It was already tiny enough!  (Having to alter patterns every time really annoys me, can you tell?)

Flashback Summer:  Sew For Victory 2.0 2014- 1940s mail order 3700 suit and sundress

Flashback Summer:  Sew For Victory 2.0 2014- 1940s mail order 3700 suit and sundress

Although the materials to make this suit are not necessarily historically accurate (I think the fabric is some sort of polyester blend and the buttons are plastic), it definitely has the look of the 40s.  More importantly, however, it embodies the "Make Do" attitude of the time.  I used only things from my stash and just had to buy some matching thread!  The buttons were given to me by my grandmother, and the fabric was about $2 at a thrift store.  All the other notions (shoulder pads, snaps, etc.) were thrifted as well for a couple bucks.  

I'm in the midst of graduating, getting married, and starting life; I do NOT have a bucket load of money to spend, so a $5 suit does just the trick!

I liked this pattern a lot (Mail Order 3700), but I would like to forewarn anyone else that tries it that it does not include any facings for the sundress and no back neck facing for the jacket.  It simply says, "Create bias facings."  That part was a bit tricky, and the rounded straps on the sundress were difficult for me to get the curve right on, but besides this (especially considering it's a SUIT), the pattern was great!  It is EXTREMELY fabric efficient (I would guess both pieces used less than two yards), and it came together relatively quickly.

In these photos it's a bit wrinkled due to being transported (it really does look way better ironed), but this suit is becoming one of my favorites.  I did a "test run" wearing on Easter to see if anything felt funny, pulled, or twisted, and it felt great!  I'm going to hold off on wearing it again until my wedding day as my going away outfit.  There I will take more pictures to share with you of the sundress underneath, so stay tuned!

Also, be sure to check out the Sew For Victory flickr group to see more of my photos and the other fabulous projects people are working on!

Outfit Details:
suit:  handmade by me (pattern from QuiltCitySue Etsy shop)
shoes:  Decades (Springfield, MO)
necklace: gift

Holy Feedsacks, Batman!

Flashback Summer:  1930s and 1940s Feedsack Print Fabric

So I just found out that my new phone has a nicer camera than my old one, and I wanted to try it along with a mobile blogging app today, just to see if it could be a new possibility for me.


Thus, I thought I'd share my new feedsack materials I found with you guys!  I found these lovelies in a flea market for ten bucks each!  Better yet, I think if I'm very careful I could squeeze a blouse out of each one... I'm looking for simple button-down blouse patterns from the 30s or 40s to try with these materials, so if you know of any good ones, please let me know!


Flashback Summer:  1930s and 1940s Feedsack Print Fabric