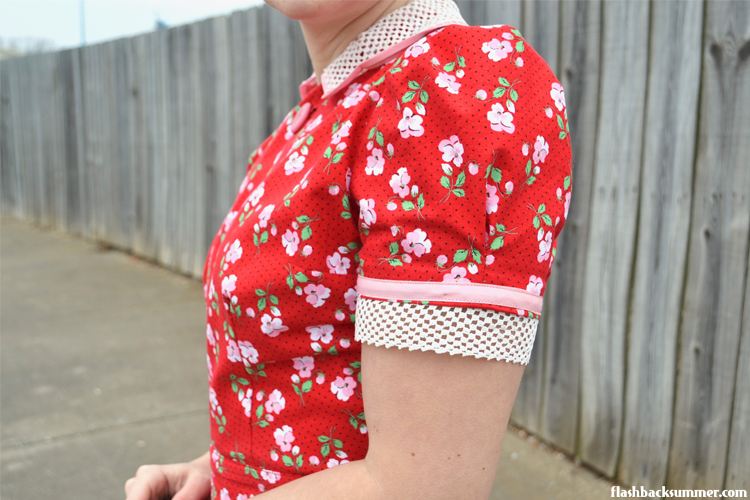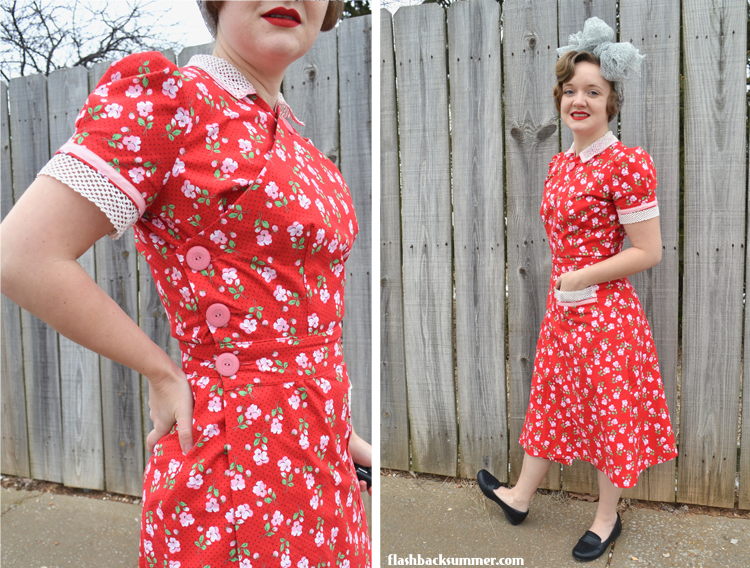
Today you're seeing something rare in my wardrobe: the color pink and puff sleeves. But I like it and it's Valentine's Day appropriate!

This pattern was kindly given to me by Amy of Myscira Makes, and I already made view 1. For this version, I thought I'd give view 2 a shot. It's almost the same, but the front bodice pieces are different and it buttons on the side instead of tying with a sash. The sleeves are different as well. Isn't it so early 40s fantastic?!

I'll admit... I don't know what happened when I was cutting this dress out. I had just enough fabric, and I managed to cut the skirt pieces out incorrectly. As in, they would have opened on the opposite side of the bodice top. Major face palm.

Happily, in 1940s skirts they're isn't too much hip shaping on the side seams, so I cobbled them together in a different way and made it work. Obviously, in my next version I'm going to cut them out correctly and I think there may be a bit more ease in the hips. I'm a sewing sleuth, I know.

However, the rest of the pattern came together pretty easily. The only adjustments I made was to narrow the shoulders by a half inch and let out the sleeve holes a bit to fit my biceps. I also neglected to stabilize the front bodice neckline... so it now gapes a little bit. I thought about it, then I forgot to do it as I sewed. So if you make a wrap dress, definitely stabilize that section since it's cut on the bias.

All in all, this dress was an exercise in forgetfulness and troubleshooting along the way. However, I went the extra mile with adding fun trims and making a matching collar; I'm proud of that. Honestly, I'm not sure how long this dress is going to fit as the arms are still a bit fitted, but I'm definitely going to enjoy it until then!

Fabric: 1930s Pindot & floral repro cotton
Pattern: Simplicity 4900
Year: 1940s
Notions: four buttons
How historically accurate is it? Very accurate! Vintage style fabric, vintage notions and a vintage pattern!
Any tricky parts to the pattern? Not if you read thoroughly and cut things out correctly.
Did you change anything? I took 1/2" off of the shoulders of each front bodice piece and added about 1-2" to the sleeves at the biceps. I also added trim.
Time to complete: two days
First worn: February 8, 2018
Total cost: I used about 3 yards of fabric and both it and the pattern was given to me, so no cost to me besides thread and time.
Notes: This is a comfortable, super cute dress. I'm going to make it more alteration-friendly in my next version, for I'll definitely be making it again and experimenting with fun trims!


This is super cute and looks really comfortable to wear! I love the side buttoning feature.
ReplyDeleteEmily
It IS! Thank you, Emily!
DeleteSO BLOODY CUTE!!! I love the fabric you chose it's perfect for this look!!! You look gorgeous with that hairstyle too!!
ReplyDeleteAw, thanks so much, Nora! 😀
DeleteThe perfect Valentine's dress! I love the crossover details and the trim on the sleeves and collar. I'm glad you were able to salvage the project after cutting out the pieces wrong- I am always so paranoid about doing that when sewing. . . although I don't think I ever actually have!
ReplyDeleteHaha, well good! This time I broke my own rule of “Don’t cut things out when you’re tired” and I paid for it! 😂
DeleteThat's so cute, and the fabric is dreamy!
ReplyDelete