Clap for that Wrap: Head Scarf Types

How exciting, the first post in this Clap for that Wrap style series!  Many of you commented about your interest and trepidation in trying out more head wrap styles for yourselves in the introduction of the series, and I hope as time goes on that we will each learn more about the diverse reasons for head wrapping and scarf styles that will fit our personal aesthetics.

For this first post, I'm going to go over some of the types of scarves that are good for head wrapping and the styles they can create.  I wear headscarves to work ALL the time, and many people are surprised to find what the actual shape of the scarf is, since it's difficult to tell when it's wrapped. Today I'll show you a few different kinds.  Although this is by no means an exhaustive list of head wrapping scarf sizes and shapes available, these are some of the most common, especially when it comes to vintage Western styles.  


I'll have tutorials for many of these styles in future posts, but this will give you ballpark expectations of what head wrap styles work for which scarves. 


Flashback Summer - Clap for That Wrap: Vintage Head Scarf Types - headwrap

1. The bandana

This, it seems, is what most people connect with vintage head wrap styles (think Rosie the Riveter).  They're widely available and inexpensive, and they come in a huge variety of colors and patterns.

These are a staple for me in my head wrapping, but I use them largely for utility or quick styles, like for cleaning or when I'm short on time.  Since they're comparatively small, there's usually just enough fabric to wrap your head and tie a knot, but not enough to do anything fancy like a ginormous bow or flower.


Flashback Summer - Clap for That Wrap: Vintage Head Scarf Types - headwrap

2. The triangle

This is very similar to the bandana, but they are often larger than a bandana folded in half.  They are still usually made of more utility fabrics like cotton.  While in vintage days they tended to serve purposes like covering pin curls or protecting hair from dusty work, both the bandana and the triangle scarves can be dressed up with pretty hairstyles  like victory rolls and poodle curls. 

Flashback Summer - Clap for That Wrap: Vintage Head Scarf Types - headwrap

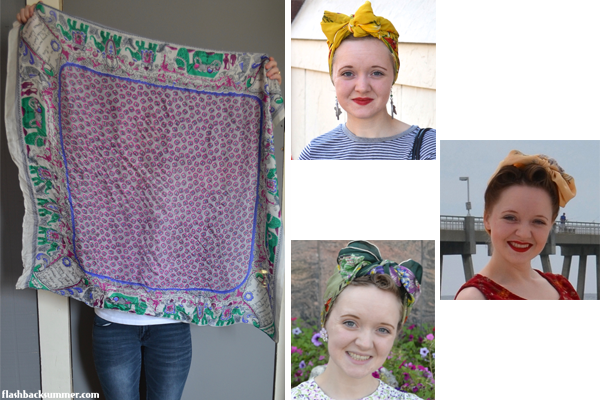
3. The large square

A large square scarf, on the other hand, is useful for a large variety of styles.  You can keep it simple and tuck in the ends for a utility look, you can do giant bows. There are lots of styles available with these!

A square scarf that measures around 24" or larger works best.  While many vintage square scarves can be found, lots of new ones are also sold in Islamic hijab shops.


Flashback Summer - Clap for That Wrap: Vintage Head Scarf Types - headwrap

4. The pashmina/rectangle

This is the kind of scarf you're most likely to find in modern stores these days.  The long, rectangular scarves come in a variety of fabrics, but thinner, lighter ones work best for head wrapping so they aren't too heavy on your head. Scarves with pretty trims or fringe can also add some pizzazz to your wraps. Pashmina scarves are also commonly found in hijab shops.

Unlike the scarves commonly found in Western stores, there are also rectangular fabric pieces that are made specifically for head wrapping.  They may match the fabric of an outfit, as is common in West African looks, or they may coordinate in color.  While these fabrics may be stiff and not good for neck scarf wearing, they work brilliantly for head wraps!


Flashback Summer - Clap for That Wrap: Vintage Head Scarf Types - headwrap
Left picture source, right picture source
5. The pre-sewn
Sometimes a head wrap isn't really fabric wrapped around the head at all.  Sometimes it's actually pre-sewn onto a base or into a certain shape.  Many more complicated-looking vintage turbans and wraps are actually pre-sewn and more like hats, so keep that in mind if you're trying to reproduce them.  Other headscarves are sewn in some places but still require being tied in other places to look right, like this 1940s duster cap I have on in the picture above.

Do you want more head wrap style inspiration throughout the week?  Check out my head wrap Pinterest board!


If you're interested in contributing to this series, email me!

Man Gifts: Lounging Set

Flashback Summer: Man Gifts - Lounging Set

Flashback Summer: Man Gifts - Lounging Set

If the men in your life are anything like the men in mine, they're difficult to get gifts for.  They either buy the things they want for themselves throughout the year, or they "don't really want anything" when a holiday or occasion comes up.  That means I have to think up gifts they will like without much guidance.

Flashback Summer: Man Gifts - Lounging Set

For this Valentine's Day, I want to do something nice for my husband.  Although he is a sentimental person, I don't want to buy items that will later become just shelf clutter.  I'd rather get him something sentimental that he would use.

Flashback Summer: Man Gifts - Lounging Set

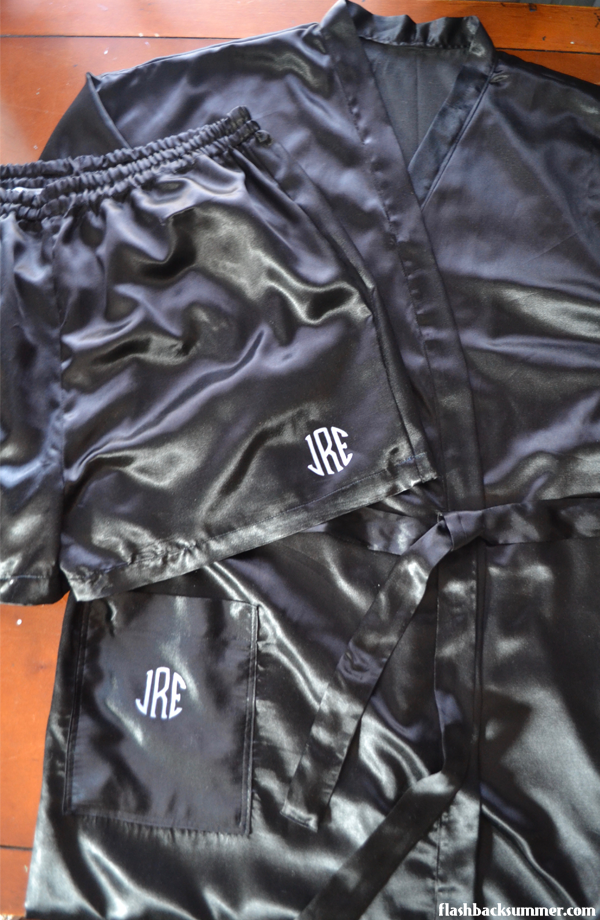
I decided to make him a lounging set!  Now my husband is a sporty, manly-man, military type, and there would never be a time when he would say, "Hey Emileigh, I'd love a fancy lounging set."  However... What guy wouldn't like to hang around the house looking like the Dos Equis man?

I decided on a black silky robe and shorts set.  While it is entirely possible to find these things in stores, they are a bit more expensive than my budget allowed.  I decided to make them myself.


Flashback Summer: Man Gifts - Lounging Set

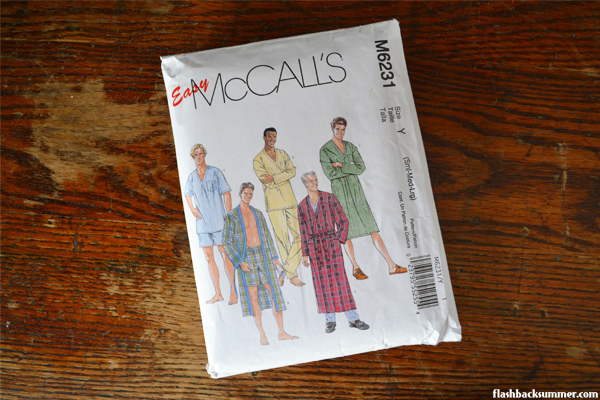
Recently at Joann there were several pattern sales, so I picked up this one for men that included a robe and shorts all in one for just $1.99.  Patterns like this one are plentiful, so it's easy to find cheap ones to use.

As far as the fabric goes, I HATE sewing with silky fabrics... but I love how they feel as a finished product.  I went with a polyester flannel-backed satin.  The flannel makes it a bit easier to work with, and the polyester makes it machine washable.  (I couldn't imagine my husband ever hand washing a lounging garment.)  


Flashback Summer: Man Gifts - Lounging Set

I'd HUGELY recommend cutting out the long, silky fabric pieces with a rotary cutter.  Besides that, the rest of the garment came together really easily.  I used French seams on everything to make it extra durable and luxurious. 

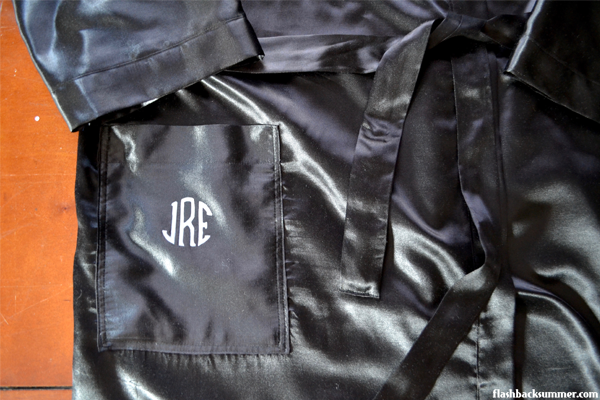
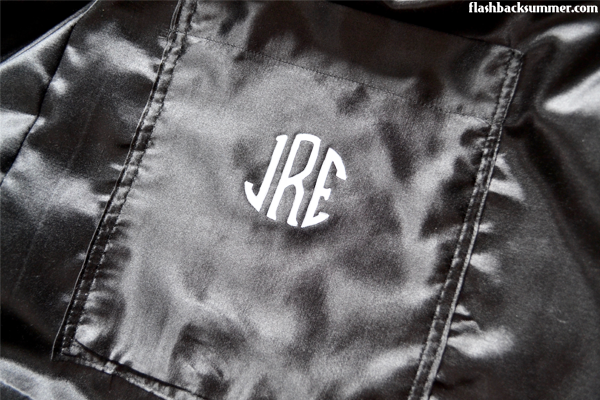
A silky robe and shorts set is nice, but a personalized set is even better!  Even if you decide to skip sewing your own set, I would definitely still suggest personalizing it.  I used mending tape to monogram both pieces with my husband's initials.  It's a super easy, no-sew option I talked about in my last post.


I put both pieces in a shirt box with some tissue paper and a card on top, and voila! Gift done!

Flashback Summer: Man Gifts - Lounging Set

Although I made this for my husband, a set like this would be a good gift for a father, brother, or other man in your life.  You could winterize it and make/buy a flannel set, or personalize it further by using a particular sports, TV show, movie, or other motif the guy is a fan of.

If you'd like to sew your own, here are some resources to help (these are the supplies I used):

flannel back satin
mending tape
robe pattern

If you'd rather skip the sewing, here are some items available and ready to buy:

Robes:  Soho Plaid Robe  |  Herringbone Stripe Silk Robe |  Cotton Robe  
Bottoms:  Silk Charmeuse shorts  |  Lounge Pants
Sets:  Cotton Jersey Pajama set  |  Silk Charmeuse PJ set

Do you have any men in your life that are difficult to buy for?  What are some of your "gifting tactics" for them?


*This post includes affiliate links. See my policy page for more info.

No-Sew Embellishing with 1940s Mending Tape

Flashback Summer: No-Sew Embellishing with 1940s Mending Tape

I've recently discovered a magical vintage embellishment secret that you won't believe.

Mending tape.


Many people see it as the scourge of vintage collections, since such it's often used to poorly repair vintage and antique pieces, but I've learned it has its proper place in a vintage wardrobe!


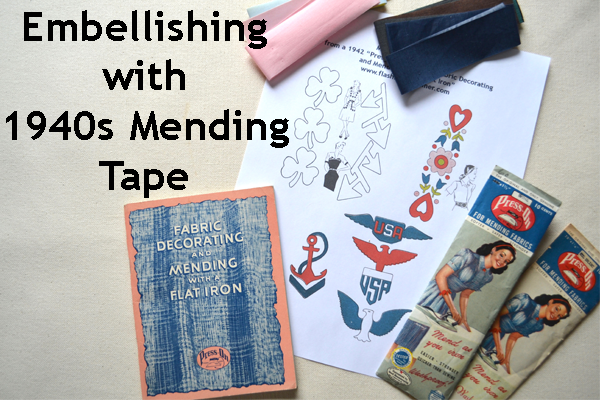
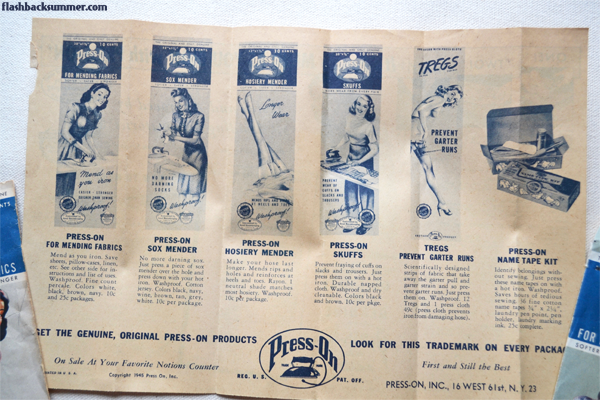
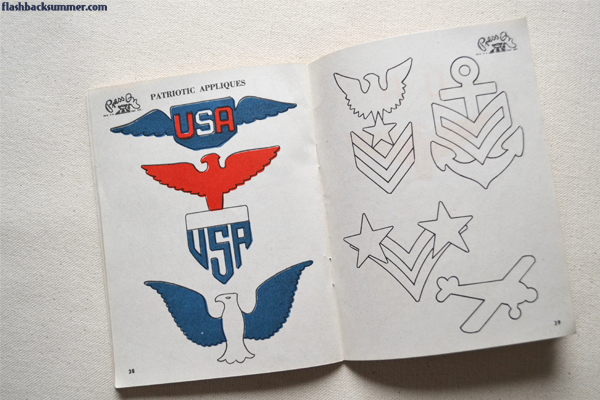
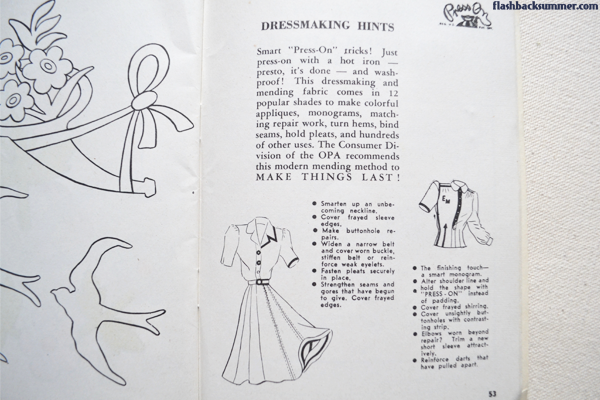
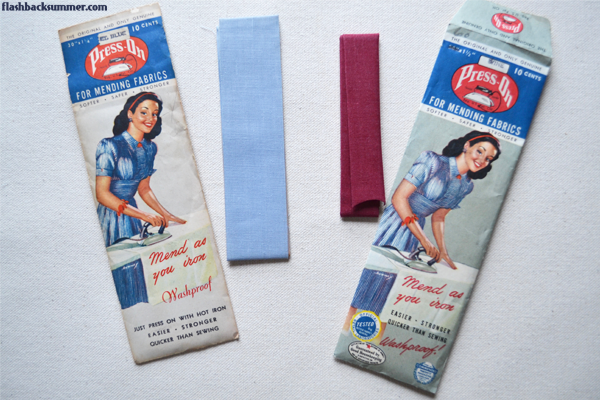
I acquired a 1940s book all about it and decided to learn about of the history of this controversial tape.  I thought it was a modern thing, but this 1940s "Press-On" book is promoting it!  I discovered patent information for the Press-On brand dating all the way back to the 1920s and 30s.  Although the mending tape may not have been one of their products then, by the time the 1940s came around it was available to consumers.  I found copyrights for Press-On mending tape from 1941 and 1942 as well, but I've yet to find any period examples of it being used on a garment or item.  (If you've run across any, PLEASE share!)


Flashback Summer: No-Sew Embellishing with 1940s Mending Tape

Flashback Summer: No-Sew Embellishing with 1940s Mending Tape - Press-On

However... LOOK AT THE WONDERS THAT CAN BE DONE WITH IT!


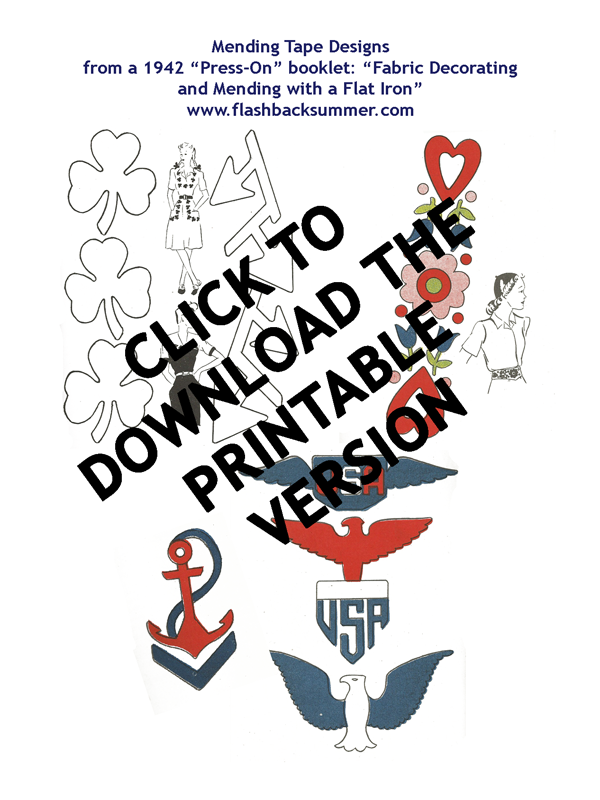
This booklet covers a bit of the mending possibilities, but mostly it expounds upon ideas for embellishing things!  One of its key points in persuading consumers is that using mending tape is far faster than embroidery and easy to add on while ironing other laundry.  The rest of the booklet includes design templates and illustrated inspiration for uses of the mending tape.  It's amazing!  Each color in the designs perfectly fit onto a strip of mending tape.


Flashback Summer: No-Sew Embellishing with 1940s Mending Tape - Patriotic

Flashback Summer: No-Sew Embellishing with 1940s Mending Tape - Make do and mend

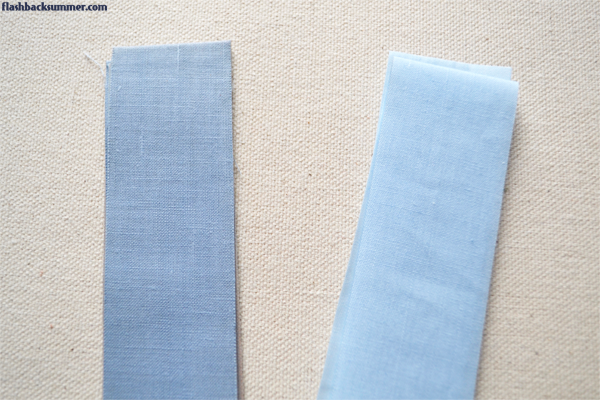
I did wonder though... Is this 1940s tape really the same as modern mending tape?  I did an experiment to find out.  I bought both two packs of 1940s vintage tape and a pack of modern tape and compared them.  I'm pleased to report they feel nearly identical!  The weave on modern tape is a bit finer and it doesn't feel as thick, but that shouldn't effect its usage!   (The vintage one is on the left, modern on the right. Below that is a picture of the two vintage tape widths I got.)


Flashback Summer: No-Sew Embellishing with 1940s Mending Tape - Make do and mend

Flashback Summer: No-Sew Embellishing with 1940s Mending Tape - Press-On

While I didn't attempt using the vintage tape (adhesives don't usually age well), the modern tape seemed to work just as described in the book on a monogram I tried.  


Flashback Summer: No-Sew Embellishing with 1940s Mending Tape - Monogram

I couldn't find the delightful variety of mending tape colors at my local store that was apparently offered in the 40s, but some further online digging could reveal more options in the future.  Vintage tapes came in differing widths, as my two vintage tape packs show, but modern tape widths still worked for all the designs in the book.


Flashback Summer: No-Sew Embellishing with 1940s Mending Tape

So I tried it out, and I think I'm hooked!  Easy monograms, crisp lines... all for only a few cents and a few minutes, and you don't need to know how to sew!


Flashback Summer: No-Sew Embellishing with 1940s Mending Tape

I hope you guys can try it out for yourselves, so I've digitized some of my favorite designs in this file you can print.  Simply place the tape on top of the paper and trace the design you want, cut it out, and iron!  For darker tapes you may need to make a paper template to trace around, since they are harder to see through.

Flashback Summer: No-Sew Embellishing with 1940s Mending Tape - Printable templates
Have any of you seen mending tape used in embellishing vintage garments?  What would you use it on?  (If you do end up doing it, I'd love to see pictures!)

{Pin this for later!}

Historical Sewing: Victorian Split Drawers

Flashback Summer - Historical Sewing: Victorian Split Drawers

I know what you're thinking.  "Ooo, a post on Victorian split drawers?  How glamorous! How sexy!"

Okay okay, that's probably not what you were thinking.  When I first started pondering my next step in my historical sewing endeavor, I mostly wondered, "Drawers?  How weird. Split drawers? How do those work?  How do those pattern pieces fit together?  This is all weird."

Flashback Summer - Historical Sewing: Victorian Split Drawers

But after a day of drafting the pattern and putting it together (albeit in a roundabout, redo-things-a-couple-times sort of way), I have a pair of drawers suitable for my future 1880s ensemble.  I'm not shooting for 100% historical accuracy in this project simply because I know I'm still in beginner learning stages.  I'm using patterns from a "Fashions of the Gilded Age" book, and there is very little to no instruction on how to put the pieces together.  Thus, I'm mostly relying on pictures of 1880s garments and blog posts from other historical sewists.

Flashback Summer - Historical Sewing: Victorian Split Drawers

I know I didn't do everything right, and I used a zig-zag stitch on the edges. They could also probably stand to be an inch or two longer. Like I said, my goal with this ensemble is mostly to figure out what the heck I'm doing and how pieces fit together.  I can worry about 100% accuracy on the next round.

Flashback Summer - Historical Sewing: Victorian Split Drawers

These drawers are the second piece in my ensemble, and they go under the chemise I made.  I made some changes to the chemise trim to be thinner and more suited to the sleeveless ball gown bodice I am eventually going to put on it.  Not to mention, I found several yards of this blue antique trim in a flea market, and I'm putting it to good use!

Flashback Summer - Historical Sewing: Victorian Split Drawers and chemise

Flashback Summer - Historical Sewing: Victorian chemise

Other historical sewists, do these even vaguely resemble Victorian drawers?  Am I on the right track?

Introducing... Clap for that Wrap Style Series!

Flashback Summer: Clap for that Wrap style series - head wrap, head scarf

It must be pretty obvious by now that I love head wraps/ headscarves/ fabric stylishly wound around my head.  It comes from both my love of easy vintage looks and the time I spent in East Africa surrounded by ladies that rocked head wraps for religious, cultural, and style reasons.  I was hooked!

I want to make some space on this blog to showcase and celebrate the head-wrapping creativity of my readers and the vintage community, and I'm calling it the "Clap for that Wrap" series!  I'll be posting every other Wednesday to begin with, and posts will include head wrapping tutorials, style inspiration, history, and tips from various people. 

I'm also going to feature head wrap photos on Wednesdays, and I'd love to share yours!  If you have a head wrap style you're especially proud of, tag it with #FSwrapclap and I may feature it on my personal Twitter and/or Instagram account!

If you would like to be featured in a Clap for that Wrap Wednesday post, feel free to email me with your post idea and a sample picture, and we'll see if we can get you scheduled in!  I can't wait to see the unique wraps you guys wear!

My Instagram: @flashbacksummer
My Twitter: @EmileighRogers

Insta-Giveaway and Sale!


The time has come for me to thin the herd... so I'm having an Insta-giveaway and sale this Friday at 11am CST!

There will be vintage clothing, accessories, sewing patterns, home decor, paper goods, Pyrex, and more!  Here are a few sneak peeks of things that will be available:


I'm also going to give away a bunch of freebies throughout the sale, so even if you're watching your budget these days, it would still benefit you to check in during the sale! 

In order to not clog up everyone's IG feed that follows me on my personal account, I've set up a separate sale account that you can follow: FSsaleIG

So tune in this Friday, and if you'd like me to tag you on Instagram as a reminder an hour before the sale starts, comment below with your IG username and I'll be sure to do that!

1920s Winter Fashion

Flashback Summer: 1920s Winter Fashion - flapper outfit, art deco

Flashback Summer: 1920s Winter Fashion - flapper outfit, art deco

TODAY WE ARE GETTING THE FIRST SNOW OF WINTER!

Yes, that's right, it has taken until January for Missouri to get a real, sticking snow.  I'm VERY happy about it.  I feel winter is a waste of time if it doesn't snow.  Who likes cold that doesn't provide snow days or outdoor fun? 

Flashback Summer: 1920s Winter Fashion - flapper outfit, art deco

Flashback Summer: 1920s Winter Fashion - flapper outfit, art deco

Anyway, I also just finished altering this 1920s suit I bought a while ago.  It was my first 1920s piece, and it had been lengthened and widened at some point in the past.  (I believe it was an old alteration, probably done in the 1920s. It kept the boxy 20s silhouette, and the added fabric is extremely close to the original.)  I took out the lengthening panel at the waist to make it short enough for me again, and it now fits!  I feel very Coco Chanel in it, but I obviously need to get myself a long string of pearls to complete the look.

Flashback Summer: 1920s Winter Fashion - flapper outfit, art deco

Flashback Summer: 1920s Winter Fashion - flapper outfit, art deco

I also felt the need for a hat (hats being a necessary part of 1920s winter fashion and all), but 1920s hats are extremely expensive and hard to come by.  I took a page out of Lauren Stowell's book and re-blocked a hat to make a 1920s cloche.  I don't have a hat block, and I took a very... make-do... questionable route to get to this cloche. (Including putting the hat on my husband's head and steaming it into shape. He's a good husband.)  I reused the embellishments that were on the modern hat and sewed them on.  I think it's pretty good for a first try ever!

Flashback Summer: 1920s Winter Fashion - flapper outfit, art deco

Flashback Summer: 1920s Winter Fashion - flapper outfit, art deco

I paired the outfit with one of my only longer-length shirts, some thigh-high socks, a "1928" brand brooch from the 1980s, and my 1920s shoes.  I used things I already had in my closet, and I'm proud of that! I'm trying to do less buying and more making-do-and-mending this year.

Flashback Summer: 1920s Winter Fashion - flapper outfit, art deco

I'm also proud of how far I've come in my knowledge of vintage styles.  A very long time ago I posted a "1920s photo shoot" post that I now realize.... was very not 1920s. My hair and shoes were close, but the dress wasn't even remotely near an actually 1920s look. Even though it's kind of an embarrassing post, it's nice to have photographic evidence of my vintage knowledge growth in the past couple years!

Outfit details:
1920s suit: Fab Gabs
sweater: Lands' End
hat: me-made
brooch: gifted, "1928" brand
shoes: Decades

What area of your vintage knowledge has grown a lot recently? Is there something you're especially proud of accomplishing or learning?

If you want more 1920s inspiration, here are some things you may like!
Instagram: @greengalosh and @rougeyourknees
Pinterest: my 1920s board

Indian Sari Debut

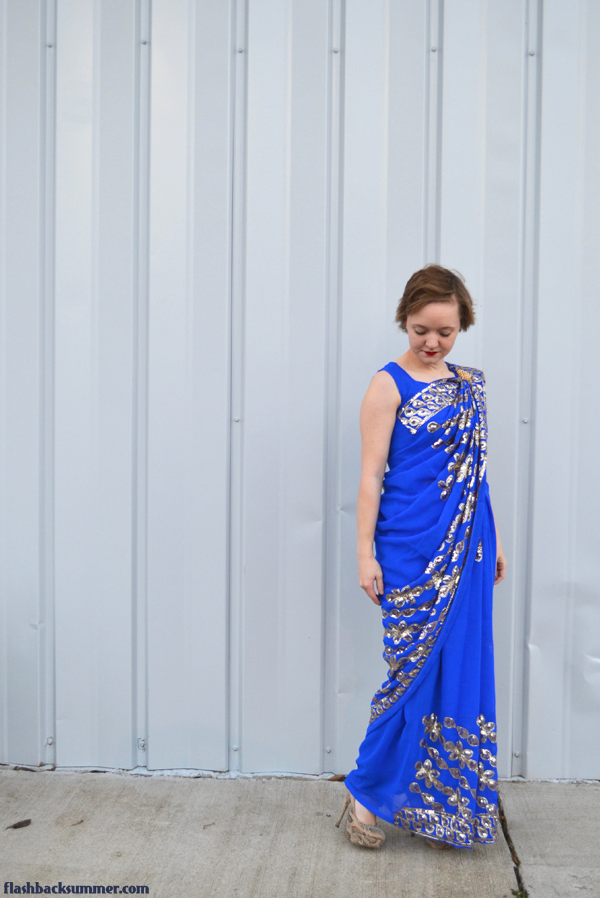
Flashback Summer: Indian Sari Debut - blue gold saree

Flashback Summer: Indian Sari Debut - blue gold saree

As some of you know from my previous posts, I'm on the pastoral team at a new intercultural church in my town.  We recently launched, and it's been a fun journey so far!  One of the ways we like to share our cultures with each other is by sharing traditional clothing.  Last week, we lady pastors decided to declare it unofficial Indian sari night!

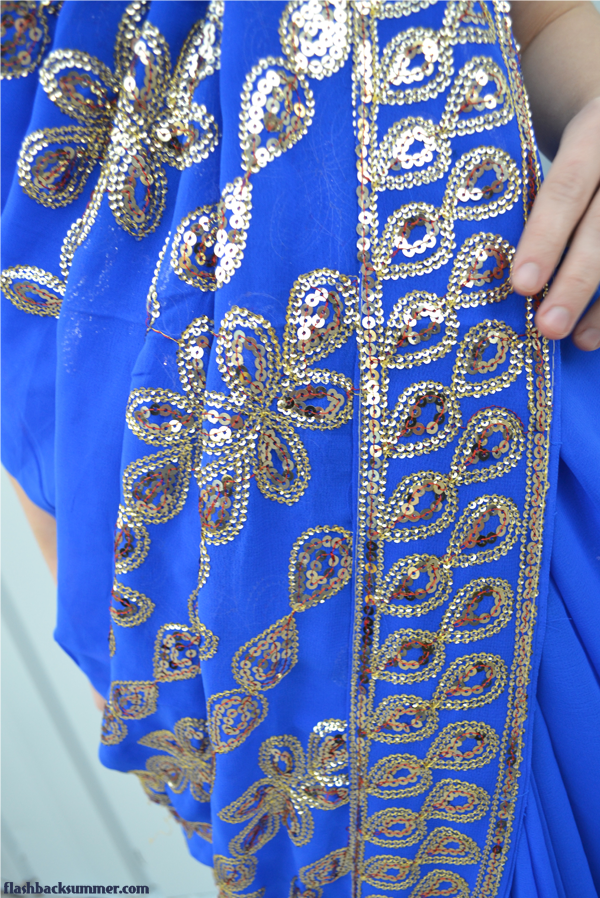
Happily, we non-Indian ladies were not left on our own to try to figure out how to wrap one.  In case you aren't familiar with the sari (or "saree"), it's a traditional Indian garment that is made of a cropped blouse and a coordinating piece of fabric several meters long that is worn over a skirt and wrapped and pleated around the body in various ways.  It's often richly embellished and made in vibrant colors and patterns.  I agree with Indian aesthetics; more is more!  For my sari, the blouse included was far too big for me.  I made it smaller and removed the sleeves. Sleeveless blouses were a popular 1930s sari trend, so I thought I'd stick with my favorite era here, too!


Flashback Summer: Indian Sari Debut - Life 360 Intercultural Church Springfield, MO
Me, Anisha, and Saehee (photo credit to Elizabeth)
Flashback Summer: Indian Sari Debut - blue gold saree

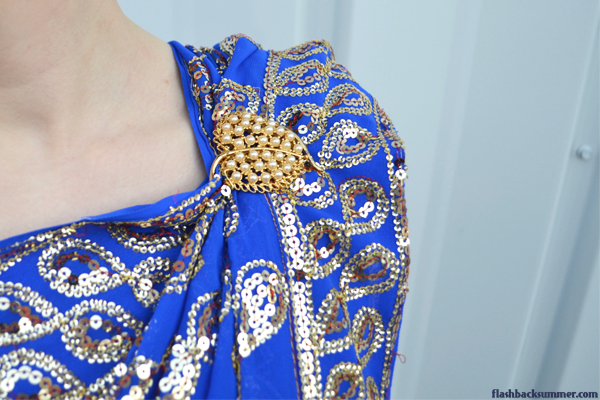
Anisha, Saehee, and I met early to get our looks put together.  Anisha wore her sari and lent one to Saehee, and I brought a sari my mother bought for me in Thailand.  Mine is what I call a "cheater sari" because the bottom half is pre-sewn into an elastic-waisted skirt!  It saves a BUNCH of time and can feel a bit more secure than the usual wrap-and-pin method most sari-wearers use.  Anisha helped me wrap and pleat the rest of the fabric around my top in a way that is flattering for a shorter person. I didn't have the forethought to bring safety pins, but--as a good vintage wearer--I did happen to have a couple brooches in my purse, and I pulled out this gold leaf one to secure the pleated fabric to my blouse. Vintage to the rescue!


Flashback Summer: Indian Sari Debut - blue gold saree

Flashback Summer: Indian Sari Debut - blue gold saree
After a recent haircut, my hair is MUCH shorter than I expected. It's still not long enough to pin curl yet, hence the straight, weird 'do.
If you have ever seen someone wearing a sari, you may notice that ours look a little different.  There's very little, if any, midriff showing on each of us, and the sari usually shows a lot more stomach than this.  We covered most of it up.  Being an intercultural church, we have people from... you guessed it... many cultures represented in our group.  With each culture comes a set of expectations and morals relating to modesty, especially modesty in a religious setting like a church.  In India, a sari is considered by many to be one of the most traditional, most conservative/ modest garments a woman can wear. Midriff showing isn't a problem.  


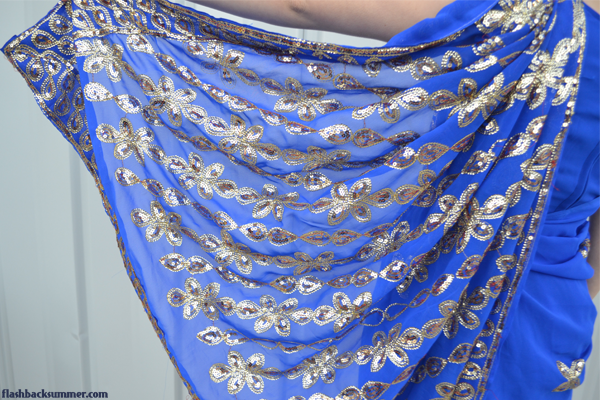
Flashback Summer: Indian Sari Debut - blue gold sari pallu

Flashback Summer: Indian Sari Debut - blue gold saree pallu

However, in many cultures and Christian backgrounds around the world, a woman showing her stomach, especially in church, is considered disrespectful or distracting.  Do Anisha, Saehee, and I think a woman's stomach showing is inherently sinful?  No, we don't.  However, we're leaders in a group of diverse peoples that we love, many of whom would be offended or at least distracted by us showing our stomachs.  The right to show more midriff in church is not a battle we feel is worth fighting in the grand scheme of things. Out of respect for people that may have been uncomfortable with it, we tweaked and pinned the sari each of us was wearing to cover most of our midriff. We were able to wear a traditional garment in a way that shares Indian culture, fits our church context, and respects the diverse cultures represented in it.


Flashback Summer: Indian Sari Debut - Life 360 Intercultural Church Springfield, MO
Our church pastoral team (photo credit to Elizabeth)
It is often popular to loudly demand our personal rights or to push the limits of others' expectations, and sometimes it's perfectly appropriate to do so.  However, at other times, laying down our personal rights in an effort to cherish and value others can do far more good.  This is a line that I am learning to distinguish, when to stand up and fight and when to lay down my rights or freedoms for the good of others and our community.  

Have you ever gotten a chance to wear a sari or another piece of Indian clothing?  What was your experience like, and how did others respond?


Have there been times when you put aside your personal preferences or views in order to show respect and value to another person?  How would you gauge when it's appropriate to stand up for your personal rights and when to lay them down for someone else's good?