DIY Potholders

Flashback Summer: DIY Potholders - stash busting beginner's project

Since I've gotten married and set up house in the past year, my grandma has been kind enough to gift me lots of towels, linens, etc.  One of my most-used items that she gave me is a set of potholders.  If you do much cooking, you know how handy a good potholder is!

I love the potholders my grandma gave me because she made them and many of them also match my kitchen.  I love a matchy-matchy kitchen.  These potholders aren't difficult to make, and they're a fantastic intro project if you're interested in learning to sew or quilt.  If you'd like to try out a new quilt square or new way to quilt, this would make a fantastic "trial run" while still making a useful item!

And I did it all on my water-stained old ironing board in these photos. So… congratulations. Hopefully an iron cover tutorial will be coming soon...

Flashback Summer: DIY Potholders - stash busting beginner's project
Materials: 6" fabric square (natural fibers, synthetic might melt), scraps (if you're piece a quilt block. If not, just another 6" square will do!), scissors, double fold bias tape, thread, and batting.  I used two layers of batting because it was thin, but you can use anything thick that won't melt; an old towel cut up, washcloth, felt, etc. would work just as well, as long as it won't be damaged by heat.
Flashback Summer: DIY Potholders - stash busting beginner's project

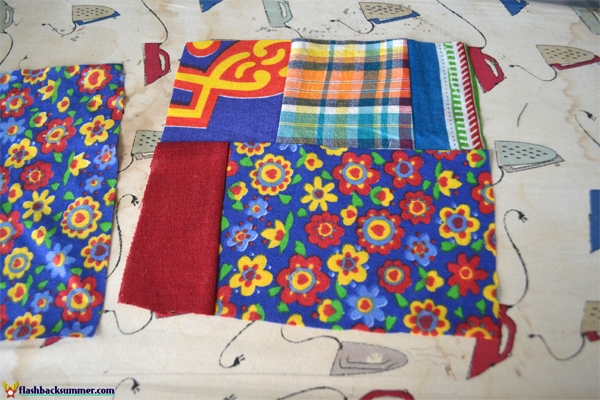
First, if you are piecing one side, now is the time to do it!  I just used scraps and made a square.  Of course, if you are just using two squares, you can skip this part.
Flashback Summer: DIY Potholders - stash busting beginner's project

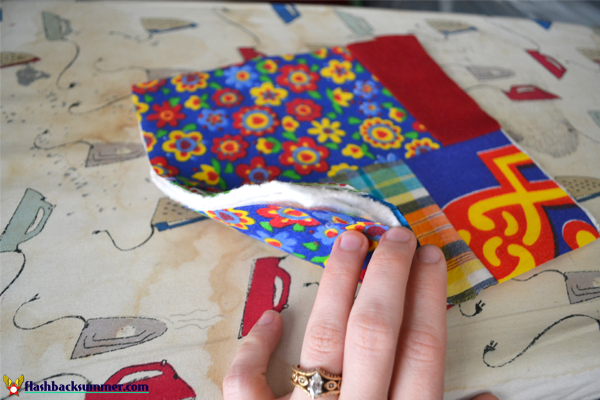
Next, make a tiny "sandwich" by layering a cloth square, batting, then the other cloth square.

Flashback Summer: DIY Potholders - stash busting beginner's project

With this tiny quilt sandwich secure, quilt through all three layers.  I just went for a quick utilitarian option and sewed and X across the square, but you can get fancier if you want!

Flashback Summer: DIY Potholders - stash busting beginner's project

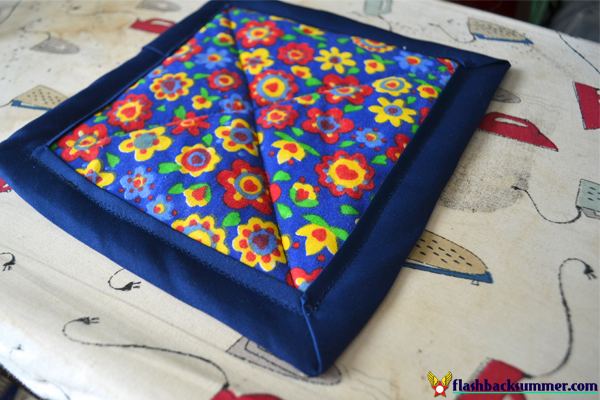
Next, get your bias tape ready.  Starting halfway on a side (starting at a corner is much harder), pin the tape around the edge, being sure to secure it on both sides.  I mitered the corners to make them look nice. 
Flashback Summer: DIY Potholders - stash busting beginner's project

Next, sew it down! (Also, I just sewed through both sides all at once.  If this is your first time binding something, I'd recommend following the tutorial in this video.)  You have a completed potholder!

Flashback Summer: DIY Potholders - stash busting beginner's project

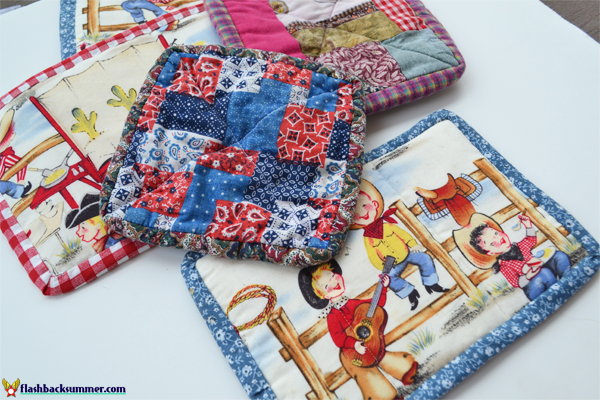
A set of these would make a fabulous gift, especially paired with an apron or cooking utensils and matching the giftee's kitchen!  They're also a great stash buster and learning project!
Flashback Summer: DIY Potholders - stash busting beginner's project

Tidbits From Aria: 3 Simple Ways to Start Eating Healthy

Flashback Summer - Tidbits from Aria: 3 Simple Ways to Start Eating Healthy

Below this month's Compact of Character post, some of you talked about developing healthy eating habits, and Aria happens to be working on that especially hard this semester! I can vouch, she practices what she preaches in real life, and if a girl living in a dorm and eating at a uni cafeteria can work at it, the rest of us can, too!  Embrace that "peach pit" and start getting healthy with these three small steps:

When it comes to eating healthily, sometimes we can be tempted to, cold-turkey, trade in all of our favorites for carrot sticks and lettuce in order to see results quickly.  If you’re anything like me, you know that that just really doesn’t work. It’s not sustainable in the long-run.  Learning to develop healthy habits is a process, so below I’ve included three tips to help you along in the journey: 

1. Eat for Nutrients, Not for Feels 

This simple phrase is scrawled on a piece of paper on my dorm mini-fridge to remind me of something I so often forget: Food is for energy, first and foremost. It’s not meant to satisfy my every craving or to numb my sometimes unpleasant emotions, it is meant to provide nutrients that keep me breathing. When I am reminded of this adage, I remember to stop and think about what my body is really asking for.  Does my body need an entire bag of gummy worms? No, it never needs gummy worms (Sadly!). I convince myself I need them to satisfy a craving for sugar, but it’s not actually a need. Often times, when I am justifying my favorite squiggly worms, my body is actually needing water, protein, vitamins, and other nutrients.  I am still in process of overhauling my habits to fit within this framework of need rather than craving, but every time I choose what I need over psychological cravings that come and go, I take steps towards building a solid foundation for my future health.  

Simply put: Control your eating choices by thinking through what your body actually needs.
Action step: Next time you feel hungry, think back over your day and determine whether you’ve had an adequate amount of water, fruit, protein, and vegetables. Choose a snack or meal accordingly. 

2. Break out the Day-planner
I’ve been traveling around Washington DC for the past two weeks, and it can definitely be difficult to maintain healthy habits without a set routine. One way you can develop the habit of “eating for nutrients, and not for feels” is to plan ahead. It may seem strange at first, and it takes thought, but thinking through what you will eat ahead of time can help you avoid being trapped into compromising a healthy choice for what is convenient.  Planning and preparing your meals at the start of the week can also help to cut financial costs along with the wrong kind of calories.  
Simply Put: Being intentional about looking ahead can help to avoid unnecessary compromise. 
Action Step: Before you go grocery shopping, take half an hour to plan what you will eat for lunch that week. 

3. Watch Your Own Plate 

One of the great challenges to taking steps towards a healthy lifestyle can be comments that others make.  “What is that, rabbit food?”, “You always eat so healthily, and here I am eating junk,” “You think you’re too good to eat simple food?”, and the list goes on. One of the greatest obstacles to overcome in building a foundation that will truly last is that of comparison.  It is easy to compare what we eat to others, judging ourselves against what we find on their plates or in their lives. There are multiple problems with comparison:
1) You don’t see what that person eats all of the time. They may be eating lettuce and carrot sticks for lunch because they had a heaping plate of double-chocolate chip pancakes for breakfast! 
2) You are not them. Duh. The genes that make you you include a metabolism that functions differently than your roommate’s.  Even if you ate the exact same things, your bodies would most likely have at least some difference in response. 
3) Comparison often leads to compromise. Sometimes seeing a friend eat healthily can cause us to eat healthily, too, but what about when you are the only one who is intentionally choosing healthy foods and portions? You would normally eat only one cookie, but if your friend eats five, two or three doesn’t seem so bad. Right? Wrong! Don’t compromise;)

Simply Put: Take control of your eating choices by setting your own standards and sticking to them. 
Action Step: Next time you start to compare, instead, remind yourself of why you are eating healthily, and of a few things you are thankful for that you have learned or accomplished along the way. 

What do you think of these tips?  Do you think they're small enough to be able to implement in your life?  Have you encountered other obstacles to eating healthier that you'd like to overcome?

Resources for Beginner Knitters/Crocheters


Since this month's theme is all about starting to learn those skills you've wanted to learn, even if you have to start out small, I have a roundup of resources anyone wanting to learn or improve their knitting or crocheting skills!

Irrational Love Outfit


Flashback Summer: Irrational Love Outfit - 1940s vintage style


Flashback Summer: Irrational Love Outfit - 1940s vintage style

Flashback Summer: Irrational Love Outfit - 1940s vintage style

Do any of you have one of those outfits that you love beyond all reason?  An outfit so perfect that you have an irrational happiness as soon as you put it on?  This is that outfit for me!

I have no idea why I haven't paired this blazer with this dress yet, but I LOVE IT!  They're separates that I've made from 40s patterns (details below), and I never thought to put them together until the other day.  I have a lot of red and blue accessories and perfectly coordinating 1950s shoes, so I knew it was meant to be!

I also got some aviator sunglasses recently because my sunglasses are all super dead (like tortoiseshell peeling off, cloudy scratched lens dead). They're obviously appropriate for a 40s look because I stole them off my fictional WWII pilot boyfriend and wore them. Obviously.

Flashback Summer: Irrational Love Outfit - 1940s vintage style

Flashback Summer: Irrational Love Outfit - 1940s vintage style

Flashback Summer: Irrational Love Outfit - 1940s vintage style

Now I'm not sure that aviators really work for my round face (they just seem to make it look even rounder!), but I enjoy the history and look of them so much that they're just one of those things that make me say, "FORGET the magazines! Forget the sunglasses advice articles! I have a round face and I will rock it!  I like aviators too much to say no!"

This outfit has made me realize how much happier I'd be with a smaller wardrobe with several solid basics like these to mix and match my statement pieces with. Obviously, I have patterns for these and have done test runs with these garments, so I'd be able to make more pretty easily.  But, sigh, add it to the queue!

Flashback Summer: Irrational Love Outfit - 1940s vintage style

Flashback Summer: Irrational Love Outfit - 1940s vintage style

Flashback Summer: Irrational Love Outfit - 1940s vintage style

Outfit Details
red dress: handmade by me
navy blazer: handmade by me
1950s shoes: estate sale
brooch: gifted from my mother
headscarves: flea markets
aviators: F21

Dot Robinson & a Freddies of Pinewood Jeans Review

Flashback Summer: Dot Robinson & a Freddies of Pinewood Jeans Review

As I talked about in my last post, I bought some new Freddies of Pinewood jeans to stem the rising panic of "THERE ARE NO PANTS IN THE WORLD THAT FIT ME," and when they arrived… they didn't fit. Instead of having a meltdown right at that moment, I looked at what needed to be done and promptly took them to a tailor. I don't often pay to have things tailored, but in this case I was too close to the emotional edge and lacking in time to attempt them myself. A tailor was a good $10 spent.

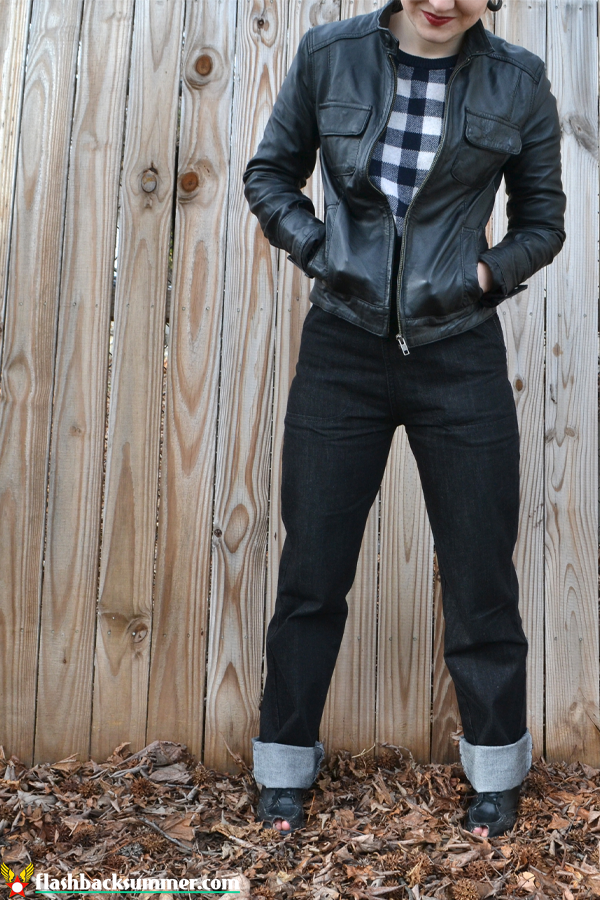
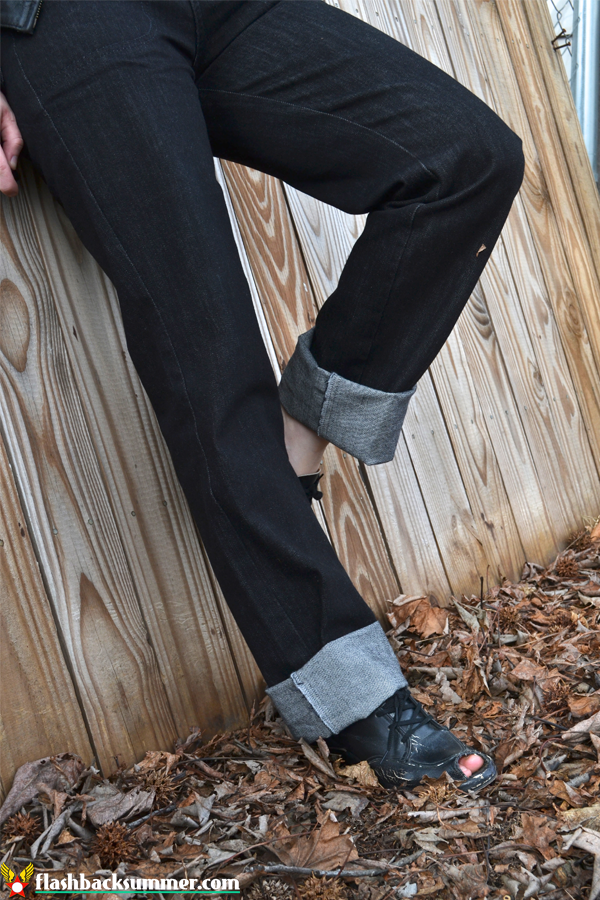
These are the Freddies of Pinewood "Ton Up" jeans, and now that they fit I love them. I'm going to wear them again today, in fact. They are made of a thick, sturdy black denim that feels fantastically hardy, and I'm sure these are going to last a long time.  Especially compared to the tissue paper-thin jeggings that are sold everywhere nowadays… these Freddies are heavenly.


Flashback Summer: Dot Robinson & a Freddies of Pinewood Jeans Review

Flashback Summer: Dot Robinson & a Freddies of Pinewood Jeans Review

Though I have worn vintage for a few years now and known about Freddies for a long time, I have never wanted to risk the money.  I was afraid of the sizing, as a petite person. I read reviews, checked measurements, all sorts of things, but I never felt comfortable enough to drop the cash on jeans that I wasn't sure would be even remotely near my size.  When I saw these jeans were on sale, though, I thought it was time to take the leap of faith.  I went with a size 24 regular.  (For those of you who may be comparing for your own sizing references, my measurements are 32-24-34" and I have a 12" front rise to my waist. I'm also 5' tall with a 28" inseam.)

These fit well except for the rise.  The rise on the 24s was about 1-2" too long for me, so when I first put them on I had a saggy-crotch-tight-on-hips fit that was pretty uncomfortable. However, I had the tailor lower the waistband 1/2" all the way around, and it has helped immensely.  At this length, the torso is short enough to line up the apex of the hips on the jeans with my own maximum hip width while not causing discomfort when I bend over or sit down.

The length is extremely long for me, even at a regular, but these are good for cuffs.  (I have folded them twice in these pictures.) If I wanted to tuck them into boots as shown on the Freddies site picture, I'd probably hem them significantly to reduce the bulk.  


Flashback Summer: Dot Robinson & a Freddies of Pinewood Jeans Review

Flashback Summer: Dot Robinson & a Freddies of Pinewood Jeans Review
This is Dietrich singing me the song of his people.


All in all, if you are petite, I would recommend Freddies with the understanding that you will need to lower the rise and possibly hem the length.  Currently Freddies of Pinewood only offers Regular and Long sizing, not petite.  Perhaps if you petite friends would kindly pressure them with me they'll offer shorter sizing… :)  Teamwork.

The "Ton Up" jeans are currently even more on sale than when I bought them!  If you haven't tried them out, now would be a great time to dabble in their sizing with a lower moolah risk.  Having now felt the quality of the jeans myself, I would HIGHLY suggest you try it.  I've never felt such fantastic jeans!


Flashback Summer: Dot Robinson & a Freddies of Pinewood Jeans Review

I've paired them here with a hint of Dot Robinson motorcycle inspiration. Hopefully someday I'll be able to go all out with motorcycle boots, the works, but for right now this is a look I'm loving!  Leather is a weakness of mine, and I love the BA, edgier feel a vintage-biker style combo makes.

Outfit Details
bakelite earrings: gifted
jeans: Freddies of Pinewood Ton Up jeans
sweater: F21 a few years ago
lipstick: Estee Lauder
leather motorcycle jacket: a store…? (Sorry, can't remember. Some store in Michigan.)
1940s shoes: Etsy

Freddies of Pinewood has not compensated me in any way for this review. I bought the jeans I'm reviewing and hope the sizing and quality information will be helpful to some of you!

Trouser Crisis and Small Steps

Flashback Summer: Trouser Crisis & Small Steps - modern 1940s 1960s retro fashion look

I had recently taken a blogging break as I sought to navigate the murky waters of a wardrobe identity crisis, and in the midst of that time I determined that my greatest obstacle in achieving my ideal wardrobe dreams was trousers.  For a week or so I couldn't find ANY that fit my ideal shape and fit while also small enough to be my size.  They were terrible, dark days.  My husband was nice enough to throw my own words at me and tell me that my body wasn't the problem, the clothes were the problem.  That didn't put pants in my closet, but it is true and it was good to be reminded.

You see, in my fervor to revamp my wardrobe I began selling like crazy (and still am) to get the "seed money" for my new look.  I sold many of the pairs of pants I owned in this process, believing that the lack of trousers in my closet would simply motivate me to find replacements more quickly.  Little did I realize it would only leave me pantsless. (Which just meant I wore skirts, never fear.)

Flashback Summer: Trouser Crisis & Small Steps - modern 1940s 1960s retro fashion look

 I went to EVERY store in my local mall looking for high-waisted, skinny trousers in my size. Nothing. I looked online... nothing was small enough or high-waisted enough.  I ventured out and bought my first Freddies of Pinewood jeans... only to try them on and realize the rise needed to be adjusted.  Off they went to the tailor!  Still pantsless.

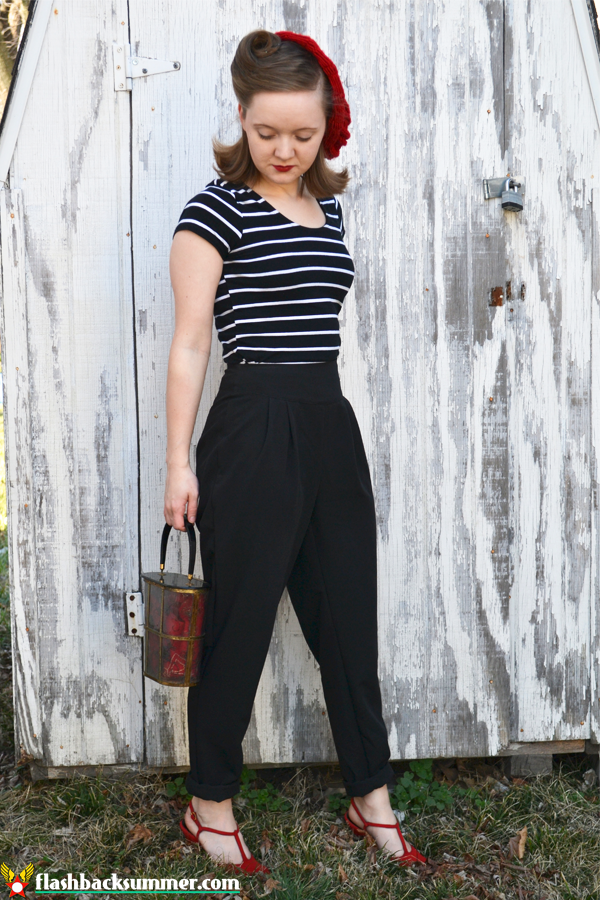
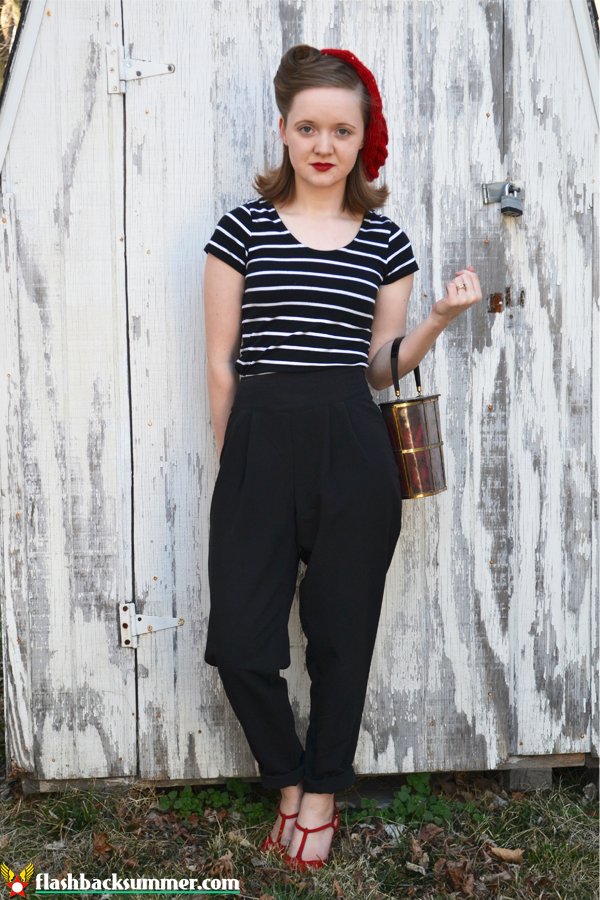
I tried sewing some from a pattern. It didn't work out, and I still can't figure out why. I found some pants in a store that were close to my size and tried to alter them... and they wrinkled weirdly.  I FINALLY found one lone pair of pants on a sales rack at Charlotte Russe that was close enough to my size, and here they are in these photos!  I brought them in at the waist, and now I love them!

Flashback Summer: Trouser Crisis & Small Steps - modern 1940s 1960s retro fashion look

Still, these are the only pair of pants I own that fit in the new look I want to have.  I was all ready to go gung ho on creating this whole new wardrobe all at once, but I've realized it's going to be much more of a "peach pit" process than I thought it would be.

So, I'm starting with trousers and summer shorts.  I need nice trousers for work, and I also need jeans for the rest of the time.  It's going to be slow going, but I've gotten denim fabric and the Ginger Jeans pattern, and I'm going to get to work making what I want.  When I get all the fit alterations right, I'll be able to churn these babies out in all sorts of fabrics!

Flashback Summer: Trouser Crisis & Small Steps - modern 1940s 1960s retro fashion look

I'm also going to work with a 1960s pants pattern I have made before. I like the fit of them, and doing them in some edgier fabrics will make them work beautifully in my new wardrobe.

I will admit, this slower process to build my new wardrobe is a bit frustrating. When I decide to do something, I want to do it all NOW.  I want it to be finished NOW.  Having this delay in adding to my wardrobe because of sizing issues is frustrating, but I'm embracing the slowness as an opportunity to increase my sewing skills and design pieces I absolutely love.  It will take several weeks to make a couple pairs of pants since my day job happens to get in the way of my sewing time (anyone identify?!), but I know it will be worth it in the end to have a perfectly-fitting me-made wardrobe.

Outfit Details
pants: Charlotte Russe
shirt: Wet Seal?
hat: handmade by a friend
lucite purse: gifted
heels: estate sale
lipstick: from F21

I've heard from several of you that you are also having wardrobe issues lately or have had them recently. Did you encounter any hang ups along the way? Have you had to slow down to baby steps with any of your goals lately?

Compact of Character: Plant for the Future & Embracing Life's Peach Pits

Flashback Summer: Planting for the Future & Embracing Life's Peach Pits

March is about the time when those of us in wintery climates begin to get spring fever, at least... I have it bad.  This year I want to plant a "pot garden" (meaning plants in pots, not pot plants, ha!), so I'm thinking ahead to when I should plant, what to plant, etc.  I think about the foods I want to have later this year and what I will use them for, and I'll be working backwards on a plan of planting action.  

Life is actually a lot like this process.  We all have things we want to change about who we are, things we want to improve in or develop more.  We have thoughts like, "I'd love to do that someday," or "I hope I'm like her when I'm older," or "I wish I could get better at this."  It can be easy to have a disconnect between the "future me" and the "present me," especially in light of life developments that may take a long time or have lots of steps to get to the goal.  It can be simple to relegate our hopes of becoming better to a future wish instead of a present possibility.


But we just can't say, "I would love to have a peach tree in the yard," and ten years later, magically, one appears. We all know that's ridiculous to expect that!  Yet, for some reason, we expect our character to be like that.  We expect that, magically, somewhere down the road, we'll be a healthier, happier, stronger, kinder person all of a sudden.  Like a peach tree, today we have to plant the seeds of who we want to be if we expect to actually become that person in the future.

"But a peach pit sure ain't no peach tree!" some of you may say. That's true.  And it's true in life. I am not suddenly going to become wealthy when I decide to buy a cheaper coffee today. However, the perk of starting with a character "peach pit," as humble and small as it may seem, is that the peach pit has the potential to become a tree.  There is no tree without the seed. 

So this month we'll be working on planting character "peach pits," those small steps we oftentimes dismiss as not being enough or even worthy of effort because they're such a humble start. (You know, "Only a 15 minute workout? What good will that even do? I'll wait 'til I have an hour a day to start it.")  I'll have simple projects and small challenges that will hopefully jump start personal growth for you guys and help you plant a "peach pit" for who you want to be down the road.

What are some character traits or skills you really want to be better in, but you just haven't begun (or kept up the momentum)? Is there a small "peach pit" step you've dismissed as not being good enough for a real start?


P.S. I'm still figuring out my wardrobe woes, but hopefully I'll have some helpful tips and updates on it soon!

Quick Update...

I wanted to update you guys real quick so you don't think I've fallen off the face of the earth due to blog silence.  I'm in the throes of wardrobe-transitioning and life logistics, and I'm going to hold off on posting for a bit until I can get more of a handle on things.  

Currently, this is the floor in my closet/sewing room:


It's frightening.  So, while I work on posting clothing items and selling and trying to stay organized and keep up with life, I may not post for a week or two.  Hopefully after that I'll be good to go, however, and I'll get back on a consistent posting schedule!

Thank you all for your patience and support!


P.S. If you're around my size and would like to see the items I'm cleaning out (or are looking for a certain type of item), just email or message me on Facebook and I'll be glad to show you what I've got!